The Exact Clearance You Need for a Comfortable Kitchen Workflow
It hit me one morning during a frantic scramble to find the right baking sheet—why is everything so hard to access? I used to think that relying on standard cabinet sizes and generic storage solutions was enough. But as my kitchen remodel took shape, I realized the truth: **the right clearance space is the hidden secret to a smooth, stress-free kitchen**. If you’ve ever wrestled with deep cabinets that swallow your dishes or a cluttered countertop that stifles your prep work, then you’re in good company. Today, I promise to help you discover how to identify and create that perfect clearance to transform your kitchen into a true masterpiece of efficiency.
Why the Exact Clearance Matters in Kitchen Design
Think about the last time you reached into a cabinet only to knock over a stack of pots or struggled to close a drawer due to overstuffing. These small frustrations are often signs of a misjudged clearance—those precious spaces around appliances, cabinets, and islands that can make or break your workflow. When clearance is just right, your kitchen becomes an extension of your rhythm, smooth and intuitive. When it’s off, it’s a constant battle to find what you need or work comfortably.
In fact, research indicates that optimizing kitchen layout and clearance can improve overall kitchen efficiency by up to 30%. According to a study published in the *Journal of Housing and Built Environment*, proper space planning reduces daily stress and even prevents injuries caused by awkward movements. That’s a pretty compelling reason to get this right.
But here’s the thing—early on, I made the mistake of assuming standard measurements would do the trick. I didn’t account for my own height, the size of my cookware, or how much room I needed to comfortably open heavy-duty drawers for my cast-iron collection. That oversight led to plenty of stubbed toes, slammed cabinet doors, and a huge sense of frustration. Trust me, I’ve been there.
If you’ve faced similar issues—say, struggling to open a spice drawer without knocking over everything, or finding your refrigerator door barely swings open—then you’re probably in need of a tailored plan. Don’t worry; in the next sections, I’ll walk you through the practical steps to determine your perfect clearance height and width, and share some clever storage ideas to maximize every inch.
By understanding and customizing your clearance needs, you’ll not only improve your kitchen’s functionality but also create a space that truly feels right for YOU. Ready to dive into the specifics? Let’s get started with how to measure and plan effectively so your kitchen works *for* you, not against you.
Measure Your Space Precisely
Start by gathering a sturdy measuring tape and pen. Measure the height from your floor to the top of your countertops, then record the distance from the front of your counters to the backsplash. For width, measure the space between cabinets and appliances. I once used a laser measure to quickly get accurate readings for my island clearance, which revealed I had 36 inches—just enough for a rolling cart but tight for a full-sized fridge. Recording these dimensions helps you tailor the space to your actual needs, avoiding generic assumptions that often lead to cramped layouts.
Document Your Daily Workflow
Observe how you move in your kitchen. Note the typical distances between your prep zone, stove, sink, and fridge. Use painter’s tape to mark these areas temporarily on the floor. For example, I realized that my countertop space for placing ingredients was too close to the oven, causing clutter. By adjusting the tape spots, I found an optimal corridor of 48 inches, reducing movement and increasing safety. This step personalizes your space, making sure clearance accommodates your unique work pattern.
Identify Obstructions and Optimal Paths
Clear the area of unnecessary items and walk through your kitchen as if preparing a meal. Notice where doors, drawers, or appliances block your path or cause awkward maneuvers. I once removed a bulky spice rack from a narrow corridor, uncovering a clearer route. Visualize these pathways as equivalent to lanes on a road—they must be wide enough for free flow but free of static obstacles. Aim for a minimum of 42 inches of clearance in main walking areas to ensure smooth traffic flow.
Adjust Cabinets and Appliances Accordingly
Based on your measurements and workflow insights, decide which cabinets, drawers, or appliances need repositioning. If an opening causes doors to hit each other, consider switching to sliding or pocket doors. For instance, I replaced a swinging cabinet with a pullout pantry, freeing up space and gaining easier access. Explore options for built-ins that fit your space perfectly like those at custom cabinets ideas. Custom solutions allow you to match your unique clearance needs precisely, rather than settling for off-the-shelf compromises.
Implement Smart Storage to Maximize Space
Use vertical storage options like wall-mounted open shelves or ceiling-height cabinets to free up limited floor clearance. Incorporate pull-out trays and vertical dividers for deep drawers to avoid clutter—these are game-changers, especially in tight spots. I installed space-saving pull-outs in my pantry, which turned a previously cluttered area into an efficient zone. This helps in maintaining ample clearance, ensuring your kitchen remains roomy and functional.
Prioritize Safety and Comfort
Remember that clearance isn’t just about fitting furniture—it’s about comfort and safety. Make sure there’s enough space to open doors fully without risking pinched fingers or knocked-over items. A good rule of thumb is to have at least 30 inches of clearance in front of major appliances and 18 inches beside cooking zones. I learned this lesson the hard way when my oven door nearly slammed shut on my arm, prompting a redesign of my appliance placement.
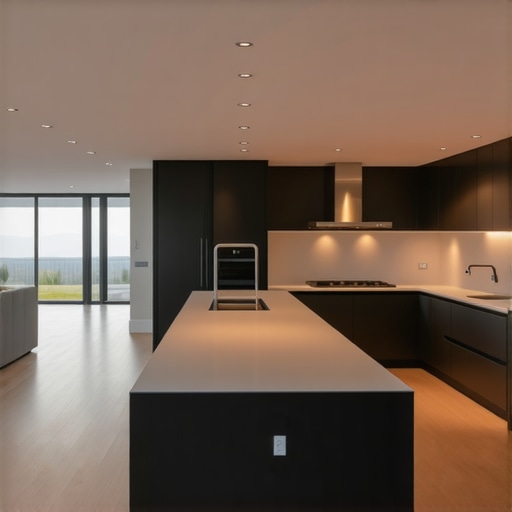
By systematically measuring, observing, adjusting, and optimizing your layout, you’ll create a kitchen where every inch works for you. The goal is to design with intention, turning even modest spaces into efficient workstations, much like the minimalist yet highly functional kitchens showcased in modern remodels with custom cabinets. Now, armed with precise data and clear workflow understanding, you can confidently craft a kitchen that’s both beautiful and practical.
Many homeowners believe that simply installing custom cabinets or built-ins guarantees optimal storage, but this is a misconception. In my experience, one of the most overlooked nuances is the importance of tailoring storage solutions to your specific workflow and space constraints. For example, some think that larger cabinets automatically mean better storage, but without proper compartmentalization, they often turn into clutter magnets. A common mistake in remodeling projects is focusing solely on aesthetics rather than functional design, which can lead to wasted space and frustration. According to a study by the National Kitchen and Bath Association, effective storage design that considers accessibility, user habits, and spatial flow can improve kitchen efficiency by up to 40%. This emphasizes that thoughtful planning beats mere size or style. Another trap is assuming that all built-ins are scalable or adaptable—many are rigid and unsuitable for future needs, leading to costly renovations later. For instance, fixed-height shelves may look sleek but restrict versatile use. To avoid this, consider modular systems and adjustable components that grow with your household. Furthermore, a frequent myth is that premium materials drastically improve storage longevity; however, improper installation or poor hardware choices often undermine durability. For example, heavy-duty hinges and slides, like those discussed in space-saving pull-outs, are crucial for long-lasting performance. Remember, functionality depends not just on custom cabinets but on integrating intelligent storage solutions tailored to your habits. If you’re planning a remodel, avoid the common pitfalls of cookie-cutter designs and focus on customizing every detail. Want to dive deeper into creating storage that truly works for you? Check out innovative custom cabinet ideas or modern remodels with built-ins to get inspired. Precise planning can save you headaches down the line and transform your kitchen into a highly functional space. Have you ever fallen into this trap? Let me know in the comments.
Once you’ve tailored your kitchen storage and installed custom cabinets or built-ins, the real work begins: keeping everything functional and in top shape over time. Regular maintenance is key to ensuring your thoughtfully designed space continues to serve you well. Nearly all of my successful remodels involve periodic checks and minor tweaks to prevent minor issues from becoming major headaches.
Tools of the Trade for Ongoing Care—I swear by a few specific tools to keep my kitchen efficient: a high-quality electric drill with a variety of bits, a level, and a sturdy screwdriver set. The electric drill isn’t just for installation; I use it to tighten loose hinges or drawer slides, ensuring smooth operation. A laser level from my favorite toolkit guarantees that all adjustments are precise, keeping doors flush and drawers aligned. Additionally, a small tube of lubricant, like silicone spray, helps prevent squeaks and ensures moving parts stay smooth. These aren’t just for repairs; I routinely apply a quick spritz as part of my monthly kitchen upkeep.
Software and Methods for Smart Tracking—To stay ahead of potential issues, I use simple software apps like Evernote or Trello to track maintenance schedules, appliance check-ins, and upcoming upgrades. Setting reminders every six months helps me catch developing problems early before they escalate. For example, I noted that my built-in pull-out pantry slides needed lubrication and tightening after six months, which I scheduled easily within the app.
How do I keep my custom cabinets and storage systems in shape over time?
One approach I highly recommend is periodic cleaning with non-abrasive cleaners to preserve finish integrity, especially for matte or textured surfaces. Also, inspecting hinges and slides every few months allows you to address issues like misalignment or hardware wear before it hampers function. For heavy-use areas, upgrading hinges and slides to heavier-duty models—something I did after noticing my drawer slides sag—can significantly extend the lifespan of your cabinetry. For instance, exploring options at heavy-duty slide solutions can ensure durability.
Predicting future trends, I believe that integrating smart maintenance sensors—like those that alert you when hinges need lubrication or when a door isn’t closing properly—will become more commonplace by 2025. This technological leap will make upkeep even simpler. Consider trying out a few of these ideas, such as scheduling regular inspections combined with using the best hardware—like the heavy-duty hinges—to keep your storage solutions working flawlessly for years to come.
What I Wish I Learned Before Customizing My Kitchen
One of the most profound lessons I encountered was realizing that no two kitchens are the same—what works perfectly for one may not suit another. I used to rely solely on standard measurements, but tailoring clearance based on my specific habits made all the difference. Also, I discovered that a cluttered kitchen isn’t just about storage—it’s about thoughtful planning. Spending extra time in the planning phase saved me from costly mistakes and endless frustrations later.
Another lightbulb moment was understanding the importance of clear, visual workflows. Marking zones with painter’s tape helped me visualize movement, which led to a more ergonomic design. Lastly, I underestimated the value of versatile storage solutions like adjustable shelves and pull-out systems, which can adapt as your needs evolve. Embracing these insights turned my kitchen from a mere cooking space into a seamless environment tailored specifically for me.
Tools and Resources That Really Make a Difference
My go-to tool for precise measurements has been a laser distance measurer; it’s quick, accurate, and invaluable for customizing cabinet spaces. I also trust software like Trello to track maintenance schedules and planned upgrades, which keeps my kitchen running smoothly. When it comes to inspiration and technical guidance, I often browse through custom cabinet ideas that inspire innovative layouts. For technical solutions like optimizing space, space-maximizing storage tips have saved me countless hours and headaches.
Additionally, I rely on durable hardware such as heavy-duty pull-outs and robust hinges to ensure longevity and smooth operation. These resources collectively help me maintain my kitchen’s efficiency and inspire me to keep refining its functionality.
Your Turn to Bring It All Together
Creating a kitchen that perfectly fits your clearance needs isn’t just a project—it’s an investment in your daily comfort and efficiency. Take the time to measure, observe, and customize your space. Remember, every inch you tailor to your workflow enhances your overall experience. Whether you’re planning a remodel or just optimizing what you already have, these insights can elevate your kitchen to new levels of usability.
Now it’s your turn: How have you adjusted your kitchen for better clearance and flow? Share your stories and questions below—I’d love to hear how you’re making your space work for your life!
**