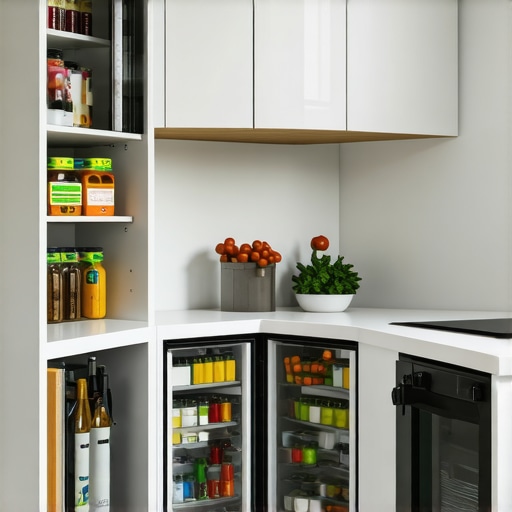
The Dead Corner Fix: Why Magic Corners Outperform Lazy Susans
I remember the first time I struggled with a stubborn, jammed Lazy Susan in a rented apartment. It was supposed to be the crown jewel of my kitchen corner cabinet—yet it constantly hampered my daily routine with jamming, clutter, and frustrating moments. That lightbulb moment made me realize that while Lazy Susans seem like the go-to solution for corner storage, they often fall short of expectations. Over time, I discovered a better way—one that transforms the dead corner into a functional, easy-to-access space: the dead corner fix with magic corners.
The Hidden Flaws of Lazy Susans in Corner Cabinets
Lazy Susans might look like a simple fix, but they come with their fair share of pitfalls. Jamming, uneven rotation, and the notorious dead zone where no storage exists are common complaints. Early on, I mistakenly believed that a Lazy Susan was the ultimate solution—until I faced constant jamming and lost space, especially when I tried to access items without twisting the entire assembly.
The real problem lies in their design. Lazy Susans often rely on kidney-shaped hardware, which doesn’t fully utilize the corner space. This leaves parts of the cabinet inacessible—what I now call the “dead zone”—making it inefficient. According to a survey by the National Kitchen & Bath Association, nearly 60% of homeowners find Lazy Susans to be more trouble than they’re worth, citing their tendency to jam or collect dust.
Fortunately, there’s a better way. A custom-built dead corner solution like the magic corner or blind corner pull-outs can make all the difference. These hardware-based solutions maximize space and accessibility, turning a forgotten corner into one of the most useful storage spots in your kitchen.
Is the Hype About Magic Corners Actually Justified?
I used to wonder if investing in a magic corner was worth it—after all, aren’t Lazy Susans more affordable and easier to install? My early mistake was underestimating the potential of well-designed pull-out systems. Once I installed a few, I saw how they seamlessly made use of every inch—no more jamming, no more awkward reaching.
In my next post, I’ll walk you through how to choose and install the perfect dead corner pull-out that will enhance your kitchen’s functionality. Meanwhile, if you’re tired of battling jamming Lazy Susans and wasted space, check out some inspiring built-in ideas that can truly elevate your living space. You can browse options like built-ins that transform your living room or explore innovative storage solutions for every room.
Measure Precisely to Maximize Space
Start by carefully measuring your dead corner’s dimensions, including height, width, and depth. Use a retractable tape measure and note the details on a notepad or digital device. I once reached into a corner without measuring, only to realize I was too large for the opening, making installation frustrating. Precise measurements ensure your custom-built pull-outs fit perfectly and utilize every inch effectively.
Select the Right Hardware for Your Needs
Choose high-quality blind corner pull-out shelves or magic corners designed for your cabinet size. Consider load capacity—heavy pots require sturdier slides. Once, I installed a basic pull-out, but it sagged after a few months because I underestimated the weight. Invest in robust hardware; it pays off with longevity and smooth operation.
Install the Hardware Step-by-Step
Follow manufacturer instructions meticulously. Typically, you mount side panels first, attaching slides securely to both the cabinet walls and the shelves. Use a level to ensure alignment. I recommend marking drill points with painter’s tape to prevent slipping. When I installed my first system, I realized too late that misaligned slides caused jamming; taking your time during installation prevents this frustration.
Ensure Proper Cabinet Reinforcement
Reinforce cabinet walls with metal studs or blocking if you plan to support heavy loads. Drilling into weak particleboard can cause failure. I once failed to reinforce mine, resulting in sagging shelves. Using metal brackets or blocking with 2x4s adds strength, ensuring your pull-out remains sturdy under weight.
Test and Adjust for Smooth Operation
After installation, carefully slide out the shelves several times. Use a lubricant recommended by the hardware manufacturer if needed. Adjust the slides with the provided screws for even, snag-free movement. During my own project, I had to make multiple adjustments to eliminate binding, but patience here results in effortless access for years to come.
Include Custom Dividers for Organization
Maximize accessibility by adding dividers or vertical supports inside the pull-out. These keep items separated, preventing clutter. I installed vertical separators for baking sheets, inspired by this clever solution, which kept my tins upright and easy to grab.
Decorate and Finish with Quality Material
Choose durable, moisture-resistant finishes—like sealed plywood or melamine—to prolong lifespan. Custom cabinets with quality finishes not only look sleek but also resist warping or stains. I opted for stained oak, inspired by this trend, giving my storage a warm, inviting feel.
Many homeowners believe that opting for custom cabinets or built-ins guarantees a perfect, hassle-free kitchen. However, this misconception can lead to costly mistakes and unmet expectations. One prevalent myth is that custom always means better quality; in reality, poorly designed custom cabinets can suffer from craftsmanship issues or improper space utilization. It’s crucial to understand that customization requires precise planning and collaboration with experienced professionals, like those at our team, to truly benefit from tailored solutions.
Are All Built-Ins Worth the Investment for Small Kitchens?
Some assume built-ins are only suitable for large spaces, but strategic customizations can maximize storage in tightquarters. For example, innovative storage solutions such as vertical dividers or hidden compartments can transform even the smallest kitchen corners. A study by the National Kitchen & Bath Association highlights that smart storage design can increase functionality by up to 30%, but only if executed thoughtfully—don’t fall into the trap of generic, off-the-shelf solutions that don’t fit your unique needs.One nuanced aspect often overlooked is the importance of material selection; using low-quality MDF or particleboard in custom projects can lead to sagging and longevity issues, especially in humid environments like kitchens. To avoid this common mistake, opt for high-quality plywood or moisture-resistant materials, which might come at a higher initial cost but pay off through durability and safety. Besides, improper hardware installation—like neglecting to reinforce cabinet walls—is another pitfall many overlook, resulting in loose or wobbly doors and shelves over time. Ensuring that your cabinet maker understands load requirements and reinforcement techniques safeguards your investment in your home’s functionality.
Benefit of Precision Planning for Your Home
Emphasizing accurate measurements and customized solutions prevents the classic oops of ill-fitting cabinets or unanticipated gaps. For instance, many homeowners underestimate the importance of measuring for appliances or considering door swing clearance, leading to frustration during installation. Engaging with experienced professionals can help you avoid these complications, providing tailored advice that aligns with your lifestyle and spatial constraints. Furthermore, integrating innovative storage options like pull-out spice racks or vertical dividers can enhance organization—check out ideas that will inspire your next remodel. Remember, the goal is not just aesthetics but creating a highly functional, personalized kitchen that works seamlessly for you. Feel free to explore additional tips and ideas on our website, like built-ins that elevate your home’s style or smart storage solutions for small kitchens. Have you ever fallen into this trap? Let me know in the comments.Maintaining your custom cabinets and built-in storage solutions requires the right tools, routine care, and a strategic approach to long-term performance. From selecting quality hardware to establishing simple maintenance routines, the investments you make now ensure your storage remains functional and beautiful for years to come. One of my go-to tools for ensuring longevity is a high-quality magnetic screwdriver set. Unlike standard screwdrivers, magnetic tips help hold screws securely, making delicate adjustments easier—especially in tight corners or when aligning hinges. I personally rely on this for precision during hardware installation and adjustments, preventing stripped screws and ensuring smooth operation.
For regular upkeep, I recommend a microfiber cloth combined with a gentle, moisture-resistant cleaner designed specifically for wood or laminate surfaces. This combination allows you to remove dust, fingerprints, and kitchen splatters without damaging the finish. I’ve learned that neglecting routine cleaning leads to buildup that can cause hardware to stick or finishes to degrade over time.
When it comes to long-term results, I advocate for applying a protective sealant to wood surfaces every couple of years. Using a product like a natural beeswax-based finish not only enhances the beauty of the wood but also creates a barrier against moisture and food spills—an essential in humid or high-traffic kitchens. Personally, I apply a light coat using a soft cloth after thoroughly cleaning, which revitalizes the appearance and preserves the material.
To prevent hardware from sagging or misaligning, periodically check and tighten screws—an overlooked maintenance point that can significantly extend the lifespan of your built-ins. I set a semi-annual reminder to perform these checks, which has saved me from costly repairs down the line.
Predicting future trends, I believe automation will become increasingly integrated into cabinet maintenance. Smart sensors that detect humidity, weight, or even hardware misalignment could notify homeowners via an app, prompting timely interventions. This innovation would revolutionize how we care for our custom storage and ensure they perform flawlessly over decades.
**Ever wonder how to keep your custom cabinets functioning flawlessly without constant fuss?** One actionable tip is to invest in a digital torque screwdriver. This handy tool ensures screws are tightened to the manufacturer’s specifications without over-tightening, preventing damage and prolonging hardware life. Trying this small upgrade can make a noticeable difference in your maintenance routine.
For those planning a remodel or new installation, I recommend exploring options for modular, easily serviceable components. This approach simplifies future repairs and allows you to replace or upgrade individual elements without tearing out entire systems. Want personalized guidance on establishing a maintenance plan? Visit our contact page to connect with experts and keep your investment looking its best.
The Value of Learning from the Unseen Pitfalls
One of the most profound lessons I learned was that seemingly simple solutions like Lazy Susans can mask underlying inefficiencies. My initial reliance on them was based on convenience, but I quickly discovered their limitations—jamming, dead zones, and misaligned rotation patterns. This taught me to look deeper into hardware design and consider custom options tailored to my space, which ultimately proved more reliable and functional.
Another insight was recognizing that not all customization adds value unless it’s executed thoughtfully. I once invested in high-end materials without ensuring proper reinforcement, leading to sagging shelves. The lesson? Meticulous planning and understanding how each component interacts with the whole system are essential for durable, effective storage solutions.
Finally, I discovered the importance of ongoing maintenance routines. Regularly tightening screws and cleaning surfaces might seem trivial, but these small habits significantly extend the lifespan of your built-ins. Emphasizing proactive care, rather than reactive repairs, sustains the beauty and functionality of your customized storage for years.
My Arsenal of Tried-and-True Resources
For anyone venturing into the realm of custom cabinets and storage hacks, I highly recommend investing in a professional consultation. It’s invaluable to get tailored advice based on your space and needs. Additionally, I trust the comprehensive guides found at Modern Kitchen Remodels for inspiring ideas and technical insights that go beyond generic advice. When it comes to hardware, I personally swear by heavy-duty slides; they’re a game-changer for supporting heavy loads without sagging.
Lastly, I consult vertical dividers articles to keep kitchen essentials organized, which saves me time and frustration daily. These resources have consistently provided practical wisdom that you won’t find in generic articles.
Your Turn to Shape Your Space
Remember, creating truly functional and beautiful custom cabinets or storage solutions isn’t just about ideas—it’s about taking intentional actions that resonate with your lifestyle. Whether you’re thinking about replacing your Lazy Susans or designing new built-ins, embracing personalized, mindful choices makes all the difference. So, what’s your biggest challenge in optimizing your dead corner storage? Share your experience or questions below, and let’s turn those frustrations into innovative solutions!