The Hidden Toe Kick Ladder: Accessing High Shelves Without a Stool
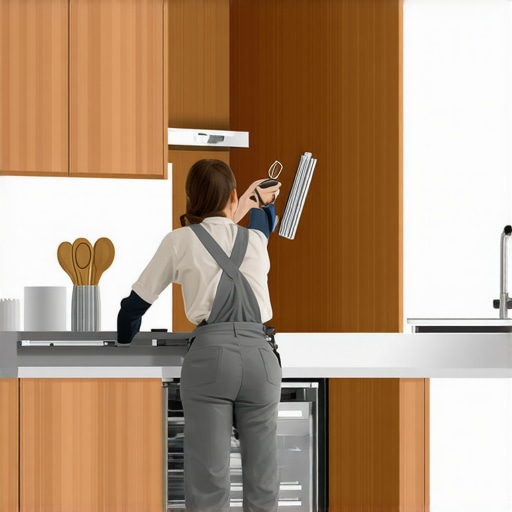
It happened to me during my latest kitchen remodel — I reached for a spice on the top shelf, only to realize I was stretching, balancing awkwardly on my tiptoes, desperately wishing for an extra set of hands or a sturdy step stool. The frustration of not having the right tools at the moment of need is something many of us can relate to. I used to think that sticking with traditional step stools was the only option, but that was before I discovered the secret weapon: the hidden toe kick ladder. Once I started using this clever solution, reaching those high shelves became effortless and safe.
The Struggle of High-Reach Storage
If you’ve ever had to dig through cluttered cabinets or risk a fall trying to grab that elusive item from a high shelf, you know how inconvenient and dangerous it can be. Traditional stools are bulky, often unstable, and can clutter your space. More importantly, they can pose a serious safety hazard, especially in busy kitchens. As I pondered better alternatives, I realized that integrating a discreet, built-in ladder into my cabinetry could be the perfect remedy. Not only does it save space, but it also provides instant access without compromising style or safety.
Have You Faced This Exact Problem?
You’re not alone. Many homeowners struggle with high shelves and limited access, especially in kitchens with tall ceilings or custom cabinets. This common challenge inspired me to explore and eventually adopt the hidden toe kick ladder, transforming the way I utilize my storage space. Curious to learn how this unobtrusive yet effective solution works? Keep reading — I’ll guide you through the ins and outs of installing and using a toe kick ladder that truly makes a difference.
Is a Toe Kick Ladder Actually Worth the Hype?
I must admit, my initial skepticism was real. I wondered if such a small addition could really make a significant impact. Early on, I made the mistake of underestimating its potential because I didn’t consider how much easier it would be to access high shelves without the usual hassle of stool and ladder juggling. As I learned more about the design and safety benefits, I was convinced that this simple upgrade was a game-changer. For those hesitant about making a change, just know that this investment genuinely enhances convenience and reduces risk — as supported by experts who emphasize ergonomic and safety improvements in kitchen design (learn more about maximizing storage space). So, if you’re tired of stretching, balancing, or risking a fall, a hidden toe kick ladder might be exactly what your kitchen needs to elevate both safety and style.
Reinforce Your Cabinet Structure
Begin by removing the toe kick panel beneath your cabinets to access the void behind. Use a pry bar and screwdriver to carefully detach the panel without damaging surrounding cabinetry. As an example, I once used a putty knife to gently lever off the panel, which prevented chipping or breaking the wood. With the panel removed, assess the available space to ensure it can accommodate the ladder mechanism. If necessary, reinforce the cabinet walls with additional framing or blocking to support the ladder’s weight, especially when planning for frequent use. Consider using high-quality plywood, like benevolent 3/4-inch plywood, for added sturdiness (see why plywood beats particle board).
Design the Ladder Mechanism
Decide on a folding or telescoping ladder based on your space constraints and ease of use. For tight spots, a telescoping version that retracts into the cavity works best. I opted for a folding step ladder that neatly tucked away, allowing seamless access to high shelves. Measure the height from the cabinet floor to the ceiling, and plan the ladder length accordingly. Mounting brackets must be anchored into the reinforced framing for stability. Use a level to align the brackets precisely, avoiding wobbly steps or unsafe angles. Remember, the goal is a smooth, effortless extension every time you need reach—think of it as creating a vertical staircase that disappears when not in use.
Secure the Ladder Support
Attach the brackets to the cabinet wall using heavy-duty screws directly into the reinforced framing. Check for levelness multiple times during installation to prevent misalignment, which could cause the ladder to bind or skew. I once neglected to double-check, resulting in a crooked ladder; fixing that involved patching newly drilled holes in the cabinetry. Use a drill and appropriately sized bits to ensure the screws seat fully into the framing, providing a safe and solid support system. For added resilience, install a secondary support or catch at the top to prevent accidental release.
Integrate the Hardware and Finish
Once the ladder is mounted, attach the pull handles or grip strips to facilitate easy opening. Match the finish of the ladder and supports to your cabinet hardware for a cohesive look—brushed nickel or matte black hardware are popular choices. Seal any exposed wood or metal with a protective finish to prevent wear and corrosion over time. Test the entire setup carefully; extend and retract the ladder multiple times to ensure smooth operation without squeaking or sticking. A well-installed toe kick ladder transforms high shelves from inaccessible to effortlessly reachable, saving time and reducing risk of falls.
Final Touches and Maintenance
Replace the toe kick panel, ensuring it fits snugly and seamlessly blends with your cabinetry. Regularly inspect the support brackets and hardware for signs of wear or loosening, and tighten as needed. Clean the ladder mechanism periodically with a damp cloth to remove dust and debris that can impede movement. When finished, confirm the safety latch or locking mechanism engages properly—this prevents accidental deployment during cleaning or if bumped. With these steps, your kitchen becomes safer and more functional, much like my own recently upgraded space that now welcomes even the highest of items with ease.
Many homeowners believe that choosing popular storage solutions or trendy custom cabinets guarantees optimal function, but in my experience, you need to look beyond the surface. A common misconception is that maximizing storage always means adding more shelves or larger cabinets, yet this often leads to cluttered spaces and wasted areas if not planned meticulously. The nuance many overlook is the importance of understanding the specific flow and habits in your kitchen before selecting or designing storage solutions. For instance, installing deep, full-height cabinets without considering accessibility or habitual usage can create unreachable zones, defeating convenience and causing frustration.
Another critical pitfall is opting for built-ins based solely on aesthetic appeal without factoring in future flexibility. Fixed, overly customized features may look stunning but can hinder modifications and upgrades down the line, especially as your needs evolve or if resale is a consideration. As explained in expert studies, flexibility in design adds long-term value and reduces the risk of costly renovations later (see why inset cabinets may be worth the extra cost).
The hidden nuance lies in understanding how often you use specific storage zones and designing within those parameters. For example, placing seldom-used appliances – like bread makers or seasonal tools – in easily accessible spots can inadvertently discourage their use or cause clutter. Instead, creating dedicated zones with smart organization, such as pull-out shelves or tray dividers, can prevent the trap of Maintaining your custom cabinets and built-ins in top condition requires the right tools and a proactive approach. I personally swear by a high-quality cordless drill like the DeWalt DCD791D2, which offers precision and power for everything from tightening hinges to making minor adjustments. Its variable speed control and ergonomic design make maintenance tasks less tedious, especially when working in tight spaces.
For cleaning and routine upkeep, I recommend a microfiber cloth combined with a gentle, ammonia-free cleaning solution. This helps preserve the finish of your cabinets without scratching or dulling the surface. Avoid harsh chemicals that can compromise finishes or cause discoloration over time. Regularly inspecting hinges and drawer slides is crucial; I use a small hex key set to tighten loose screws before they become bigger problems. These small adjustments can extend the lifespan of your cabinetry significantly.
When it comes to long-term results, investing in durable hardware, such as soft-close hinges and heavy-duty slides, is essential. I opt for items from Blum, which are known for longevity and smooth operation. They might be costlier upfront but save you money and frustration over time by reducing wear and repair needs. For larger projects, I embrace a method called modular maintenance, where I focus on individual components rather than entire assemblies. This approach simplifies repairs and upgrades, keeping your space functional and stylish for years.
Looking ahead, the trend is moving toward smart storage solutions that incorporate sensors and automation. In the future, expect to see cabinets with built-in monitoring to alert you about humidity, pests, or structural issues—saving you from costly damage or deterioration. Staying ahead means updating your toolkit regularly and embracing innovations that enhance both convenience and durability.

To maintain your built-ins effectively, select specialized tools like the Klein 675 Series Screwdriver Set, designed for precision and ease in tight spots. Using the correct hardware and techniques ensures your custom features stay functional and beautiful longer.
How do I maintain my storage solutions to last a lifetime?
Regular inspections and using recommended tools can prevent minor issues from turning into major repairs. Schedule annual check-ups for hinges, slides, and finishes, and consider applying protective finishes or lubricant to moving parts to keep things operating smoothly. For insights on optimizing your storage long-term, explore innovative ideas at maximize space with innovative storage solutions.
Don’t hesitate to try a dedicated maintenance kit that includes a multi-bit screwdriver, lubricant spray like WD-40, and a soft cloth. Keeping these tools handy allows you to address small issues before they escalate, ensuring your cabinetry continues to serve your needs beautifully for years to come.
The Hard-Earned Wisdom of Reaching High Shelves
One of my biggest lessons came from realizing that safety and accessibility aren’t just buzzwords—they’re essential in everyday life. Installing a hidden toe kick ladder taught me that simple upgrades can dramatically improve safety, especially when you routinely access high shelves. Don’t wait for a near-miss or fall to consider smarter solutions; proactive changes pay off in peace of mind and functionality.
What I Wish I Knew Before Starting My Kitchen Remake
I underestimated the importance of tailored storage design. Custom cabinets and built-ins offer flexibility that generic solutions can’t match, but only if planned meticulously. Figuring out personalized zones and choosing durable hardware have extended the lifespan of my investment, reminding me that intentionality in design saves time and money down the line.
Small Tweaks, Big Impact
Sometimes, the smallest adjustments—like reinforcing framing or selecting the right hinges—can turn frustration into efficiency. Regular maintenance routines, focused on hinges, slides, and finishes, preserve the beauty and safety of your cabinet investments. It’s a reminder that care and attention to detail create lasting value in your storage solutions.
Curiosity Leads to Innovation
Exploring unconventional ideas, like integrating adjustable support for heavy appliances or smart storage sensors, opened new horizons for my kitchen. Staying curious about emerging trends and tools—like modular maintenance or innovative hardware—can keep your space evolving to meet future needs. Haven’t you thought about what your kitchen could become with just a few bold upgrades?
My Personal Arsenal of Tools and Resources
- DeWalt DCD791D2 Cordless Drill: Reliable power for assembly and adjustments, trusted for its ergonomics and precision.
- Microfiber Cloths and Non-Abrasive Cleaners: They keep finishes pristine without stripping protective coatings.
- Blum Hardware Lines: Known for longevity and smooth operation, essential for high-quality cabinetry.
- Online Design Portals and Inspiration Websites: Platforms like Artisan Cabinetworkz offer innovative ideas tailored for personal spaces, guiding smarter decisions.
Step Forward with Confidence in Storage Innovation
Your kitchen is more than just cabinets; it’s a canvas for endless customization and improvement. Embracing thoughtful upgrades like a toe kick ladder or reinforced support transforms your space from cluttered chaos to organized sanctuary. I encourage you to take that first step—whether it’s installing a discreet support or simply rethinking your storage zones. Your future self will thank you for the effort. What small change will you make today to elevate your kitchen’s storage efficiency? Share your ideas below and let’s inspire each other to create better, safer spaces!
,