The Built-In Coffee Station Move That Ends Morning Counter Chaos
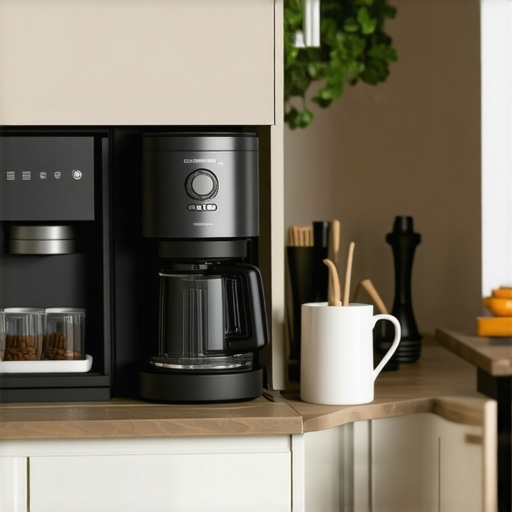
It hit me one hectic morning as I watched my coffee mug teeter dangerously on a cluttered counter—enough was enough. No matter how many organizers I bought or how many hours I spent tidying, the chaos persisted. That lightbulb moment led me down the path of creating a built-in coffee station, transforming my kitchen and morning groove. If you’re tired of the daily scramble for your favorite mug or the endless searching for coffee supplies, then you’re in the right place. Today, I promise to share how moving that coffee station into a dedicated built-in area can end your counter chaos for good.
Why Your Kitchen Desperately Needs a Coffee Station Makeover
Imagine waking up and knowing exactly where everything coffee-related is—no more rummaging through drawers or knocking over everything in sight. A well-designed built-in coffee station isn’t just about aesthetics; it’s about efficiency, safety, and peace of mind. After facing the morning mess myself, I realized that the key was creating a customized space tailored to my habits. This meant thinking beyond standard cabinetry and embracing innovative storage solutions that maximize space and organize accessories seamlessly. For more ideas on how to make the most of your space, check out this guide on clever storage solutions. But I’ll admit, the journey wasn’t without hiccups. I made a crucial mistake early on—underestimating how much I’d need to contain the clutter and overestimating the ease of installation. Trust me, I learned the hard way that proper planning makes all the difference. Now, I want to guide you through the practical steps to build your own coffee haven, turning mornings from stressful to smooth.
Plan Before You Drill
Start by measuring your available space carefully. Sketch a layout that accommodates your coffee maker, mugs, and accessories, leaving room for easy access. I remember drawing mine on graph paper, trying different configurations until I found one that felt natural. Think of it as designing a custom suit—precision matters to get a perfect fit.
Choose Durable Materials that Match Your Style
Select materials that handle moisture and are easy to clean, like sealed plywood or MDF with a waterproof coating. I opted for a moisture-resistant plywood, which worked great against kitchen humidity, and finished it with a matte paint to prevent fingerprints. Visualize this choice as selecting the right armor—protecting your investment over time.
Build the Frame with Precision
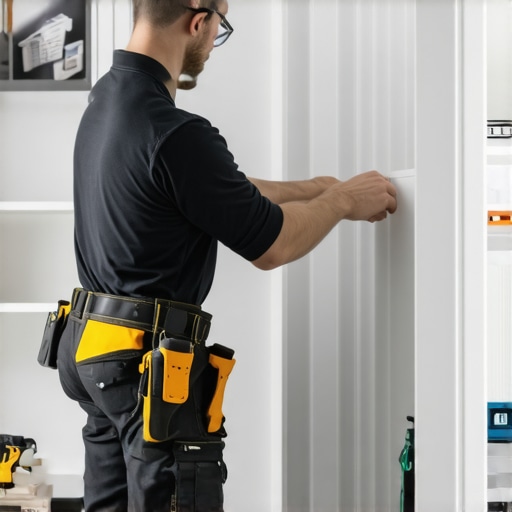
Start by constructing the frame using impact drills and high-quality screws. Use a level to ensure everything aligns perfectly; think of this step as laying a solid foundation for a building. I remember marking my studs carefully before drilling, which saved me from misaligned shelves later. For hanging cabinets securely, review this guide on wall cabinet installation.
Incorporate Smart Storage Solutions
Maximize tiny spaces with pull-out trays and vertical dividers, especially for lids and utensils. I installed deep drawers with vertical dividers that support clutter-free organization, which made retrieving my favorite mug effortless. Think of these as the secret weapons for organized chaos.
Install Electrical Outlets Thoughtfully
Plan for outlets beneath the cabinets for appliances and charging stations. I added a discreet outlet strip inside the cabinetry, which kept my countertop clear. Remember, a well-placed outlet is like giving your coffee station a power boost without visual clutter—check this article on outlet planning for detailed guidance.
Finish with Practical Accessories
Add hooks for mugs, a small chalkboard for notes, or a tray for accessories. I improvised with over-the-door hooks, which saved space and kept everything within reach. Visualize these as charming details that personalize your space and enhance functionality. For additional ideas, explore built-ins that improve your living spaces.
Secure and Seal Everything
Ensure all components are firmly attached, and seal the surfaces to prevent moisture damage. Use waterproof sealants on the countertop and edges—think of it as sealing a boat; water protection is crucial. I learned this the hard way after a small spill caused warping a cabinet base. You can find more sealing tips at this waterproofing guide.While many believe that opting for standard cabinets or off-the-shelf storage solutions guarantees a successful kitchen remodel, the reality is more nuanced. One widespread misconception is that bigger or more expensive equals better, but in my experience, precise customization and understanding of functionality often trump sheer size or cost. A common trap homeowners fall into is underestimating the importance of airflow and moisture control, especially when integrating built-in storage into humid environments; improper sealing or material choice can lead to warping and damage over time. Instead, selecting moisture-resistant materials and implementing proper sealing techniques are crucial steps often overlooked, even by seasoned renovators.
How does advanced moisture management influence the longevity of custom cabinetry in high-humidity kitchens?
Experts like cabinetry specialists emphasize that integrated moisture barriers and venting are vital in preventing cabinet warping and ensuring durability. According to a study published in the Journal of Building Physics, improper moisture control accounts for approximately 30% of cabinet failures in humid climates, underscoring the importance of this often-neglected detail. Moreover, many assume that standard drawer slides and hinges will suffice for heavy-use areas; however, failing to upgrade to high-quality, heavy-duty hardware can result in sagging doors and misaligned drawers, particularly when storing heavy items like cast iron cookware. Check out this guide on durable hardware to ensure your storage solutions stand the test of time. For those looking to elevate their kitchen’s efficiency, understanding the advanced nuances of space utilization—like vertical dividers or hidden compartments—can make a significant difference. Don’t be tempted by superficial changes; instead, invest in thoughtful, expert-led planning. Remember, a well-executed remodel isn’t just about aesthetics but about creating a resilient, functional space tailored to your habits. Have you ever fallen into this trap? Let me know in the comments.Maintaining your custom kitchen storage systems over time requires more than just initial setup; it demands the right tools and consistent upkeep. Personally, I heavily rely on high-quality cordless drills like the DeWalt DCD791D2, which offers remarkable battery life and precision, making assembly and adjustments much more manageable. For measuring intricate cabinet alignments, a digital laser level such as the Bosch GLL3-330CG ensures perfect accuracy, helping prevent issues like uneven doors or misaligned shelves that can compromise long-term durability.
When fine-tuning hinges and drawer slides, I prefer precision screwdrivers like the Wiha 26197, which provides exceptional grip and control, reducing wear on hardware and ensuring secure fittings. Investing in a set of these tools has paid off over years of remodeling, as they facilitate easy adjustments that keep everything functioning smoothly.
Software-wise, I recommend using design programs like SketchUp to visualize storage layouts before cutting or installing, saving time and minimizing costly mistakes. Regular inspections are crucial—checking for loose hardware or signs of moisture damage—and addressing these issues promptly preserves the integrity of your cabinetry.
Looking ahead, the trend points toward smarter, integrated solutions like sensor-activated hinges and moisture-resistant finishes that can alert you to potential problems before they escalate. For example, installing smart hinges from this guide allows hands-free operation and provides maintenance alerts via connected apps.
How do I maintain my custom storage setups over time? Regularly inspect hinges, slides, and seals, applying appropriate lubricants like silicone spray from this expert-recommended product to reduce wear. Sealing surfaces with moisture barriers, especially in humid environments, extends their lifespan significantly.
A practical tip I encourage you to try today is to install adjustable, high-quality hinges that support easy alignment and a DIY calibration process. This simple upgrade can prevent the common issue of misaligned doors and keeps your cabinetry looking pristine for years. For more detailed hardware advice, check out this resource. Consistent upkeep, combined with the right toolset, makes all the difference in longevity and usability of your kitchen storage investments.
Lessons the Old Remodelers Don’t Share
One of the hardest lessons I learned was that rushing through material choices without considering moisture resistance led to costly repairs later. I once picked a stylish but non-resistant finish, only to see it peel in high humidity. Now, I always prioritize durable, moisture-resistant materials for built-ins. Another realization was that overlooking airflow and ventilation in custom cabinetry planning can cause warping and deterioration over time. Now, I incorporate hidden vents and strategic openings to keep everything dry and standing strong. Finally, I underestimated the value of high-quality hardware; cheap hinges and slides failed under heavy use, frustrating me repeatedly. Investing in heavy-duty, expert-recommended hardware has saved me endless headaches and keeps my kitchen functional and beautiful. These insights, gained through trial, error, and a lot of research, have transformed my approach to kitchen remodels, ensuring longevity and happiness in the space I love.
My Go-To Sources for Kitchen Transformation Wisdom
First, I rely heavily on this guide on clever storage solutions. It consistently helps me optimize space, balancing aesthetics and function. I also trust the in-depth hardware reviews found in this hardware selection resource—they’ve prevented sagging and misalignment issues in my cabinets. For design inspiration, this collection of custom cabinet ideas offers innovative ideas that blend style with practicality. Lastly, I follow this practical advice on built-in integration—it’s been instrumental in making my remodeling process smooth and successful. These sources have become my trusted companions on the journey to a lasting, beautiful kitchen.
Your Next Step in Kitchen Confidence
Embarking on a kitchen remodel with built-ins and custom cabinets isn’t just about making your space look good—it’s about creating a durable sanctuary that supports your daily life. Embrace these lessons, trust your resources, and remember that meticulous planning today prevents headaches tomorrow. Your dream kitchen is within reach; with patience and the right know-how, you’ll craft a space that lasts generations. What’s the one upgrade you can’t wait to try in your kitchen remodel? Share your plans below—I love hearing about your vision for a more organized and beautiful space.