Why We Recommend Inset Cabinets for Historic Home Restorations
I remember the moment vividly—standing in my old, charming kitchen, surrounded by faded cabinetry that had seen better days. The drawers stuck, the doors wouldn’t close properly, and the charm was soaked in years of wear and tear. It struck me then: I wanted to preserve the historic look, but I also craved functional, modern storage. That was the lightbulb moment that led me to discover inset cabinets. These beautifully crafted, flush-mounted doors aren’t just a nod to history—they’re a game-changer for homeowners like us striving to blend vintage charm with everyday practicality.
Reimagining Historic Kitchens with Inset Cabinets
Restoring a historic kitchen isn’t just about looking good—it’s about creating a space that functions seamlessly while honoring the unique character of the home. The challenge often lies in balancing authenticity with modern needs. That’s where inset cabinets shine. Unlike overlay cabinets that sit on top of the frame, inset cabinets are mounted flush within the framework, offering a clean, streamlined appearance that fits perfectly with historic aesthetics. Plus, they provide the opportunity for meticulous craftsmanship, enhancing the authenticity of your restoration.
But I must admit, early on I made a mistake—believing that installing inset cabinets would be overly complicated and expensive. That couldn’t be further from the truth. With the right guidance and the right materials, inset cabinets can be both affordable and straightforward to incorporate. And the benefits extend beyond looks; they improve your kitchen’s overall function, offering better alignment and a sleeker profile that’s truly timeless.
If you’re considering a kitchen makeover and want to preserve or revive its historic charm while ensuring modern ease, inset cabinets are worth a serious look. Not only do they elevate your design, but they also enhance your storage solutions, making every inch work harder for you. Want to see how they compare with other options? Check out [custom cabinets as a game-changer in your kitchen remodel journey](https://artisancabinetworkz.com/custom-cabinets-as-a-game-changer-in-your-kitchen-remodel-journey). Now, let’s tackle some of the biggest doubts people have about inset cabinetry—because education is the first step toward making confident choices for your home.
Plan Your Inset Cabinet Design Carefully
Start by measuring your existing cabinet openings precisely, accounting for door and drawer hardware clearance. Use a tape measure and a level to ensure accurate dimensions, as errors here will complicate the installation later. I vividly recall spending an entire afternoon re-measuring my kitchen openings after an initial miscalculation nearly caused a delay—remember, meticulous planning prevents headaches.
Choose Quality Materials for Longevity and Style
Select high-quality plywood or hardwood faces for your inset doors and panels, as these materials match the authenticity of historic kitchens. Don’t skimp here; inferior materials may warp or crack over time. When I ordered a batch of plywood for my project, I opted for a Baltic birch that was smooth and uniform, which made sanding and finishing much easier. For a detailed comparison of materials, check out this guide.
Prepare Your Cabinet Frames for Accurate Fit
Remove existing cabinet doors and hardware, then inspect the frames for plumbness and squareness. Use shims to correct any irregularities. This step is crucial because inset cabinets require precise framing; even a small misalignment will be amplified. I once had to shim a frame significantly to get the door fit right, which taught me that patience and accuracy are key here.
Install the Inset Doors Using Proper Hardware
Use high-quality, soft-close hinges designed for inset doors—these allow for alignment adjustments and a seamless look. Drill pilot holes before screwing hinges into the door and frame to prevent splitting. Remember, the positioning of hinges affects the door reveal; aim for a consistent gap on all sides. I initially underestimated hinge placement, resulting in uneven gaps, but after re-adjusting, the doors looked impeccable. For more hinge insights, visit this article.
Adjust the Doors for a Perfect Finish
Once hung, close the doors and check the reveal gaps. Use a screwdriver or Allen key to tweak the hinge screws until the gap is uniform and the doors align flush with the cabinet frame. This step often involves minor adjustments, but it defines the overall aesthetic. I spent nearly an hour adjusting my doors until the reveal was just right, which made a huge difference in the final look.
Seal and Finish Your Cabinets for Authenticity and Durability
Apply a primer and a finish that matches your desired look—be it matte, satin, or gloss. For a truly authentic historic feel, consider tinted or distressed finishes. Use a brush or sprayer for even coverage, and allow adequate drying time. I tested different stains and paints on scrap pieces first to ensure the perfect hue—this extra step saved me from costly mistakes. For finishing techniques tailored to inset cabinets, see this comprehensive guide.
Many homeowners believe that a straightforward renovation is all about choosing trendy cabinets or adding more shelves, but in my experience, this misses the crucial nuances that determine a truly successful kitchen upgrade. One prevalent misconception is that more storage always equals better organization. However, piling on cabinets or deep drawers without considering workflow and accessibility can lead to clutter and frustration rather than efficiency. This is why integrating thoughtfully designed built-ins and custom cabinets, tailored precisely to your space, is essential. For advanced readers, it’s worth examining how the subtle alignment of cabinet interiors can impact usability—details often overlooked in standard remodels, yet critical for seamless operation. According to experts like those at Fine Homebuilding, small adjustments in cabinet placement and hardware positioning can significantly enhance functionality. Be aware of common traps: rushing hardware installation or neglecting the importance of proper framing can result in misaligned doors and uneven reveals. To avoid these pitfalls, study your space meticulously and consider professional guidance for detailed planning. Have you ever fallen into this trap? Let me know in the comments. For a deeper dive into how top-tier custom cabinetry can revolutionize your kitchen’s look and utility, explore [custom cabinets as a game-changer in your kitchen remodel journey](https://artisancabinetworkz.com/custom-cabinets-as-a-game-changer-in-your-kitchen-remodel-journey). Remember, the devil is in the details, and mastering these nuances can elevate your renovation from ordinary to extraordinary.
Essential Tools for Long-Term Kitchen Performance
Maintaining a beautiful and functional kitchen, especially with custom cabinets and built-ins, requires the right tools. I personally rely on a high-precision Bosch router for delicate edge detailing and secure fitting on inset cabinets. Its variable speed control lets me fine-tune each cut, ensuring perfect alignment and finish. For measuring, I swear by a digital laser level, which accelerates the process and guarantees perfect plum lines—crucial for flush-mounted cabinetry. Additionally, a cordless oscillating multi-tool has become indispensable for trimming hardware or making minor adjustments without damaging surrounding surfaces.
Adopt Computer-Aided Design for Longevity and Precision
To keep your kitchen functioning beautifully over time, I recommend investing in CAD software like SketchUp or Cabinet Vision. These programs help visualize modifications, anticipate potential issues, and plan maintenance. Designing with accuracy minimizes errors that could lead to costly repairs later. I’ve found that regularly revisiting my CAD models before any touch-up work ensures that all components fit seamlessly, preserving the integrity of custom cabinetry and storage solutions. As technology advances, expect these tools to incorporate augmented reality features, making ongoing maintenance planning more interactive and precise.
Why Regular Maintenance Matters for Custom Cabinets
Cleaning and examining your cabinetry every few months can prevent small issues—like loose hinges or sticky drawers—from becoming expensive repairs. Use a soft cloth with a gentle cleaning solution to remove dust and grease, and check hardware attachments. Lubricate hinges periodically with silicone spray, which resists dust buildup and prolongs their life. I also recommend inspecting shelves for warping or wear, addressing problems early, and preventing uneven weight distribution that can cause structural issues. For detailed maintenance routines, see expert tips on storage maintenance.
How do I keep my custom storage solutions in top shape over time?
Implementing a regular maintenance schedule, using quality lubricants and tools, and keeping detailed records of any repairs will save you money and keep your kitchen running smoothly. Remember, high-quality hardware and finishes are designed to last, but only if properly maintained. Adopting these habits now ensures your investment continues to provide value in the years to come.
Looking ahead, I believe trends in smart home integration will extend into kitchen maintenance, providing real-time alerts for hardware issues or the need for adjustments. In the meantime, I challenge you to try using a laser level for precise alignment of your cabinets during the next touch-up—it’s a game-changer for long-term aesthetics and functionality.
The Hardest Lesson I Learned About Kitchen Renovation and Storage
One of the most profound lessons I uncovered was that even the most beautiful custom cabinets need meticulous planning and craftsmanship to truly elevate a historic kitchen without sacrificing functionality. Rushing through measurements or opting for cheaper materials often led to misaligned doors and uneven reveals, reminding me that patience and precision are invaluable. I also realized that every decision, from hinge placement to finish choice, contributes to the space’s authenticity and usability. Embracing the learning curve transformed my project into a rewarding journey rather than a costly mistake.
Tools That Transformed My Kitchen Makeover Experience
Investing in quality tools such as a digital laser level, a high-precision Bosch router, and cordless oscillating multi-tools made all the difference. These tools provided accuracy and ease, especially when aligning inset cabinet doors or making precise cuts. I trust my laser level to ensure perfect plumb lines, which is critical when achieving that seamless flush look. For anyone tackling their own kitchen renovation, a reliable toolkit isn’t just convenient—it’s essential for professional results. For additional guidance on your project, explore expert tips on storage selection.
Believing in the Power of Customization to Transform Your Space
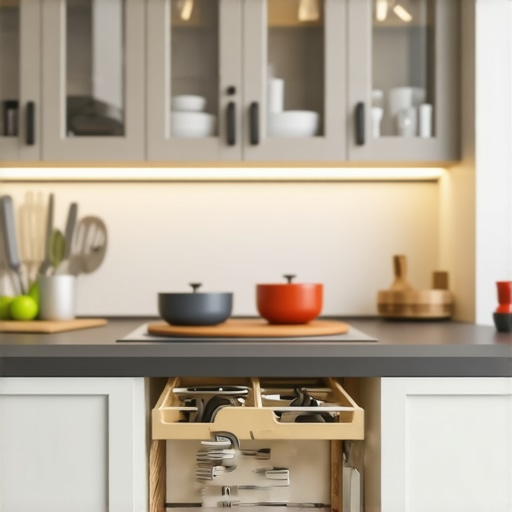
One of the most inspiring aspects of working with custom cabinets and built-ins is the ability to tailor every inch to your habits and style. This personalization means not only better aesthetics but also smarter storage—places for everything, and everything in its place. I found that integrating innovative storage solutions like pull-out spice racks or hidden charging drawers increased my kitchen’s efficiency tenfold. As you plan your remodel, remember that thoughtful customization is the secret ingredient to turning a good kitchen into a personal sanctuary. Curious about more ideas? Check out this resource on modern storage solutions.
Inspiration for Your Next Action the Moment You Finish Reading
There’s no better time than now to start visualizing your ideal kitchen—be it mixing vintage charm with the sleekness of inset cabinets or crafting clever storage for every utensil and appliance. Don’t let the fear of complexity hold you back; the right planning, tools, and a dash of patience will make your kitchen renovation both enjoyable and rewarding. Your space can reflect your personality and improve your daily routine—so take that first step today. What’s one custom storage idea you’re excited to implement? Let me know below.