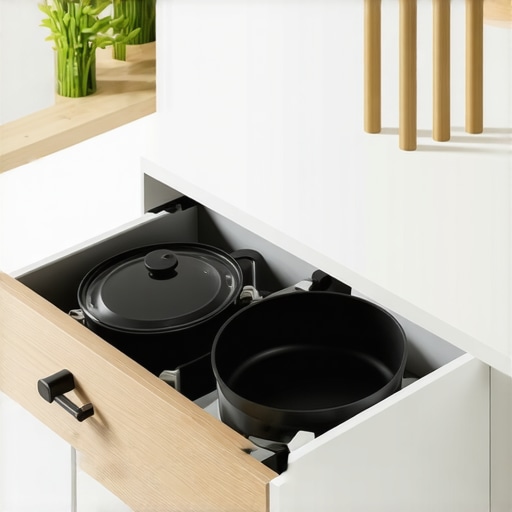
7 Deep Drawer Fixes for Better Pot and Pan Access
Have you ever reached into a crowded deep drawer, only to find yourself wrestling with a tangle of lids, sauté pans, and that favorite roasting dish? I’ve been there—frustrated, messy, and wondering if there’s a better way to organize those bulky kitchen essentials. That lightbulb moment hit me hard when my lids kept slipping to the back every time I opened the drawer, turning my kitchen chaos into a full-blown annoyance. If this sounds painfully familiar, you’re not alone—and more importantly, there’s hope.
Why Deep Drawer Organization Matters More Than You Think
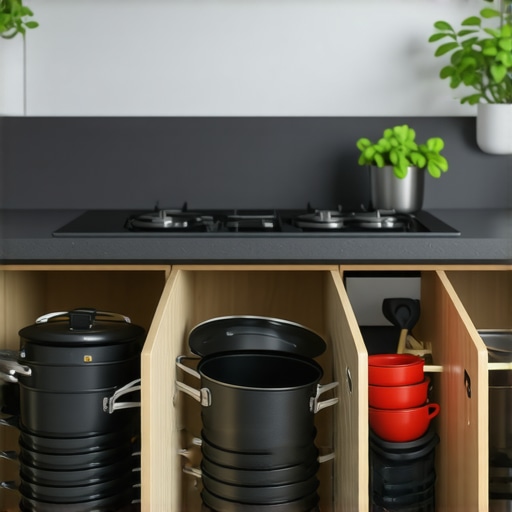
Deep drawers are a game-changer in kitchen storage, offering a sleek, unobtrusive way to keep pots, pans, and lids accessible. But without proper organization, they quickly become black holes where everything gets lost or stuck. The good news? With a few strategic fixes, you can turn those cluttered drawers into efficiency hubs that save you time and frustration each day.
Early in my remodeling journey, I made the mistake of installing standard slides without considering the unique needs of deep drawers. As a result, pots jammed, lids slipped, and it was nearly impossible to find what I needed without digging through a mountain of cookware. I learned that customized solutions make all the difference—hence, these seven deep drawer fixes that really work, backed by my personal experience and a bit of expert advice from an industry insider.
Is Investing in Customization Worth the Hype?
One of my biggest early missteps was overlooking quality slides and vertical dividers, thinking all options were created equal. I found that cheap hardware not only failed under weight but also led to drawer sagging over time. Fortunately, choosing the right tools transforms chaos into order and might be more affordable than you think—especially when you consider the long-term benefits of durable, well-designed storage.
In the next sections, I’ll guide you through seven practical fixes that can make your deep drawers more functional and easier to use. Whether you’re remodeling or simply tidying up your current setup, these tips will help you make the most of your space, saving you headaches and perhaps even some time in the process. Ready to dive in? Let’s get started on building a kitchen that actually works for your lifestyle.
Install Custom Dividers That Actually Work
Begin by measuring your deep drawers precisely—this is like picking the right size shoes; ill-fitting can cause discomfort and inefficiency. Use these measurements to order or craft custom dividers from sturdy materials like hardwood or high-quality plastic. I once took a old shoebox, cut it into sections, and inserted it into my drawer, which surprisingly held lids and utensils better than store-bought options. The key is seamless fit to prevent shifting with daily use.
Choose Heavy-Duty Drawer Slides
Standard slides may sag under weight, especially with cast iron pans or multiple lids stacked high. Upgrade to heavy-duty slides rated for at least 100 pounds, and install them according to manufacturer instructions—double-check the placement with a level. During my last remodel, I replaced my old sliders with industrial-grade ones and immediately noticed smoother operation, preventing sagging and making retrieval effortless.
Vertical Lids Storage to Prevent Mess
To avoid lids becoming an unmanageable pile, invest in vertical dividers—think of them as the surfboard racks of your drawer. Position these dividers at regular intervals to hold lids upright and separated, much like organizing file folders. I used scrap plywood to build one in an afternoon; it drastically reduced lid slipping and made finding the right lid quick and easy. This simple addition keeps everything accessible, saving time during cooking hectic mornings.
Maximize Space with Pull-Out Trays
Pull-out trays turn deep, dark cabinets into accessible treasure troves. Install slim, sturdy trays that glide smoothly on high-quality slides—these are ideal for small items or baking sheets. I added a pull-out tray for baking sheets in my last kitchen, which replaced a frustrating stacking system where sheets slipped and caused endless fuss. Now, the trays slide out with a gentle touch, revealing neatly organized sheets and pans, preventing clutter and damage.
Label Everything Clearly
Labels are like signposts in a cluttered city; they guide you directly to what you need. Use a label maker or permanent marker to mark sections—be specific, like “Lids” or “Measuring Cups.” During my organization, I labeled each divider and tray, which saved minutes searching—especially when hosting guests or multitasking in a rush.
Regular Maintenance and Adjustments
Once your drawers are organized, make a habit of quick monthly checks to re-align dividers or tighten slides. Over time, hardware can loosen or contents shift. I keep a small toolkit handy to tighten screws, which keeps the system running smoothly. This routine prevents deterioration and keeps your setup functioning optimally for years.
Leverage Expert Resources for Custom Solutions
If DIY isn’t your thing, consult a professional for custom-built solutions tailored to your specific needs—especially useful if your space has awkward corners or unusual depths. Visit this link to see how custom cabinets can transform your kitchen and help you build smarter, more accessible storage compartments that last.
Remember, the secret lies in precise measurements, durable hardware, and thoughtful organization—turning chaos into clarity with these actionable steps boosts your kitchen’s efficiency and reduces daily stress. Incorporate vertical divisions, heavy-duty slides, and clear labeling to make your deep drawers work for you, not against you.
Even seasoned homeowners and designers often fall into common misconceptions about custom cabinets and storage ideas, believing that one-size-fits-all solutions or trendy designs are the ultimate fix. In reality, these misconceptions can lead to expensive mistakes and underutilized space. Let’s explore some nuanced errors that frequently go unnoticed, and how understanding them can elevate your remodel from good to exceptional.
Many assume that high-end materials automatically guarantee durability and longevity, but in my experience, the real story lies in the details of construction, joint integrity, and hardware quality. For example, a beautiful veneer veneer may look stunning but can peel or warp in high-humidity zones if not properly sealed or reinforced, leading to costly repairs down the line. This is why I always emphasize inspecting the quality of plywood core and finish options before approving a design, as discussed in this article.
Another misguided belief is that customizing storage means creating elaborate, complex compartments. I’ve seen kitchens where homeowners opt for intricate pull-outs and specialty cabinets, only to find that accessibility becomes a nightmare for daily use. Sometimes, simplicity trumps complexity—well-designed, open shelving or slim pull-out trays based on actual usage patterns are often more effective, as outlined in this resource. Don’t let the allure of fancy features distract you from what genuinely enhances functionality.
What about the myth that larger cabinets are always better? Bigger isn’t necessarily smarter; overly deep or wide units can become difficult to reach and maintain. The secret lies in optimizing depth and height according to ergonomic principles. Adjustable shelving and custom dividers can make a world of difference, which is why I recommend consulting with experts who understand these nuances. For extensive insights, check out this guide.
Are Built-Ins Actually Just Styling or Do They Improve Usability?
Let’s be honest: many built-ins are added mainly for aesthetics rather than function. However, strategic built-ins—like integrated wine storage, hidden panels, or multi-purpose niches—can significantly enhance daily life if planned properly. It’s easy to overlook these details during a remodel, but they often make the most impact. For an advanced look at integrating such solutions, consider exploring this article.
Remember, the key to successful custom cabinetry and storage lies in the details—materials that stand the test of humidity, user-friendly configurations, and thoughtful integration that aligns with your habits. Have you ever fallen into this trap? Let me know in the comments. Improving your space isn’t just about choosing the latest design; it’s about understanding the subtle nuances that deliver real durability and daily convenience.
Tools That Keep Your Custom Cabinets in Top Shape
Ensuring your investment lasts years requires the right toolkit. I personally swear by a high-quality cordless drill with a set of precision driver bits—it’s invaluable for tightening loose hinges or adjusting drawer slides without the hassle of dealing with cords. Additionally, a soft-bristled brush and a microfiber cloth are perfect for cleaning dust and smudges from delicate surfaces without scratching them. For measuring, a digital caliper provides accuracy when fine-tuning hardware placements, especially if you’re adding custom dividers or pull-out trays to your storage system.
When it comes to maintenance, having a silicone-based lubricant spray helps keep slides and hinges operating smoothly. I meticulously apply it every six months to prevent squeaks and reduce wear, especially in humid environments where metal parts tend to seize over time. Remember, choosing tools designed specifically for cabinetry ensures longevity and minimizes damage during adjustments or repairs.
Software and Planning for Durable, Scalable Storage Solutions
On the digital front, I rely on CAD-based design programs like SketchUp to plan and visualize custom storage layouts before building. This allows me to experiment with different configurations, ensuring each shelf, divider, or pull-out tray fits perfectly, aligning with the existing cabinetry. Using 3D models also helps predict how components will perform over time, making it easier to identify potential stress points that could lead to failure or sagging—especially critical with heavy-duty hardware. For documenting and tracking maintenance schedules, I use Todoist, which reminds me when to check hinges, lubricate slides, or replace worn-out parts, extending the lifespan of my cabinetry.
Long-Term Results Come from Consistent Upkeep
Regular inspections are vital. I check my custom storage solutions quarterly, looking for loose screws, signs of wear, or misalignments. Adjusting soft-close hinges with a screwdriver and renewing lubrication prevents nagging issues down the line. That TLC maintains optimal functionality and keeps the aesthetic pristine, which ultimately preserves property value. Remember, small, proactive interventions now save costly repairs later—something I’ve learned the hard way.
Scaling Your Storage System for Growing Needs
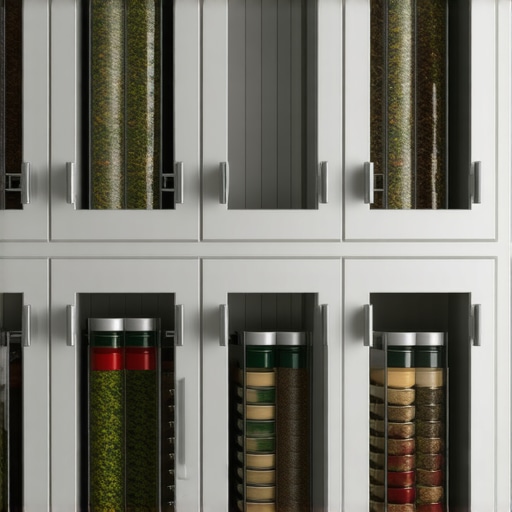
If your household is expanding or your storage demands change, don’t hesitate to reassess and scale. Installing modular components, such as adjustable shelves and customizable dividers, makes it easy to reconfigure without complete remodels. For example, I added a pull-out spice rack in an under-utilized corner, making use of a narrow space that once collected dust. These flexible solutions can be designed using advanced tools and maintained with simple hardware adjustments, future-proofing your kitchen against evolving needs. For professional-grade recommendations, consult experts via this contact page.
How do I maintain my cabinet hardware over time?
Maintaining your hardware ensures smooth operation and prevents costly replacements. Regularly clean hinges and slides with a soft cloth and apply a silicone lubricant to keep parts moving effortlessly. If you notice squeaking or sticking, addressing it promptly will prolong hardware lifespan and avoid misalignments that could compromise your cabinetry’s integrity. To learn more about hardware longevity, see this article. I recommend trying out a dedicated hardware maintenance routine every six months—it’s a simple step that yields significant long-term benefits.
Secrets I Overlooked in My Kitchen Makeover
One of the most valuable lessons I learned was that even the best hardware can fall short if not installed or maintained correctly. I once skimped on high-quality slides for my deep drawers, thinking it was a cost-saving move. The result? Sagging, sticking, and endless frustration. It became clear that investing in durable, heavy-duty hardware wasn’t a luxury but a necessity, especially in a busy kitchen. This experience pushed me to prioritize quality over savings and to understand the subtle details—like proper weight ratings and precise installation—that make all the difference.
Another revelation was the power of dedicated vertical dividers. Initially, I relied on makeshift solutions like repurposed shoeboxes, hoping they would hold up over time. They didn’t. It was only after I built custom, seamless dividers from high-quality materials that I saw how much easier it became to find lids, baking sheets, and utensils. This taught me that tailored organization not only enhances functionality but also transforms daily routines into seamless experiences.
Finally, I discovered that labels are more than just signs; they are the GPS of your kitchen storage. A quick, clear labeling system streamlines cooking, shopping, and cleanup. I earnestly wish I had started this practice sooner—it saved me time and reduced stress, especially during hectic mornings or when entertaining guests. These insights reveal that successful cabinetry isn’t just about choice of materials—it’s about thoughtful planning, community-tested hardware, and a commitment to regular maintenance that stands the test of time.
Gear I Trust for Lasting Custom Cabinetry
To keep my investment in top shape, I rely on a high-quality cordless drill equipped with precision bits. It’s perfect for tightening loose hinges, adjusting drawer slides, and fine-tuning custom dividers. A microfiber cloth and a soft-bristled brush are staples for cleaning and dusting, ensuring surfaces stay pristine without scratches. For measuring, a digital caliper has been indispensable—allowing me to precisely customize dividers and pull-out trays, ensuring perfect fit every time. Lubricant sprays formulated for cabinetry keep slides and hinges operating smoothly, especially in humid environments where metal parts tend to seize. These tools have become the backbone of my ongoing cabinet maintenance routine, helping me preserve functional beauty for years to come.
Moreover, I utilize CAD planning software like SketchUp to visualize and tweak my organization ideas before building or purchasing components. This foresight saves time and costly errors, making sure each piece fits perfectly and performs well under weight. For tracking maintenance tasks, I depend on apps like Todoist, which send reminders for tightening screws or replacing worn hardware. These resources empower me to manage my cabinetry proactively, ensuring that the system remains as effective and beautiful as the day it was installed.
Embrace the Challenge, Shape Your Space
Remember, transforming your kitchen storage isn’t just an project—it’s a journey that emphasizes learning, patience, and adjustment. Each upgrade, from vertical dividers to heavy-duty slides, builds a more resilient and enjoyable space. With the right tools, thoughtful planning, and a willingness to learn from missteps, you can craft a kitchen that truly works for your lifestyle. Whether you’re embarking on a full remodel or simply refining your existing setup, don’t shy away from innovative ideas or expert advice. Your kitchen should evolve with you, and every small improvement adds up to a significant liberation from clutter and chaos.