7 Space-Saving Pull-Outs That Fix Deep Pantry Clutter Issues
It hit me one Saturday afternoon, surrounded by an avalanche of cans, spice jars teetering on the edge of collapse, and half-empty cereal boxes that refused to stay upright. My deep pantry was a battlefield of clutter and wasted space, making every grocery trip feel like a scavenger hunt. That moment of frustration sparked a realization: my storage woes weren’t just about bad planning—they were fixable with the right solutions. Today, I want to share how a handful of smart pull-out organizers changed my kitchen—and how they can do the same for you.
Solving Deep Pantry Headaches with Smart Storage
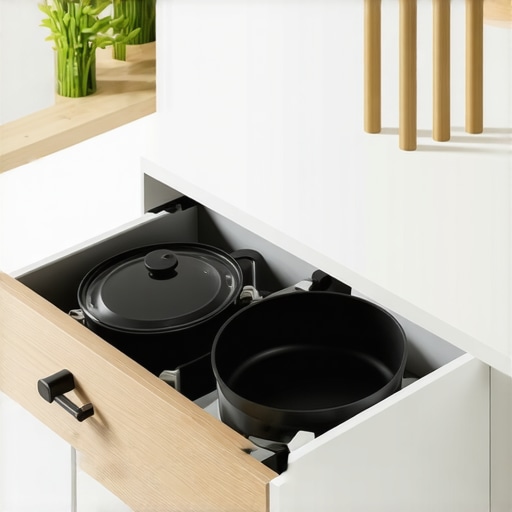
Deep cabinets often become black holes where food and supplies go to hide forever. But there’s hope. Space-saving pull-outs are designed to maximize every inch, making access easy and transforming chaos into order. These solutions not only free up space but also save time and reduce food waste—you’ll spot that expired jar long before it hides behind ten others. Plus, they keep your kitchen looking sleek and clutter-free.
Are you tired of blindly digging through your pantry, only to find the bottle you needed is buried beneath a mountain of chaos? If so, you’re not alone. I’ve been there. Early on, I made the mistake of adding extra shelves without considering accessibility, which only compounded the mess. But once I installed a few adjustable pull-outs, everything changed. To learn more about innovative storage solutions that can elevate your kitchen, check out [this helpful guide](https://artisancabinetworkz.com/innovative-storage-solutions-for-modern-kitchen-remodels).
Is Deep Pull-Out Storage Really Worth All the Hype?
Like many, I was initially skeptical about investing in specialized hardware—was it really worth the cost, or just another add-on? My skepticism was rooted in early mistakes, such as installing cheap, flimsy slides that wobbled every time I reached for a can. The truth is, quality pull-outs make all the difference, offering durability and smooth operation. They become a game changer—trust me, once you experience the convenience, you won’t go back. For detailed insights, you might find [this article](https://artisancabinetworkz.com/expert-tips-on-selecting-storage-solutions-for-a-perfect-kitchen-upgrade) helpful.
Now that you understand why these storage tricks matter, let’s explore some of the best pull-out solutions that can tackle even the deepest, most stubborn pantry clutter. The journey to a beautifully organized kitchen starts here—and I’ll show you how to make it happen.
Start with a Precise Plan of Your Space
Assess your cabinets’ dimensions carefully using a tape measure, noting width, depth, and height. Imagine your cabinet as a puzzle; understanding each piece ensures the right fit. I once measured my pantry and realized that existing shelves couldn’t hold the weight or allow full access. Sketch out your layout or use online room planners for accuracy. This preparation prevents surprises later and helps determine how many pull-outs you’ll need, aligning your storage goals with actual measurements. For detailed planning ideas, visit this guide.
Choose the Right Hardware for Durability and Smooth Operation
Pick high-quality slides rated for the weight of your stored items. Heavy-duty, ball-bearing slides are like the suspension system in your car—ensuring smooth, reliable movement every time. I once installed cheap slides that wobbled after a month; replacing them with top-tier hardware transformed my experience. When selecting, consider weight capacity, extension length, and ease of installation. Proper hardware prevents sagging or sticking and extends the lifespan of your storage. For expert recommendations, explore this resource.
Prepare Your Cabinets for Installation
Remove existing shelves and clear out your cabinet to access the interior walls. Use a level to ensure your markings are straight—this step is crucial, like aligning a picture frame. Mark where the slides will attach, accounting for the depth of your pull-outs plus clearance space. I once mismeasured this step and had to redo the entire install, which was a lesson in patience. Pre-drill holes to prevent wood splitting, especially in particle-board cabinets. Confirm that the inner walls are solid enough to support the hardware; reinforce weak spots if necessary. For detailed surface prep tips, see this article.
Attach Slides and Build the Pull-Out Frames
Secure the slides to the sides of your cabinet using the screws provided, aligning them carefully. Think of this step as anchoring the foundation of a house—precision matters. Once slides are fixed, attach the corresponding parts to your pull-out frames, ensuring they glide smoothly. I used shims to fine-tune alignment, preventing skewed movement. Test each pull-out multiple times to confirm smooth operation before proceeding. Proper attachment avoids wobbly shelves or uneven extensions. Be sure to follow the manufacturer’s instructions closely, which you can find here.
Load Your Shelves and Final Checks
Place your stored items onto the pull-outs, arranging like a chef prepping ingredients—organized and accessible. Use bins or risers for small items, making full use of space and visibility. Push the shelves in fully and observe their movement, checking for any sticking or misalignment. Adjust the slides or leveling shims as needed; think of these as fine-tuning your car’s suspension for a smooth ride. Once satisfied, secure any remaining screws or stops that prevent over-extension. Regularly maintaining and cleaning your pull-outs ensures longevity—think of it as servicing a trusted vehicle. Discover more tips at this page.Many homeowners believe that opting for built-in storage solutions automatically guarantees a sleek, functional kitchen. However, this assumption overlooks the nuanced challenges that come with custom cabinetry and integrated storage. For instance, integrating built-ins without considering future access needs can lead to awkward retrieval of rarely used items, defeating the purpose of the upgrade. Additionally, a prevalent myth is that more customization always equates to better function—it doesn’t if dimensions and user habits aren’t meticulously analyzed. These pitfalls often stem from overlooking small yet crucial details, such as hardware choices or the precise measurement of space, which can lead to costly adjustments later. Elevating your understanding of these subtleties ensures a more successful remodel. For example, selecting hardware rated for heavy use can prevent squeaky doors and misaligned drawers, common annoyances that detract from the intended luxury feel. Moreover, many tend to underestimate the importance of seamless transitions between built-ins and existing cabinetry, which can result in a disjointed look and compromised usability. A thorough planning process, including detailed measurements and understanding of your daily routines, is essential. This is why consulting with experts or referring to comprehensive guides, such as those found at this resource, can save you from these common pitfalls. An advanced consideration involves the choice of materials—opting for high-quality plywood over particle board can ensure durability and longevity, particularly in high-moisture areas like kitchens and pantries. According to industry studies, material quality directly impacts the lifespan and maintenance needs of custom cabinetry. Never forget, the devil is in the details. Overlooking small factors can turn what should be a luxurious, functional kitchen into an ongoing battle with hardware, warping, or insufficient storage. Have you ever fallen into this trap? Let me know in the comments.Maintaining an impeccably organized kitchen requires more than just initial planning; it involves consistent upkeep and the right tools to keep everything functioning smoothly. Personally, I rely on a combination of high-quality hardware and specialized cleaning products to ensure that my custom cabinets and storage solutions stay in top shape over the years. One tool I swear by is the Magnetic Level. It might seem simple, but using a precision magnetic level during installation or adjustments guarantees that shelves and hinges are perfectly aligned, preventing issues like uneven drawers or misfitting doors. For ongoing maintenance, I recommend regularly inspecting soft-close hinges—every six to twelve months—and applying a little silicone lubricant to prevent squeaking and ensure smooth operation. This proactive approach extends the lifespan of your hardware and keeps your kitchen operating effortlessly. Looking ahead, I believe the trend is moving toward smarter, sensor-based hardware that can alert you when maintenance is needed, making upkeep even easier.
How do I maintain built-ins and custom cabinets over time?
The key is a combination of routine cleaning, hardware checks, and employing the right cleaning agents. I use a damp microfiber cloth with a mild soap solution to gently wipe down surfaces, avoiding abrasive cleaners that can scratch finishes. Checking and tightening hinges or slides biannually prevents sagging or sticking, which becomes more critical as hardware ages. For a thorough deep clean, I sometimes remove drawers and shelves to clean behind or underneath, which helps prevent dust buildup and preserves air quality. Additionally, applying a specialized cabinetry polish every year helps preserve wood finishes and maintains that just-installed look. For expert advice, I often consult articles like this resource. Don’t shy away from trying out advanced tools such as a cordless drill with adjustable torque settings—it’s perfect for re-tightening hardware without risking damage. Incorporate these practices into your routine, and you’ll enjoy a kitchen that remains both beautiful and highly functional for years to come. Keep in mind, regular upkeep combined with the right tools like a magnetic level and gentle cleaning agents can prevent costly repairs down the line and ensure your storage solutions perform flawlessly.Over the years, I’ve realized that the real magic in transforming a kitchen isn’t just in selecting trendy hardware or flashy countertops—it’s about understanding the nuanced dance of patience, precision, and foresight that goes into creating built-in storage solutions. My experience taught me that sustainable organization comes from appreciating the details—like the tension between aesthetics and functionality—that most people overlook. When I first dived into remodeling, I thought a few new shelves would be enough. But I soon discovered that integrating custom cabinets and smart storage is a craft that requires careful planning and a willingness to challenge conventional ideas. Embracing quality hardware and meticulous measurement proved to be game changers, helping me avoid costly mistakes and ensuring that my built-ins truly served my lifestyle rather than just looking good. Now, I understand that thoughtful design is an ongoing commitment—something I revisit seasonally, tweaking my setup for maximum efficiency and joy. Trust me, the way to truly elevate your kitchen with built-in solutions is through an attentive, detail-oriented approach that honors your unique space and habits.