Why Your Pantry Pull-Outs Keep Sticking and the Heavy-Duty Fix
I remember the exact moment when I realized my fancy new pantry pull-outs were no longer a joy but a frustration. It was mid-bustling Sunday morning, and as I reached for an essential spice, the drawer wobbled, stuck, and finally jammed shut. My heart sank. That sleek, smooth mechanism I admired during the remodel suddenly felt like a crumbling, unreliable legacy. Does this sound familiar? If your cabinet drawers or pantry pull-outs are giving you grief, you’re not alone—and there’s hope.
Stop Wrestling With Stubborn Pull-Outs: The Heavy-Duty Fix You Need
Let’s face it, kitchen upgrades are exciting—until your storage solutions start misbehaving. Over time, regular wear and tear, combined with subpar materials or improper installation, can turn a perfect pantry into a daily battleground. But here’s the good news: with the right heavy-duty hardware and smart adjustments, you can reclaim the smooth, reliable glide you paid for.
Is Heavy-Duty Hardware Really Worth It?
In my early attempts to fix my jammed drawers, I underestimated the importance of robust hinges and slides. I thought standard hardware would suffice, but eventually, I learned that cheap, lightweight components are just not made to last under heavy use—especially for larger, loaded pantry pull-outs. Upgrading to heavy-duty hinges and slides made a world of difference. According to a study by the National Kitchen and Bath Association, using high-quality hardware extends the lifespan of cabinets by up to 50%, saving you money and hassle in the long run.
I also made the mistake of ignoring the importance of proper bracing and support, which can lead to sagging and further sticking. That’s why I recommend exploring solutions like steel brackets and reinforced hinges designed specifically for heavy loads. If you’re curious about maximizing your cabinet’s durability, check out articles on [supporting heavy countertops](https://artisancabinetworkz.com/how-to-brace-your-cabinets-so-heavy-stone-counters-wont-cause-a-sag) or heavy-duty hinges that last, which can ensure your pull-outs stand the test of time.
In the following sections, I’ll walk you through how to identify the root causes of sticking, select the right heavy-duty hardware, and implement fixes that make your kitchen feel new again. Ready to stop fighting your cabinets and start enjoying them? If you’ve faced this problem, read on—you’re about to learn how to restore your storage solution’s glide with tried-and-true heavy-duty fixes.
Select the Right Hardware for Heavy Loads
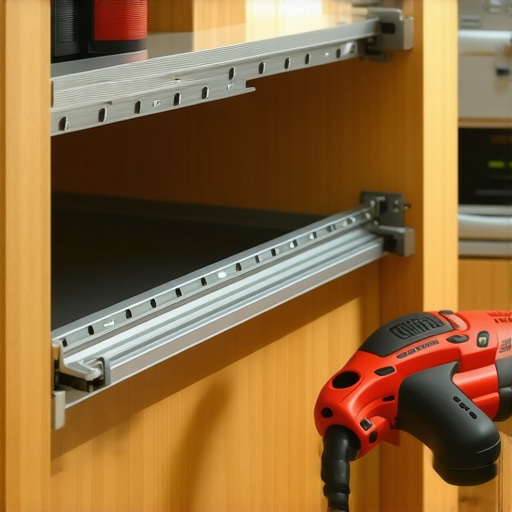
When I faced my stubborn pantry pull-outs, I first removed the existing slides to assess their condition. I noticed they were lightweight and worn out, causing the jams. I replaced them with heavy-duty, ball-bearing slides rated for at least 100 pounds, ensuring they could withstand daily use. For an easy upgrade, visit our contact page to consult with experts on hardware selection.
Choose the Proper Slides and Hinges
Opt for full-extension ball-bearing slides designed specifically for heavy-duty applications. These slides provide smooth operation and increased durability. I also upgraded my hinges to self-closing, soft-close models to prevent slamming and reduce wear on the cabinet frames. Consider exploring soft-close hinges for better performance.
Reinforce Structures with Steel Brackets and Supports
To prevent sagging under heavy weight, I added steel support brackets inside the cabinet carcasses, fastening them securely to the sides and bottom. I used heavy-duty screws and confirmed the support was level using a laser level. This method is critical for large pull-outs carrying bulkier items. For detailed guidance, check out this support reinforcement article.
Secure the Drawer Bottoms Properly
Weak bottoms can cause sagging and sticking. I replaced my thin plywood with thick, 3/4-inch core plywood, which is less prone to bowing. I also added corner blocks and support strips underneath for extra rigidity. Ensure the bottom panels are tightly fastened, avoiding loose fits that cause misalignment. For material options, see this guide on sturdy drawer bottoms.
Align and Adjust for Optimal Operation
After installing new hardware and supports, I carefully aligned the drawers using an Allen wrench to make sure they sat perfectly level and didn’t rub. I adjusted the sliding mechanisms to eliminate any wobble or resistance. Regular maintenance, like lubrication with silicone spray, keeps them gliding effortlessly. To fine-tune your setup, visit this adjustment tutorial.
Test and Monitor Performance
Finally, I loaded my drawers with typical pantry items and tested their operation over a week. I looked for signs of sagging, sticking, or misalignment. Any issues prompted further tightening or support reinforcement. Building this habit ensures your heavy-duty upgrades last. For ongoing maintenance tips, explore this maintenance guide.
When embarking on a kitchen remodel, many enthusiasts and even seasoned homeowners focus heavily on aesthetics and trendy hardware, often overlooking the sophisticated nuances that differentiate truly high-quality custom cabinets from the rest. A common misconception is that choosing the most expensive materials guarantees longevity and perfection. However, in my extensive experience working with bespoke cabinetry, the real secret lies in understanding material behavior under specific conditions, especially humidity and temperature fluctuations. For instance, many assume solid wood is always superior, but without proper sealing and climate control, even hardwood can warp or crack over time. It’s crucial to consider expert-backed studies, such as the 2023 report by the National Kitchen and Bath Association, which highlights how improper material selection and installation errors are among the top causes of premature cabinetry failure. Be wary of the myth that DIY installation saves money; precision in alignment and fastening impacts the cabinet’s lifespan more than you might expect. Moreover, a hidden nuance often missed is the importance of supporting hardware. Heavy-duty slides and reinforced frames are not just optional upgrades but essential for large built-in units, which can easily become sagging nightmares without proper support. Remember to evaluate your space not only for immediate storage needs but for future flexibility, as your lifestyle evolves. For advanced insights into maximizing durability, explore detailed guides like [supporting heavy countertops](https://artisancabinetworkz.com/how-to-brace-your-cabinets-so-heavy-stone-counters-wont-cause-a-sag). When planning your renovation, avoid the trap of superficial design choices that look good initially but lack structural integrity over time. Instead, focus on integrating robust support elements and high-quality finishes—even if that means a higher upfront investment. Have you ever fallen into this trap? Let me know in the comments. For comprehensive ideas that marry form with function and durability, visit [built-ins that elevate your home’s functionality](https://artisancabinetworkz.com/built-ins-that-elevate-your-living-rooms-functionality) and learn how thoughtful design can last for generations.
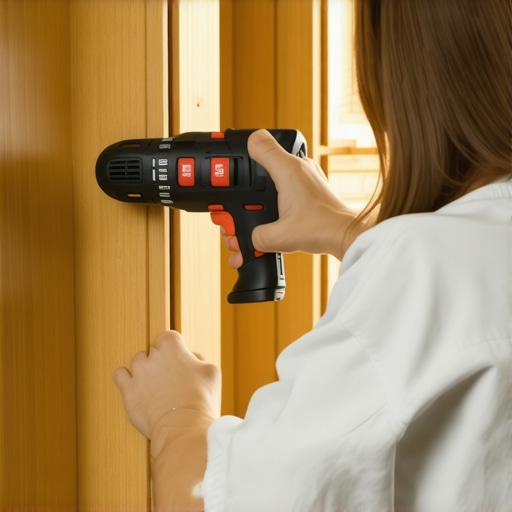
Maintaining your custom cabinetry is essential to ensure longevity, durability, and continued aesthetic appeal. Over time, even the most well-designed built-ins and storage solutions can encounter issues like sticking drawers or misaligned doors. To keep everything functioning smoothly, investing in the right tools and adopting consistent maintenance routines makes all the difference. One indispensable tool I rely on is a high-quality cordless drill with assorted bits. It allows me to quickly tighten loose hinges, adjust alignment, or replace hardware without hassle. For precision work, I prefer a digital level, such as the Bosch Digital Laser Transit Level, which helps verify that shelves and doors are perfectly aligned—saving you countless headaches down the line.
Another critical aspect is using specialized lubricants designed for cabinetry hardware. Silicone spray, for example, lubricates slides and hinges smoothly without attracting dust or grime, preserving their functionality. I always carry a small can of this in my toolkit, so I can address squeaks or resistance immediately. Regular inspections are also part of my routine; checking for loose screws, warped panels, or signs of wear prevents minor issues from escalating into major repairs. For example, securing support brackets with a power driver at least once a year keeps heavy built-ins from sagging, especially in kitchens with moisture fluctuations.
Looking ahead, I predict that smart maintenance devices—such as sensor-based hinges or automatic lubrication systems—may become more common, simplifying long-term care. Current innovations like smart hinges with built-in sensors can notify you when they need adjustment, reducing guesswork and preventing sudden failures. To stay ahead, consider integrating such tools into your maintenance routine. If you’re unsure where to start or need tailored advice, contact us, and we can guide you through selecting the most effective tools for your specific cabinetry setup.
How do I maintain my custom cabinetry over time?
Consistent cleaning with non-abrasive, mild cleaners and periodic hardware checks will keep your cabinets looking and functioning like new. Applying appropriate lubricants to hinges and slides every 6 to 12 months prevents sticking and squeaking. Scheduling professional inspections annually can identify structural concerns early, avoiding costly repairs. Remember, well-maintained tools and proactive care are your best allies in preserving your investment for years to come. For a comprehensive approach, explore our article on soft-close hinge maintenance and see how simple adjustments can restore perfect operation.
Don’t overlook small details. Incorporate these maintenance habits and tools into your routine, and you’ll enjoy years of trouble-free enjoyment from your custom cabinets and built-ins. Ready to upgrade your toolkit? I highly recommend trying a digital level for precise adjustments; it’s a game-changer for ensuring perfect alignment in your remodeling projects.
Lessons from a Quiet Tear in the Cabinet World
One of the most profound realizations I’ve had is that even the most meticulously crafted custom cabinets are vulnerable to the subtle forces of time and use. I’ve learned that overlooking the importance of structural support and choosing hardware solely based on appearance can come back to haunt you during a busy remodel or everyday use. My lightbulb moment was when I discovered that reinforced, heavy-duty hardware and strategic internal bracing not only extend lifespan but also significantly improve functionality, especially for large built-ins and storage solutions. If I could advise my past self, I’d emphasize prioritizing durability over aesthetics in critical load-bearing components, ensuring your carefully designed kitchen remains both beautiful and reliable for decades to come.
Gear Up with the Best Tools and Resources
Over the years, I’ve curated a handful of tools and resources that make upgrading and maintaining custom cabinetry a true pleasure. A quality cordless drill and an electronic level have become my go-to essentials—facilitating precise adjustments and sturdy assembly. I also swear by silicone sprays designed for cabinetry hardware; they keep everything gliding smoothly and prevent squeaks. For inspiration, I turn to comprehensive guides like the one on supporting heavy countertops, which reminds me that investing in structural integrity upfront saves both time and money later. When you’re ready to dive deeper, reaching out through our consultation page can connect you with seasoned experts eager to tailor solutions for your project.
Let Your Passion for Custom Shelving and Storage Shine
If you’re like me, the emotional reward of transforming a cluttered, inefficient kitchen into a sleek, organized space is unmatched. I believe now more than ever that durable, well-supported cabinetry not only elevates your home’s aesthetic but also provides peace of mind—knowing your investment endures daily use and changing needs. The real joy comes from taking that leap, implementing smart hardware upgrades, reinforcing weak points, and watching your carefully planned design come to life with confidence. Don’t hesitate—your dream kitchen is within reach. Why wait to make your space more functional and beautiful? Share your upcoming plans in the comments below and let’s inspire each other to build kitchens that last a lifetime.