The Best Way to Store Your Stand Mixer Out of Sight
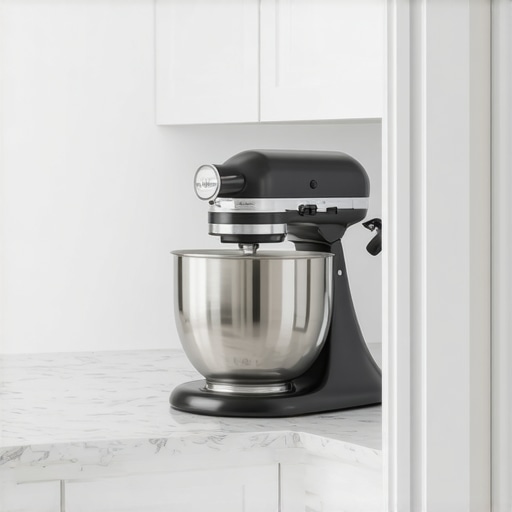
I remember the morning I nearly threw my back out reaching for my KitchenAid. It was buried in the deep, dark corner of a lower cabinet, tucked behind a slow cooker and a mountain of mismatched plastic lids. By the time I finally lugged that twenty-five-pound beast onto the counter, my desire to bake fresh sourdough had completely evaporated. It felt like I was wrestling a boat anchor just to make a simple loaf of bread. If your kitchen counter currently feels more like a crowded appliance showroom than a functional workspace, I have been exactly where you are. I spent years thinking this was just the tax I had to pay for owning a well-equipped kitchen, but I was wrong.
Stop Fighting Your Heaviest Kitchen Gadgets
The truth is, your stand mixer is likely the most used yet most awkward item in your arsenal. It is too heavy to move easily, yet it is a total dust magnet if it sits out permanently. When I first started looking into revolutionizing my kitchen remodel using built-ins, I realized that the standard cabinet layout was actually working against me. I made the classic mistake early on of thinking I could just organize better with what I already had. I bought plastic bins and turntables, but none of that fixes the sheer weight of a professional-grade mixer. You need a dedicated home for it that doesn’t involve a gym membership to access. Integrating custom cabinets as a game-changer means you can stop treating your appliances like clutter and start treating them like tools that belong. According to research from the National Association of Home Builders (NAHB), nearly 35% of homeowners now prioritize specialized storage for small appliances to achieve a clean-counter aesthetic. We are going to find a way to make that heavy mixer disappear when you do not need it and reappear with zero effort when you do.
Is a mechanical mixer lift actually worth the cabinet space?
I will be honest: I was skeptical too. I worried that a heavy-duty lift would eat up so much room that I would lose space for my pots and pans. But once I saw how the best way to store heavy small appliances involves utilizing the vertical height of a base cabinet, my mind changed. If you have ever felt like your kitchen was closing in on you, it might not be the square footage—it is likely the visual noise of everything sitting on your counters. Transitioning to smart storage ideas is not about having less stuff; it is about having better access to the stuff you actually use. Have you ever avoided starting a recipe simply because you did not want to dig the equipment out of a dark corner? I would love to hear your appliance storage horror stories! It is time we stop the countertop shuffle for good and look at how innovative storage solutions can finally give you your prep space back.
Ditch the Heavy Lifting for a Better Kitchen Flow
To truly reclaim your workspace, you have to think of your kitchen as a high-performance workshop rather than just a storage room for food. When you start planning your layout, the goal is to eliminate the ‘friction’ of getting started. If you have to move three things to get to one, you won’t use that tool. I learned this the hard way when I installed my first heavy-duty mixer lift. I didn’t account for the clearance of the bowl-lift handle on my professional-grade mixer. I went to swing it up for the first time, and thwack—it hit the underside of the counter lip. I had to shim the entire mechanism down an inch, spent the afternoon covered in sawdust, and realized that the best way to store heavy small appliances in a base cabinet isn’t just about the weight; it’s about the geometry of the swing.
Anchor Your Layout to the Work Triangle
Before you start picking out hardware, look at where you actually stand when you prep. Your heavy equipment should live within two steps of your primary workspace. This is why why your kitchen layout should follow the work triangle rule is so vital. If your mixer lift is on the opposite side of the kitchen from your oven and prep sink, you are still carrying heavy bowls of batter across the floor. Think of your built-ins as docking stations; they should be positioned so the appliance is ready to work the second it is deployed.
Install a Heavy-Duty Lift Mechanism
The core of this setup is a spring-loaded shelf mechanism. Think of it like an elevator for your flour. These units are rated for up to 60 pounds, which is more than enough for even the beefiest mixers. When you pull the shelf forward, the springs take over, neutralizing the weight and locking the appliance at counter height. This is a primary component when you transform your kitchen with custom cabinets because it eliminates the need to lift or carry. You are effectively adding a secondary, mobile countertop that hides away.
Add Power Right Where the Action Happens
One mistake I see homeowners make constantly is installing a beautiful lift but forgetting that the cord still needs to reach a wall outlet. This creates a tripping hazard and looks messy. You need to ensure your contractor includes a dedicated circuit inside the cabinet. Specifically, why you need a flush-mount outlet inside your toaster garage or mixer cabinet becomes clear when you realize it allows the appliance to stay plugged in 24/7. When the shelf is up, the cord is hidden behind it; when it is down, everything is tucked away.
Maximize Your Small Footprint with Slim Built-ins
If you are working with a tighter floor plan, don’t assume you can’t have these features. Using smart storage solutions for small kitchens in 2025 means being surgical with your cabinet choices. You can find narrow lift mechanisms that fit into 12-inch or 15-inch wide cabinets. It is about choosing depth and verticality over horizontal sprawl. I once helped a friend fit a full baking station into a galley kitchen by using a vertical pull-out for the mixer and thin dividers for the sheets, proving that even the smallest kitchens can handle heavy-duty tools if the storage is engineered correctly.
Stop Settling for the Standard Corner Carousel
Most designers will tell you that a Lazy Susan is the gold standard for corner cabinets, but I am going to challenge that. In my experience, Lazy Susans are where Tupperware lids go to disappear and where heavy mixers are most likely to cause a mechanical failure. If you really want to maximize your footprint, you should skip the lazy susan and install lemans pull-outs instead. These kidney-shaped shelves swing entirely out of the cabinet, bringing the items to you rather than making you dive into a dark hole. According to the National Kitchen & Bath Association (NKBA), efficient corner storage can reclaim up to 50% of otherwise ‘dead’ cabinet volume compared to traditional fixed shelving. When you are looking for expert tips on selecting storage solutions, always prioritize mechanisms that bring the contents into the light. #IMAGE_PLACE_HOLDER_C#
Why Your Floating Floor Should Never Go Under Your Cabinets
Here is a major ‘oops’ factor that costs homeowners thousands in repairs: trapping your flooring. If you are installing luxury vinyl plank or laminate, you might think it is easier to run the floor wall-to-wall and set the heavy custom cabinets on top. This is a massive mistake. These floors are designed to ‘float,’ meaning they expand and contract with humidity. When you pin them down with 500-pound base cabinets, the floor has nowhere to go and will eventually buckle or gap. This is why why luxury vinyl plank should not be trapped under your base cabinets. Instead, you must install your cabinets first and then floor around them, or use specific expansion gaps hidden by base molding. It is a nuance that separates a DIY job from creating seamless kitchen remasters that actually last. I have seen beautiful remodels ruined in a single summer because the floor couldn’t breathe. Have you ever fallen into this trap? Let me know in the comments.
Why do my soft-close drawers feel sluggish when the temperature drops?
If you have invested in high-end cabinetry, you might notice your drawers moving like molasses during the winter. It is not necessarily a broken mechanism; it is often the viscosity of the hydraulic fluid inside the dampers. Understanding the real reason your soft-close drawers are sluggish in winter can save you a service call. Similarly, if your kitchen has a high spot in the subfloor, a lazy installer might just crank the leveling feet, but an expert knows the proper way to shim cabinets on a high spot to ensure the weight is distributed evenly without stressing the joinery. These small details are the difference between a kitchen that looks good in a photo and one that works perfectly for twenty years.Once your custom remodel is complete, the battle shifts from installation to preservation. I have a very specific kit I keep in my pantry specifically for my built-ins. It includes a #2 Pozidriv screwdriver—not a standard Phillips, which can easily strip those specific European hinge screws—and a small bottle of dry PTFE lubricant. If you notice your heavy appliance lift starting to squeak, don’t reach for WD-40 or heavy grease. Flour and dust will stick to those oils like glue, creating a grinding paste that will eventually ruin your bearings. When touching up seals, keep in mind why you should never use silicone for cabinet joinery; it creates a surface that won’t accept future paint and can lead to messy, irreversible residues on your custom wood.
How do I keep my custom storage performing like day one?
Regularly performing a ‘hardware audit’ is my number one secret for longevity. Every six months, I go through every single door and drawer. If you find a screw that just won’t stay tight despite your best efforts, you should learn how to fix a stripped screw hole in a solid wood cabinet door before the weight of the door causes it to drop and gouge your frame. Protection is also about the things you cannot see. For instance, understanding why your sink cabinet needs a drip tray right now is a lesson I learned the hard way after a slow, silent leak from a reverse osmosis system warped an expensive custom floor panel. It is a thirty-dollar fix that saves a three-thousand-dollar cabinet. I also highly recommend looking at the best way to seal the gap between your cabinet and the floor to prevent moisture from cleaning mops from seeping into the raw underside of your toe kicks. 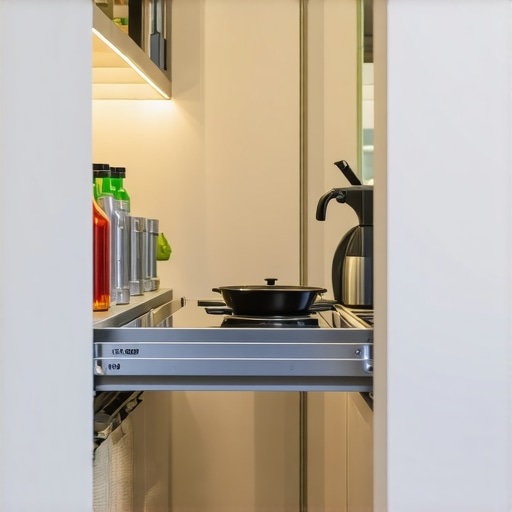
The future of built-in kitchen tech is motorized
I predict that within the next five years, we will stop pulling on heavy lifts entirely. We are already seeing the integration of ‘servo-drive’ technology where a simple tap of the knee opens a heavy trash pull-out or a voice command raises your stand mixer to counter height. As you look into smart storage ideas to maximize your kitchen space this year, the focus is shifting toward these effortless, motorized solutions. According to the Blum Technical Data Manual, modern electronic drive units for cabinetry are now rated for over 100,000 opening cycles, which means the technology is finally durable enough to outlast the countertops themselves. When you are following expert tips on selecting storage solutions for a perfect kitchen upgrade, always ask your contractor if they can pre-wire for these systems. This is also why your kitchen remodel needs a lighting plan first; it is significantly easier to run low-voltage wiring for motors and LEDs before those heavy built-ins are permanently anchored to your walls. I strongly encourage you to grab a Pozidriv screwdriver today and check the tension on your most-used cabinet door. This simple act of creating seamless kitchen remasters with built-in storage solutions ensures your investment stays functional for decades rather than just years.
Lessons Learned the Hard Way Under the Counter
If there is one thing a decade of remodeling has taught me, it is that the smallest oversight in the planning phase becomes a daily headache once the glue dries. I have seen homeowners spend thousands on high-end hardware only to realize their mixer lift hits the underside of the granite because they didn’t account for the swing radius. One of the most vital expert tips on selecting storage solutions I can give is to measure your specific appliance height with the bowl attached before you anchor any brackets. Another lightbulb moment for many of my clients is realizing that the proper way to shim cabinets on a high spot in the floor is about more than just aesthetics; it ensures your heavy-duty pull-outs don’t drift open or closed on their own. Lastly, never underestimate the power of protection. I always tell my friends that why your sink cabinet needs a drip tray right now applies to your mixer cabinet too—accidental flour spills or oil leaks from the mixer motor can degrade raw wood over time if not caught early.
Tools That Belong in Your Kitchen Maintenance Kit
To keep your investment performing like a professional workshop, you need more than just a standard toolbox. I personally recommend keeping a #2 Pozidriv screwdriver on hand; it is the specific bit used for European hinges that prevents stripping. For the smooth operation of your creating seamless kitchen remasters with built-in storage solutions, always use a dry PTFE lubricant for your drawer slides rather than grease, which attracts dust. When you are doing your final seals, remember why you should never use silicone for cabinet joinery—it is nearly impossible to paint over and makes future repairs a nightmare. For those living in colder climates, knowing the real reason your soft-close drawers are sluggish in winter helps you realize that your hardware isn’t broken; it just needs a little warmth to get the hydraulic fluid moving again.
Your Journey to a Frictionless Kitchen Starts Now
The goal of any high-end remodel is to eliminate the ‘friction’ of your daily life. When your heavy stand mixer glides into place without you breaking a sweat, you will find yourself baking more, experimenting more, and enjoying your home the way it was intended. By integrating modern kitchen remodels featuring custom cabinets and built-ins, you are not just adding storage; you are upgrading your lifestyle. Don’t be afraid to customize these spaces to fit your specific height and needs. Have you ever avoided a recipe just because your heavy equipment was too much of a chore to dig out? Let me know your storage struggles in the comments below!