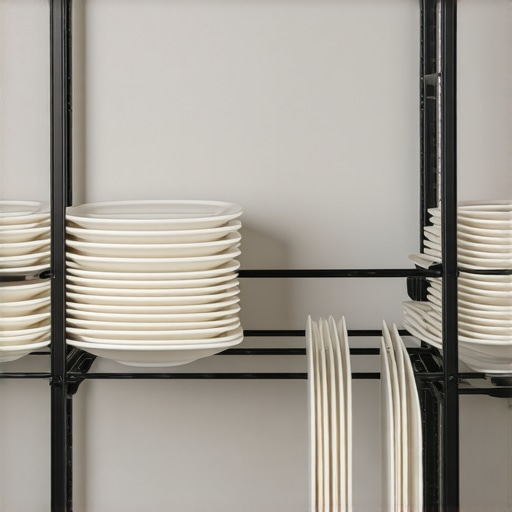
Stop Stacking Your Baking Sheets: The Vertical Divider Fix
Have you ever found yourself desperately digging through a towering pile of baking sheets, only to knock over that precious pie crust or spill flour everywhere? I learned this the hard way in my own kitchen—stacking baking sheets seemed like the easiest storage hack until I realized how much time and patience I was wasting every time I baked. That lightbulb moment hit me hard: there had to be a better way to organize those bulky, unwieldy pans.
The Vertical Divider Solution That Changed My Baking Routine
Today, I want to share a simple fix that revolutionized how I store my baking sheets and, honestly, saved my sanity. By adding a vertical divider, I stopped the endless sliding and stacking chaos. Not only does this keep my sheets neat and accessible, but it also prevents me from battling a collapsing tower every time I grab one. No more awkward attempts to fish out the right pan without knocking over the whole stack. If you’ve faced similar frustrations, hang tight—I’ll guide you through installing a vertical divider that makes this storage challenge a thing of the past.
What Bogs You Down? The Risks of Ignoring Proper Storage
Before discovering this fix, I made the mistake of trying to cram all my baking sheets into one narrow cabinet, hoping they would fit. Spoiler—this only led to jumbled, warped pans and constant frustration. Early on, I overlooked that improper storage not only wastes space but also damages your cookware over time. If you’re skeptical about whether a simple divider can really make a difference, I get it. But trust me, the benefits go beyond organization—think longevity of your pans and faster clean-up. Curious? Check out our space-saving solutions to see how small tweaks make big impacts.
Gather Your Tools and Measure Carefully
My first step was to identify the right materials — a sturdy sheet of plywood, a saw, a drill, and screws. I measured the width and height of my cabinet interior, noting the space where the divider would sit. Remember, precision here ensures a perfect fit, preventing wobbling or gaps. Once I had my measurements, I marked the plywood accordingly, similar to how you might draft a blueprint for a custom cabinet — ensuring each line is deliberate and exact.
Cutting and Preparing the Divider
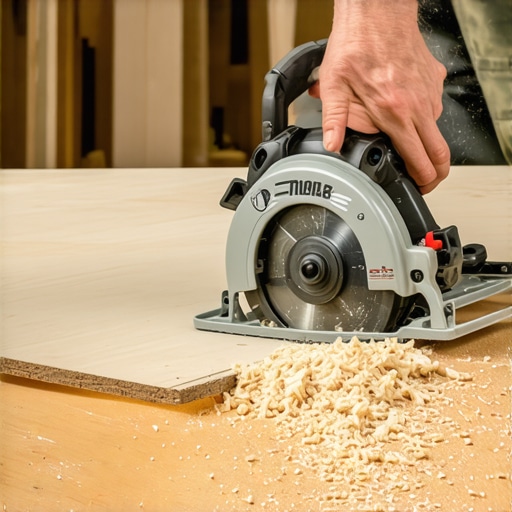
Next, I carefully cut the plywood along the marked lines using a saw, making sure to smooth the edges with sandpaper to prevent splinters. This is crucial; rough edges can damage your pans or catch on fabric. I then drilled small pilot holes to make screwing easier, especially if you’re working with a hardwood plywood. This step is akin to preparing a piece before installing a built-in — attention to small details prevents big headaches later.
Positioning the Divider Within Your Cabinet
Now comes the pivotal part: placing the divider. I slid it into the cabinet, ensuring it rested securely against the sides and back. To prevent movement, I pre-drilled holes in the plywood corresponding to existing screw holes in the cabinet. For a seamless look and added stability, I secured the divider with screws, just like anchoring a custom shelf in place. This method is reminiscent of installing built-ins; confident, precise attachment guarantees long-lasting organization.
Finishing Touches for a Professional Look
Finally, I checked the stability of the divider, making sure it was firmly in place and level. For extra durability, I applied a coat of sealant, especially if your cabinets are in a humid area—think beyond aesthetics; it’s about preservation. This quick step prevents warping or swelling over time, similar to how a custom cabinet maker ensures longevity through meticulous finishing. With the divider secured, my baking sheets now stand upright neatly, easily accessible, and ready for my next baking adventure.
Got a tricky spot or uneven wall? Consider scribing a filler strip to ensure a tight, gap-free fit.
For more ideas on customizing your kitchen storage, explore custom cabinet ideas or check out our space-saving solutions to maximize efficiency and style.
 Many homeowners believe that choosing the right storage system or custom cabinets is primarily about maximizing space or getting a sleek finish. However, as an experienced designer, I’ve learned that most misconceptions stem from overlooking nuanced details that can make or break your project. For instance, the common myth that all wood is equally durable is just not true; seasoned experts know that species like maple or oak offer significant advantages over softer woods, especially in high-traffic areas. Neglecting these subtle distinctions can lead to premature warping or damage, which is a costly mistake in kitchen remodeling. Additionally, a frequent trap many fall into is assuming that built-ins are only for aesthetics—they can be powerful tools to improve workflow and storage efficiency when designed thoughtfully. But beware: poor planning here, such as inconsistent heights or lack of proper clearance, can result in awkward usability, defeating their purpose altogether. Advanced homeowners and designers pay close attention to the hidden clearance needed for appliances and doors, often referencing studies like those from the National Kitchen and Bath Association, which highlight how small miscalculations can drastically reduce functionality. So, what should you watch out for in your next remodel? The key lies in understanding the intricate balance between form and function, and making informed choices about materials, layout, and hardware. For example, incorporating Blum soft-close hinges and full-extension slides significantly enhances usability and longevity, but only if they are properly installed and maintained. Thinking beyond basic options ensures your kitchen not only looks great but functions seamlessly for years to come. Better storage isn’t just about adding shelves—it’s about strategic planning at every detail, including filler strips for uneven walls or properly scribing cabinetry to walls—details often overlooked but essential for a professional finish. If you’re aiming for a space that truly elevates your lifestyle, exploring innovative storage solutions like deep pull-outs or custom corner units can unlock surprisingly wasted space. For more insights into creating personalized, functional kitchens, check out our custom cabinet ideas and modern remodels with built-ins. Remember, the devil is in the details, so don’t settle for just surface-level decisions—your space deserves the nuanced expertise that ensures both beauty and practicality. Have you ever fallen into this trap? Let me know in the comments.
Maintaining your customized kitchen storage solutions over time requires more than just initial planning; it demands the right tools and consistent upkeep. Personally, I swear by using a combination of high-quality drill bits and precision level laser tools for installing and adjusting built-ins—these ensure perfect alignment and long-term stability. A cordless impact driver with adjustable torque settings has revolutionized my ability to assemble and tweak cabinets, especially when dealing with heavy doors or soft-close hinges. Additionally, for ongoing maintenance, I rely on a digital moisture meter to monitor humidity levels in high-traffic areas, preventing warping of wood components over the years. As the trend towards smart kitchens accelerates, I foresee a move toward integrated maintenance apps that can track hardware wear or suggest when tightening or replacing parts. Looking ahead, investing in modular hardware with built-in sensors could lead to self-adjusting hinges or soft-close mechanisms that prevent misalignment or failure, simplifying long-term care.
How do I keep my storage solutions functioning flawlessly over time?
To ensure your custom cabinets and built-ins stand the test of time, regular inspection and gentle adjustments are key. For example, periodically checking and tightening mounting screws with a compact impact driver prevents sagging or misalignment. Using a laser level to verify that shelves and cabinet doors remain perfectly aligned helps catch issues early before they become major problems. Applying a suitable wood conditioner or sealant annually can also extend your cabinets’ lifespan by defending against humidity-induced warping. For intricate or hard-to-reach areas, I suggest employing a flexible inspection mirror and a handheld magnifier to spot screws or hinges that need minor tweaks. Keep in mind, maintenance isn’t just about tools; understanding your materials’ specific needs (e.g., avoiding water exposure on plywood or MDF) is equally vital. To streamline this process, I recommend setting a seasonal maintenance checklist—think of it as routine checkups for your kitchen’s backbone. If you’re curious about optimizing your space further, explore our space-saving solutions that integrate seamlessly into your lifestyle.
Remember, when you choose durable, high-quality hardware and invest in the right maintenance tools, your kitchen’s storage system can function beautifully for years. Don’t forget to regularly inspect and adjust your built-ins—think of it as giving your kitchen the routine checkup it deserves. For an extra tip, try installing soft-close dampers if you haven’t already; they not only quiet your cabinets but also reduce wear over time. Interested in more advanced tips? Consider incorporating smart hardware with sensors that alert you to loosened hinges or misaligned doors, bringing maintenance into the digital age.
Need personalized advice? Reach out through our contact page and let’s keep your kitchen working flawlessly for the long haul.


Through my journey with storage solutions, kitchen remodels, custom cabinets, and built-ins, I’ve uncovered that the devil truly is in the details. A single misstep or overlooked nuance can turn an elegant space into a frustrating mess. My biggest lesson? Never rely solely on surface choices; it’s the intricacies—like scribing a cabinet filler strip or choosing the right hardware—that transform a good design into a lasting masterpiece.
What the Pros Keep to Themselves About Storage Brilliance
- The Power of Scribing: I used to ignore the uneven walls, thinking my cabinets could hide imperfections. Then I learned about scribing—literally customizing the fit to wall contours—which saves countless headaches and looks seamless. This tiny detail can elevate your entire kitchen, making installations look professional without the hefty price tag.
- Hidden Hardware Secrets: The right soft-close hinges and slides aren’t just about quiet operation; they prevent premature wear. I discovered that choosing high-quality hardware and maintaining it with simple tools prolongs functionality more than anything else.
- Material Matters Beneath the Surface: Not all wood species age the same. Using durable options like maple or oak can mean the difference between beautifully aged cabinets and ones that warp or crack over time—especially in humidity-prone kitchens. This insight has saved me from costly replacements.
- Beyond Aesthetics—Flow and Function: Strategic placement of appliances, doors, and storage enhances workflow. I realized that planned clearance, like in the about that essential clearance, makes daily chores smooth, reinforcing how deliberate planning impacts daily life more than just looks.
Tools and Reads That Upped My Game
- Laser Levels and Impact Drivers: Precise alignment and secure mounting are critical. These tools became my best friends, making installations straightforward and professional-looking. I trust brands like DeWalt and Bosch for reliable accuracy and durability.
- Books from Seasoned Experts: “Kitchen Confidential” by Michael P. shows how small, well-executed details can dramatically improve functionality. For strategic storage ideas, I turn to custom cabinet inspiration that emphasize thoughtful planning.
- Online Communities and Articles: Forums and articles, especially from trusted sources like space-saving solutions, helped me troubleshoot before problems arose and provided fresh ideas I would never have conceived alone.
Seize the Moment to Reinvent Your Space
Transforming your storage solutions and kitchen isn’t just about choosing the right cabinets or hardware; it’s about embracing those subtle, intentional details that create harmony and longevity. Don’t wait for clutter or frustration to push you—start integrating these lessons today and watch your space evolve into a sanctuary of efficiency and beauty. Remember, the ultimate upgrade begins with attention to what often goes unnoticed. Your dream kitchen, personalized and perfectly tailored, is within reach—just take that first careful step.
What small detail have you overlooked in your current storage or kitchen setup? Share your experience below—I’d love to hear how you’re planning to elevate your space!
For more expert advice and ideas on custom cabinets and built-ins, visit our curated design insights.