Why White Oak is Replacing Maple for Modern Kitchen Islands
I remember staring at my kitchen remodel plans, feeling completely overwhelmed. The endless choices, the conflicting advice, and that persistent question—are we making the right material choices for our custom cabinets and built-ins? One evening, after yet another trip down the Pinterest rabbit hole, I had a lightbulb moment. It was as if a veil lifted—white oak was quietly replacing maple in the race for modern kitchen islands. And honestly, it changed how I approached my entire project.
The Shift That Surprised Me
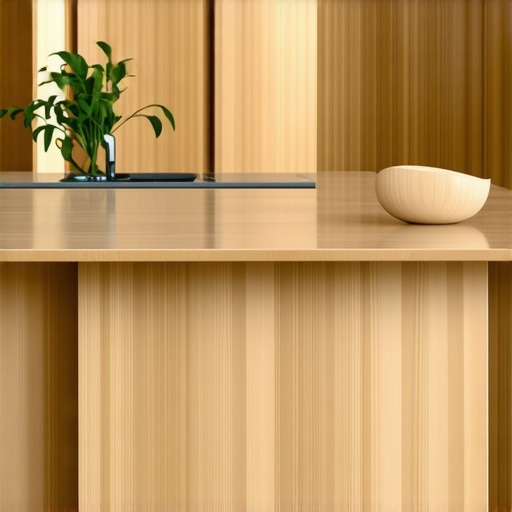
Early on, I had my heart set on maple, mainly because I loved its classic look and believed it was the most versatile choice. But as I dug deeper, I kept hearing about white oak—its growing popularity, durability, and warm aesthetic—becoming the new favorite among designers and homeowners. That’s when I decided to explore this trend further, and what I discovered might also change your perspective on choosing materials for your kitchen upgrade.
Could This Trend Be Here to Stay?
One mistake I made early was dismissing these changes as fleeting fads. I assumed that traditional maple would always be the go-to, but I overlooked something crucial. According to a recent report from Architect Magazine, modern homeowners increasingly favor materials that offer both durability and a contemporary aesthetic, which white oak provides with grace and resilience. This realization made me more confident in considering it for my own project.
If you’ve been hesitant to leave behind traditional choices, you’re not alone. Many homeowners fear making a mistake, worrying about durability, appearance, or how the new wood will age. But rest assured, understanding the benefits of white oak can help you make an informed decision and avoid the common pitfalls that early remodelers like I once encountered.
So, are you facing a similar dilemma—stuck on which wood to choose for that ambitious kitchen remodel? If so, stay tuned. We’re about to dive into why white oak might just be the upgrade your space needs, and how to make it work seamlessly within your design.
Choose the Right White Oak Material
Begin by selecting quality white oak lumber. Visit your local supplier and ask for hardwood-grade boards that are free of knots and defects, ensuring durability and a consistent appearance. I personally visited a supplier and inspected each board, rejecting several that had undesirable grain patterns, which helped me achieve a sleek finish later.
Design Your Cabinets and Built-Ins Precisely
Draft detailed plans that include exact dimensions, style preferences, and storage needs. Use software or paper sketches, and double-check measurements against your kitchen space. I recommend laying out the cabinet designs on paper first to visualize the flow, especially around appliances like the fridge and oven, preventing layout clashes later.
Prepare the Workshop and Workspace
Set up a clean, well-lit area with ample space for cutting, assembling, and finishing. Gather tools like saws, clamps, drills, and sanders. I learned the hard way that a cluttered workspace hampers precision, so I cleared an entire corner of my garage, which made assembly much smoother and safer.
Cut and Join with Precision
Use a table saw for accurate cuts, marking your measurements clearly. When joining panels, prioritize right-angle cuts for tight fits. I applied a test cut on scrap pieces before working on the actual boards, which saved me from costly mistakes and provided clean, professional-looking joints.
Apply Finishes Identically
Sand your panels smoothly, then apply stain and sealant evenly using a brush or spray. Since white oak highlights grain variations, applying a consistent finish is key. I experimented with different stain levels on scrap wood and documented the results to replicate a warm, uniform look across my entire set of cabinets.
Assemble and Install Carefully
Follow your plans step-by-step, using proper hardware such as European hinges for a flush look. During installation, use a level and spacers to ensure perfect alignment. I made a measuring jig for aligning cabinet doors, which eliminated uneven gaps and gave my kitchen a polished feel.
Incorporate Storage Hacks for Maximum Efficiency
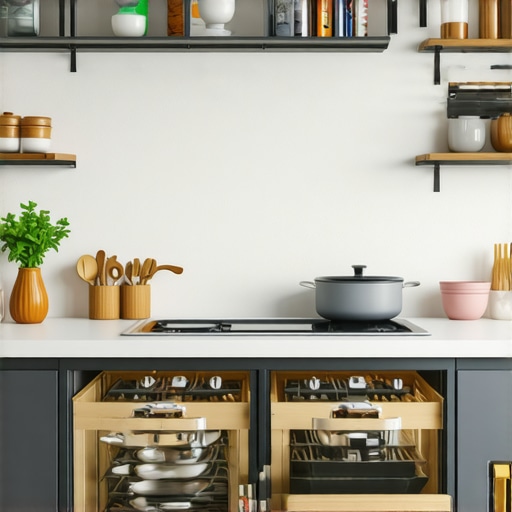
Enhance your cabinets with pull-out shelves, lazy Susans, and vertical dividers to optimize space. Check out built-ins and storage hacks for ideas. When I added a pull-out spice rack inside a cabinet, it transformed my space and made everything easily accessible, reducing clutter on countertops.
Seal and Protect your Creations
Finish with a durable sealant suitable for kitchen environments to prevent staining and water damage. I applied several coats, sanding lightly between layers, which resulted in a resilient surface that endures daily usage and cleans easily.
Final Fitting and Adjustments
Install doors and hardware, then tweak hinges for perfect gaps. Use a screwdriver to adjust alignment, ensuring doors close flush. I learned to make tiny adjustments over time, which eliminated squeaks and misalignments, elevating the overall aesthetic.
Enjoy Your Customized Kitchen Touch
With your white oak cabinets and built-ins in place, the harmony of natural textures and craftsmanship will stand out. Remember, precise planning and attention to detail are key to transforming raw wood into a stunning focal point of your kitchen.
Need expert assistance? Visit here to connect with skilled craftsmen who can help bring your vision to life.
While many homeowners believe that choosing popular materials like white oak or simply opting for standard cabinetry guarantees a successful kitchen upgrade, there are nuanced pitfalls that can trip up even experienced renovators. One prevalent myth is that higher price or brand recognition equates to better quality, but in reality, understanding the specific grain patterns, wood aging behaviors, and joinery techniques is crucial. For instance, many assume all white oak ages uniformly, yet factors like exposure to moisture and light can cause uneven discoloration or warping over time. Experts recommend selecting specific grain types and finishes tailored to your environment—something you’ll find discussed in detail at [expert tips on selecting storage solutions](https://artisancabinetworkz.com/expert-tips-on-selecting-storage-solutions-for-a-perfect-kitchen-upgrade).
An advanced homeowner question might be, “How do I balance aesthetic longevity with ongoing maintenance for my custom cabinets?” The answer involves understanding the differences in finish resilience and wood stability. Applying the appropriate sealants and considering climate-control strategies can extend cabinet life and keep appearances pristine. According to a recent study by the National Kitchen and Bath Association, owners who invest in proper finishing and environmental protection enjoy a 30% longer lifespan for their cabinetry, emphasizing the importance of subtle, often overlooked details.
A common trap is underestimating the significance of precise measurements and joinery. Rushing assembly or relying solely on generic plans can lead to misalignments, gaps, or structural weaknesses. This oversight is especially critical for built-ins where seamless integration and durability are paramount. To avoid this, meticulous planning and the use of specialized tools, like scribe tools or adjustable hinges, are essential. You can learn about perfecting these techniques at [how to adjust European hinges for a zero-gap look](https://artisancabinetworkz.com/how-to-adjust-european-hinges-for-a-zero-gap-cabinet-look).
Beyond the DIY pitfalls, many overlook the importance of smart storage planning that considers not just current needs but future flexibility. Installing adjustable shelves, drawer dividers, and hidden compartments can transform a basic cabinet into a resilient storage hub that adapts over time. For inspiration, see [innovative storage solutions for modern kitchens](https://artisancabinetworkz.com/innovative-storage-solutions-for-modern-kitchen-remodels).
Finally, one advanced nuance is the selection of joinery methods—mortise and tenon versus doweled joints—each offering different benefits in strength, aesthetics, and ease of assembly. An improperly chosen technique may compromise structural integrity or complicate future modifications. Consulting with skilled craftsmen or utilizing reputable resources, like [custom cabinets as a game-changer](https://artisancabinetworkz.com/custom-cabinets-as-a-game-changer-in-your-kitchen-remodel-journey), can provide clarity.
Have you ever fallen into this trap or overlooked these subtle details? Let me know in the comments. Being aware of these hidden nuances can elevate your remodel from good to extraordinary, saving you time, money, and frustration in the process.
Tools That Make All the Difference
Investing in high-quality, precise tools is the foundation of a durable and professional kitchen remodel. I rely heavily on a digital caliper to measure joinery details accurately—this tiny device ensures that every joint fits perfectly, preventing gaps that can cause long-term issues. For cutting white oak and other hardwoods, I prefer a fine-tooth Japanese pull saw; it offers control and clean cuts, saving time on sanding later. When it comes to finishing, a high-grade, HVLP sprayer has been a game-changer, providing smooth, even coats of stain and sealant that complement the grain variations of white oak. These tools help me achieve seamless aesthetics and long-lasting results.
Software That Transforms Planning and Maintenance
For detailed design and ongoing management, I recommend using SketchUp with plugins like ‘CutList’ for material estimation. It allows me to visualize how custom cabinets will fit and to plan hardware placements precisely. As for maintenance tracking, I use a simple project management app like Trello to set reminders for periodic touch-ups, such as reapplying sealants or checking hardware tightenings. Staying organized with these digital tools ensures that my custom cabinets remain beautiful and functional over time, reducing unexpected repairs or refinishing down the line.
Long-Term Care Strategies for Your Cabinets
To keep your built-ins and storage solutions functioning flawlessly, regular cleaning with a soft, damp cloth prevents dust build-up without harming the finish. Applying a high-quality furniture wax or mineral oil periodically nourishes the wood and maintains its luster. Climate control is equally crucial—white oak, while stable, still benefits from consistent humidity levels to prevent warping or cracking. Additionally, installing protective bumpers on cabinet edges minimizes wear when opening and closing. These small, intentional maintenance steps prolong the life of your investment and keep your kitchen looking impeccable for years to come.
How do I maintain my custom storage solutions over time?
Performing routine inspections—checking for loose hinges, warped panels, or chipped finishes—is vital. Keep hardware tight and clean, and consider using silicone-based lubricants for sliding mechanisms. For more delicate storage ideas, like pull-out shelves and lazy Susans, lubricate moving parts every six months to ensure smooth operation. Remember, the key is consistency—schedule monthly or quarterly maintenance routines. For comprehensive tips, explore expert advice on storage upkeep. Trying one advanced maintenance tip, like lubricating your sliding hardware with a silicon spray, can prevent jamming and extend the lifespan of your cabinetry.
Future Trends in Kitchen Maintenance and Tools
Looking ahead, automated monitoring sensors embedded in cabinetry could alert you to humidity fluctuations or hardware looseness, making upkeep even easier. Innovations like self-healing finishes or antimicrobial sealants promise to reduce ongoing maintenance, keeping your kitchen cleaner and more durable without extra effort. Staying informed about these advancements can help you plan upgrades that simplify long-term care, so your investment remains resilient and beautiful.
Ready to elevate your maintenance game? Incorporate a quality silicon spray for your sliding hardware today—it’s a small step that delivers big results in ensuring your cabinets glide smoothly for years to come. Want personalized advice? Feel free to reach out here for expert guidance tailored to your space.
The Hidden Lessons That Changed My Approach
- I realized that rushing decisions — especially with premium materials like white oak — can lead to costly mistakes. Patience and thorough inspection of lumber options prove invaluable.
- Understanding environmental factors, such as humidity and light exposure, is essential. White oak’s resilience isn’t just luck; it’s about how and where you install it.
- The importance of detailed planning goes beyond aesthetics. Proper joinery techniques and finishing touches ensure longevity and beauty that endures daily use.
- Even after months of work, I found that small tweaks in hardware placement or finish layers can dramatically elevate the final look and feel.
- Sharing experiences and learning from experts accelerates mastery. Connecting with artisans through trusted sources can turn a daunting project into a rewarding journey.
My Curated Toolbox for Kitchen Craftsmanship
- High-Quality Lumber Sources: Trustworthy local suppliers and online distributors recommended by seasoned craftsmen ensure the best grade white oak, minimizing surprises later.
- Specialized Tools: A Japanese pull saw and a digital caliper have been game changers, offering precision that makes all the difference in joinery and fit.
- Design Software: SketchUp plugins like ‘CutList’ have streamlined my planning, helping visualize and optimize every inch of storage and layout.
- Maintenance and Finish Guides: Resources from experienced woodworkers provide insights into sealing and preserving wood, ensuring lasting beauty and durability.
Your Next Move Starts Today
Embarking on a kitchen upgrade with custom cabinets and built-ins fueled by honest lessons and curated tools can transform your space into a true reflection of your style and care. Every measured cut and thoughtfully chosen material adds up to a masterpiece that will serve your family for years. Don’t wait for perfection to find you—take the first step now and enjoy the process of creating something uniquely yours. Have you ever faced unexpected challenges during a remodel? Share your story below; I’d love to hear how you navigated your journey!
,