The 15-Inch Trash Pull-Out vs. the Double Bin Strategy
I vividly remember the moment I realized my kitchen’s trash dilemma was more than just a minor annoyance; it was a full-blown obstacle to my daily routine. Every time I opened the cabinet, I was greeted by a messy jumble of plastic bags, food scraps, and wasted space. That lightbulb moment led me down a path of deep research and experimentation with various storage solutions, including the popular custom cabinets and clever built-ins. But one question kept circling back—should I opt for a 15-inch trash pull-out or settle for the traditional double bin strategy? And more importantly, how do I decide which will truly serve my family’s needs?
Stuck Between Convenience and Versatility
The truth is, finding the perfect trash solution isn’t just about aesthetics; it’s about making your kitchen functional without sacrificing style. The 15-inch trash pull-out is often touted as a sleek, space-saving marvel, seamlessly hiding waste out of sight and freeing up precious countertop real estate. Meanwhile, the double-bin system offers flexibility—separating recyclables from waste—or even room for composting—an increasingly popular eco-conscious choice.
Over the years, I’ve seen firsthand how choosing the right storage can revolutionize your kitchen’s usability. In fact, a recent study revealed that disorganized storage often increases kitchen stress and reduces efficiency, leading many homeowners to their own “aha” moments when they finally implement better solutions (source). If you’re wrestling with similar decisions or feeling overwhelmed by options, you’re not alone. That’s exactly what I’ll help you unpack today—so you can make an informed choice that aligns with your lifestyle and kitchen layout.
Is the hype around pull-outs worth the extra effort?
Early in my remodel journey, I made the mistake of thinking that all trash solutions are created equal. I underestimated how much a poorly planned setup could hinder daily tasks. For example, I initially installed a basic double bin under my sink without considering access, size, or integration with my cabinetry. That neglect led to frustration and frequent mishaps, like overflowing bins or inconvenient placements. Learning from that mistake, I now know that the right choice depends on your unique kitchen flow and load, which I’ll explore further. If you’ve faced similar frustrations, keep reading—we’ll look at what truly makes a storage solution work better for you, not just what looks good in a showroom.
Assess Your Kitchen Workflow and Space
Start by observing how you use your kitchen daily. For example, during my recent remodel, I noticed I opened the cabinet under my sink dozens of times, often spilling waste or fumbling for bags. To fix this, I first measure the available cabinet width and depth, ensuring the chosen solution fits snugly. Use a tape measure and sketch your space to avoid surprises when ordering custom cabinets or built-ins. This initial step prevents costly mistakes and lays a foundation for an efficient setup.
Decide Between Pull-Out or Double-Bin Systems
Next, determine whether a pull-out trash can or double-bin setup aligns with your routines. I opted for a custom cabinets outfitted with a 15-inch pull-out, similar to a drawer that slides smoothly out of sight, allowing quick access and hidden waste management. Think of it like a secret drawer that keeps things tidy. Alternatively, if you prefer separated compartments for recyclables and compost, a double-bin system offers versatility and easy sorting.
Design the Internal Layout for Accessibility
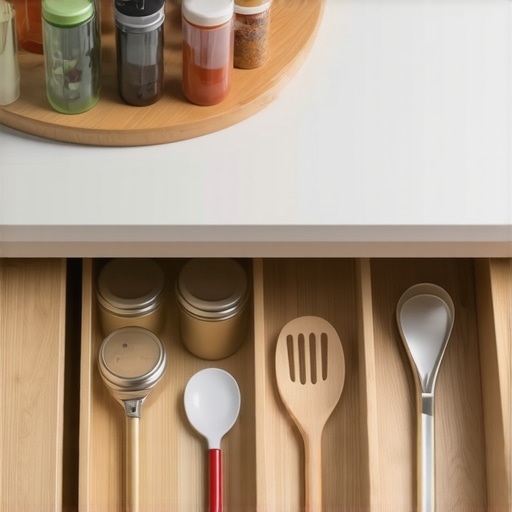
Once you’ve chosen the system, plan how items will be stored inside. For example, I added adjustable dividers to my double bins to prevent mixing recyclables with waste, maintaining an organized appearance. Use adjustable shelving or removable bins to accommodate different waste sizes. Consider your height and arm reach—if installing a pull-out, ensure it can be fully extended without hitting plumbing fixtures or cabinetry supports.
Choose and Prepare Your Materials
With measurements and design settled, select your materials. Opt for moisture-resistant finishes like water-based lacquers if you’re considering custom cabinetry, especially in high-humidity areas. For durability, I used plywood with a veneer finish, knowing it would withstand frequent use and moisture exposure. Don’t forget hardware—soft-close hinges and heavy-duty slides—much like premium kitchen hardware, can transform your experience with smoother, quieter operation (see why soft-close is worth the investment).
Install the System Securely
During installation, use shims to level cabinets on uneven floors, preventing sticking or sagging. Securely fasten pull-out units or bins using appropriate screws and anchors. In my recent project, I reinforced the base with extra supports to handle heavier waste bags, much like how a built-in library ladder requires proper support. Test the movement and access repeatedly, adjusting hinges and slides as needed.
Integrate Features for Practical Maintenance
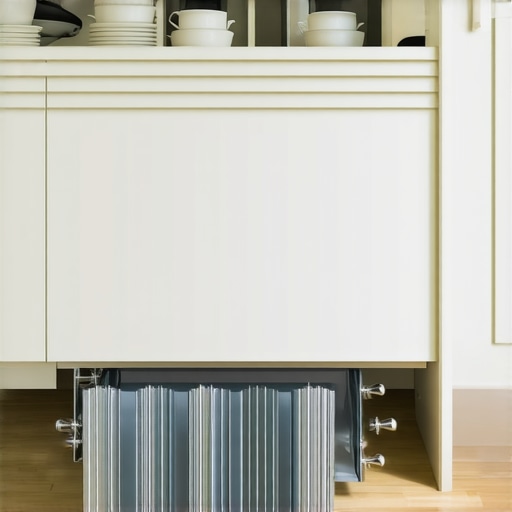
Add features like toe-kick drawers or hidden compartments to maximize space while maintaining a clean look. For example, I integrated a toe-kick drawer into my cabinet base to store cleaning supplies, freeing up adjacent pantry space. Regular cleaning of slides and hinges keeps the system functioning smoothly—apply silicone lube periodically to prevent squeaks and ensure longevity. Incorporate ventilation features if necessary to reduce odors, similar to specialized kitchen built-in ventilation.
Fine-Tune for Family and Lifestyle Needs
Tailor your setup based on your household habits. For instance, with kids in my home, I chose a pull-out with a child-proof lock, preventing accidental spills and encouraging responsible waste sorting. Consider additional organizational features like liner retainers or odor filters to enhance usability and cleanliness. This way, your waste system remains a seamless part of your daily routine, not an obstacle to efficiency.
Many homeowners assume that investing in custom cabinets and built-ins automatically guarantees a flawless kitchen upgrade. However, one of the most overlooked nuances is how the hype around these solutions can mask underlying pitfalls that lead to costly mistakes and frustration. Let’s dig deeper into what most people get wrong about kitchen remodels and how to avoid falling into these traps.
A widespread myth is that larger or more intricate storage always equates to better functionality. In reality, overcomplicating storage with excessive compartments or fancier hardware can hinder daily use, especially if the internal layout isn’t thoughtfully planned. For example, installing elaborate pull-outs or multiple-tier shelves without considering your actual usage can result in wasted space or difficulty reaching items. An especially common mistake is neglecting to assess the cabinet’s internal dimensions against the sizes of your typical dishes, utensils, or pantry staples. This oversight often leads to clutter buildup despite the investment.
Furthermore, many believe that custom cabinetry is an expensive luxury reserved for high-end renovations. While it’s true that custom solutions involve a bigger initial investment, they offer unparalleled efficiency when designed with real-world needs in mind. Custom cabinets can be tailored to optimize corner space, incorporate hidden compartments, or even integrate electrical outlets—details that off-the-shelf products can’t match. For an in-depth look at how custom cabinets can revolutionize your kitchen, check out https://artisancabinetworkz.com/custom-cabinets-as-a-game-changer-in-your-kitchen-remodel-journey.
Beware of the trap of choosing aesthetic over practicality. Glamorous finishes or trendy hardware can decline rapidly in a busy family kitchen, leading to peeling paint, scratched surfaces, or tarnished fixtures. Opting for durable, moisture-resistant finishes and hardware that withstand daily wear is essential. Sometimes, homeowners focus too much on visual appeal and forget to incorporate features like soft-close hinges or moisture-proof materials, which significantly extend the lifespan of your cabinetry. Learn more about the best finishes and hardware choices at https://artisancabinetworkz.com/why-we-avoid-glossy-black-finishes-in-busy-family-kitchens.
Another nuanced mistake is underestimating the importance of proper ventilation, especially when installing enclosed cabinetry around appliances or within tight spaces. Insufficient airflow can cause odors, mold, and even warping of cabinetry materials. Advanced homeowners and designers know that integrating ventilation ducts or choosing cabinetry with built-in airflow features is crucial, often overlooked in the planning stage. For insights on ventilation strategies, visit https://artisancabinetworkz.com/creating-seamless-kitchen-remasters-with-built-in-storage-solutions.
A common trap that many fall into is the assumption that all storage solutions are compatible across different kitchen layouts. In reality, an approach that works in a large, open-concept kitchen may be a disaster in a compact space. Customization allows you to craft storage that fits precisely within your unique layout, whether that means a discreet pull-out for trash or a corner cabinet optimized with lazy Susans. If you’re unsure how to personalize your storage, I recommend exploring https://artisancabinetworkz.com/expert-tips-on-selecting-storage-solutions-for-a-perfect-kitchen-upgrade.
Finally, don’t forget the importance of ongoing maintenance and refinement. Many homeowners install elaborate custom storage only to discover that clutter re-accumulates because they didn’t plan for easy cleanup or regular organization. Features like removable bins, accessible shelving, and integrated lighting make maintenance easier—saving time and preserving your investment.
Have you ever fallen into this trap? Let me know in the comments. Remember, understanding these nuanced pitfalls can save you significant time and money, ensuring your kitchen remodel truly enhances your home’s function and style.
How do I maintain my custom cabinets and storage solutions over time?
Maintaining your kitchen’s storage systems, especially custom cabinets and built-ins, requires a combination of the right tools and consistent care. I personally swear by a few specific items that have made a significant difference in preserving the functionality and appearance of my remodel investments. First and foremost, a high-quality microfiber cloth is indispensable for daily dusting without scratching surfaces. I recommend using a soft, lint-free cloth, similar to those available from brands like Swiffer, to gently remove dust and debris.
For cleaning, I use a mild, pH-balanced spray designed for wood or laminate surfaces—nothing too harsh or abrasive—which helps preserve finishes and prevents peeling or discoloration over time. Regular application of a furniture polish containing a silicone or wax base can provide an extra layer of protection, enhancing durability and maintaining the luster of your cabinetry. I find that scheduling a bi-weekly wipe-down keeps everything looking brand new and prevents grime buildup.
Additionally, a pair of precision screwdrivers and a soft-bristle brush come in handy for periodic inspections, tightening hardware, and removing dust from tight corners or hinges. Proper lubrication of slides and hinges, using a silicone-based spray, is essential for smooth operation. This preventative maintenance reduces wear and extends the lifespan of your investment.
Thinking about the future, as trends towards smart kitchen technologies advance, integrating IoT devices and sensors into your storage can help monitor usage and alert you to potential issues before they escalate. For example, sensors that track humidity or detect leaks near built-ins are becoming more accessible and affordable—adding an extra safeguard. Experts predict that smart maintenance systems will become a standard part of high-end kitchen remodels in the next decade, ensuring long-term performance with minimal manual effort. For more on innovative storage ideas that future-proof your space, visit this guide.
Staying ahead with efficient tools
When choosing tools for ongoing maintenance, I rely on a few specific products. A cordless drill with a set of precision bits allows me to tighten or replace hardware quickly without damaging the cabinetry. A small, portable vacuum cleaner with a brush attachment makes cleaning out hinges and tight spots effortless. For checking the smoothness of slides or hinges, a simple plastic pry tool helps if adjustments are necessary, preventing scratches or marks.
Investing in these tools not only preserves your work but also makes routine checks less intimidating, encouraging regular upkeep instead of neglected repairs. Keep in mind, a well-maintained system enhances the longevity and continued aesthetic appeal of your custom cabinetry—saving you money and stress in the long run.
If you haven’t already, try applying a silicone lubricant to your drawer slides and hinges. It’s a quick step that can dramatically improve operation and reduce squeaks. Remember, a little preventative care today can prevent costly repairs tomorrow. Want to dive deeper into sustainable and innovative maintenance practices? Explore this resource for cutting-edge ideas.
The Biggest Surprises That Changed My Approach to Kitchen Storage
One of the most profound lessons I learned was that excess complexity in storage often leads to chaos, not order. Initially, I believed the more compartments and features, the better. However, I soon discovered that simplicity and thoughtful internal organization, like adjustable dividers, can make a world of difference. This realization pushed me to prioritize functional layouts over flashy hardware, simplifying my space and reducing clutter.
Tools That Became My Secret Weapons
Over time, I found that investing in the right tools makes all the difference in maintaining custom cabinets and built-ins. A quality microfiber cloth, a silicone spray for hinges, and a compact vacuum have become staples in my toolbox. These tools not only extend the lifespan of my remodel but also turn routine maintenance into a quick, satisfying task. Trust me—having a dedicated care kit empowers you to keep your kitchen looking pristine without hassle.
Choosing the Unseen: What I Wish I Knew from the Start
From the very beginning, I underestimated the importance of proper ventilation within enclosed cabinetry. Small oversights like this can lead to lingering odors or even damage over time. Incorporating passive or active airflow solutions might seem minor but can prevent headaches down the line. My advice? Think beyond the immediate aesthetic; consider how your storage solutions will perform with daily use and environmental factors.
Where Growth Comes From: The Power of Personal Reflection
Reflecting on my kitchen journey, I realize that every mistake was a stepping stone toward a more efficient space. Whether it was misjudging bin sizes or overlooking hardware durability, each misstep gave me insight into what truly matters—ease of access, longevity, and harmony with my family’s habits. Embrace your imperfections as learning opportunities—they’re vital to creating a kitchen that genuinely serves you.
Resources That Turn Ideas Into Reality
Throughout my remodeling process, a few sources provided invaluable guidance. Custom cabinets articles revealed the potential for tailored solutions to maximize space, while storage innovations helped me think creatively about hidden compartments and pull-outs. These resources turned my vision into achievable steps, making the process enjoyable instead of overwhelming.
Seize the Moment and Reimagine Your Space
Your kitchen is more than just a space to cook—it’s the heart of your home, deserving thoughtful upgrades that reflect your lifestyle. Remember, the most inspiring remodels come from intentional choices and learning from setbacks. Your perfect storage solution is within reach; you just need to embrace the journey with patience and curiosity. Now’s the time to transform your kitchen into a masterpiece that balances style, function, and personality.
Have you ever faced a surprising challenge during your kitchen remodel that changed the way you look at storage? Share your story below—I’d love to hear how you turned obstacles into opportunities!
,