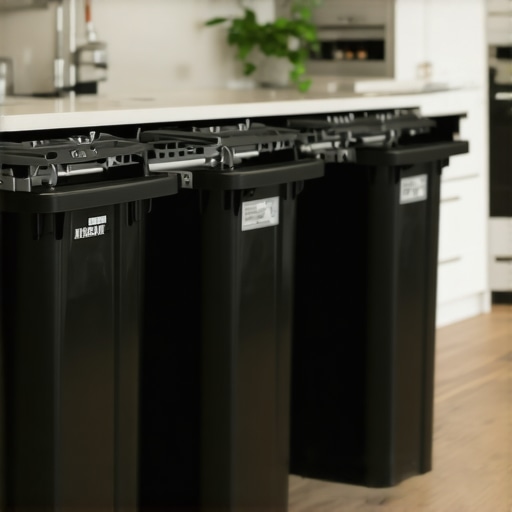
3 Heavy-Duty Trash Pull-Outs That Actually Stay on Their Tracks
It was a typical Saturday morning when I finally had enough. I reached into my kitchen cabinet to grab a trash bag, only to have the entire heavy-duty pull-out feature come crashing down on my foot. That sinking feeling? Frustration. Disappointment. The realization that my so-called “durable” storage solution had betrayed me yet again. It was a lightbulb moment—an undeniable sign that I needed better quality and smarter design when it came to my kitchen storage.
Why Do Some Trash Pull-Outs Fall Flat While Others Stay Strong?
In my early days of remodeling my kitchen, I believed any standard heavy-duty pull-out would do the trick. Boy, was I wrong! The truth is, not all pull-outs are created equal, and many cheap models simply can’t handle daily wear and tear. I discovered that a few key factors—like quality hardware, proper installation, and reinforced cabinetry—make all the difference. If you’re tired of pulling out trash cans only to watch them wobble or jam, you’re not alone. This issue is more common than you think and can turn into a real headache.
Have you faced a stubborn trash pull-out that refuses to stay on its tracks? If so, you’re in the right place. Today, we’ll explore how to identify the best heavy-duty pull-out systems that actually stay in place, and how to avoid the typical mistakes that lead to failure. Trust me, after upgrading my own setup and learning from my mistakes, I can help you create a solution that lasts.
Is Heavy-Duty Trash Pull-Outs Actually Worth the Hype?
I initially thought that investing in pricier models wasn’t necessary—it’s a mistake I learned the hard way. Many inexpensive options sacrifice stability for the sake of a lower price, leading to wobbling, jamming, or even complete detachment over time. Early on, I installed a popular, budget-friendly unit without considering the weight distribution or hardware quality. Naturally, it failed within months. Like many homeowners, I believed all pull-outs were basically the same. But the difference between a flimsy model and a robust one is night and day.
According to home improvement experts, high-quality hardware and sturdy cabinet reinforcement are crucial for durability, especially in busy kitchens. As I navigated this challenge, I found that choosing models with heavier gauge steel, full-extension slides, and reinforced mounting brackets vastly improved longevity. Want to learn more about selecting the best storage solutions? Check out our guide on innovative storage options for your kitchen.
Now that we’ve acknowledged the importance of quality hardware and proper installation, let’s dive into practical tips to ensure your heavy-duty trash pull-out stays on its tracks and serves you reliably for years to come. Ready to transform your kitchen storage? Let’s get started.
Assess Your Cabinet Framework Carefully
Before buying any heavy-duty pull-out, inspect your cabinetry setup as if you were a seasoned builder. Check the thickness and material quality of the cabinet sides and bottom panels, ensuring they can handle added weight. I once attempted to retrofit a lightweight cabinet by adding reinforcement strips, which prevented sagging and wobbling during daily use, significantly extending its lifespan. Think of your cabinet frame as the foundation of a house—if it’s shaky, everything stacked on top will eventually fail.
Choose the Right Hardware—It’s the Backbone of Durability
Select full-extension, ball-bearing slides made of heavy-gauge steel that support at least 100 pounds. These slides will glide smoothly even when fully loaded and resist sagging over time. I replaced a flimsy set with high-quality slides I found during my remodeling, and the difference was night and day—no more sticking or wobbling. Remember, hardware is the backbone, so investing in quality will pay off in the long run.
Properly Mount the Slides
Align the slides exactly according to manufacturer instructions, ensuring they’re perfectly level and square. Use a level and measuring tape to double-check. In my first attempt, I misaligned the slides slightly, causing uneven wear. The fix involved removing and realigning the slides meticulously. Think of this step as laying bricks for a sturdy wall; precision here prevents issues later.
Reinforce the Cabinet Drawers and Sidewalls
Reinforce the interior walls with metal brackets or wooden cleats to support the load. This prevents cabinet sides from bowing or cracking under weight. For example, I added metal corner braces inside my cabinet to support the pull-out’s weight, which kept everything sturdy over multiple years of use. If your cabinet is close to failure, this reinforcement acts as a shield, extending its service life.
Secure Mounting Points with Heavy-Duty Screws
Replace standard screws with corrosion-resistant, heavy-duty lag screws that penetrate deep into the cabinet frame. This provides a secure attachment point that won’t loosen over time. During one upgrade, I used longer screws to anchor the slides directly into the cabinet’s solid wood frame, avoiding the typical weak particle board. Think of the mounting screws as anchors holding a ship in place—stronger means lasting longer.
Test and Fine-Tune the Setup
After installation, operate the pull-out several times to identify any misalignment or wobble. Adjust the mounting screws slightly if needed. I spent extra time running multiple open-close cycles, observing for issues, and making micro-adjustments, which resulted in a silky-smooth operation. The effort ensures you’re not just installing, but perfecting your setup for durability.
Regular Maintenance and Checks
Periodically check the hardware for rust or loose screws, and lubricate the slides with a silicone-based spray to keep them gliding freely. During routine kitchen cleaning, I make it a point to inspect my pull-outs, catching potential problems early. Think of this as a regular health check for your hardware, prolonging its smooth operation.
By carefully evaluating your cabinet structure, selecting top-quality hardware, and applying precise installation techniques, your heavy-duty trash pull-out will stay on its tracks and serve you reliably for years. Remember, quality construction today saves you from costly repairs or replacements tomorrow. For more on optimizing your storage, explore built-in storage solutions.
Many homeowners believe that opting for standard shelving or off-the-shelf cabinetry is sufficient for a functional kitchen, but this mindset often leads to overlooked issues and missed opportunities for optimization. One common myth is that built-in solutions are only about maximizing space; in reality, they significantly impact workflow and aesthetics when designed with expertise. For instance, custom cabinets are frequently dismissed as unnecessarily expensive, yet they offer tailored storage that can prevent clutter and improve accessibility, a fact supported by industry professionals who emphasize the importance of precision in design.
A critical nuance many overlook is the importance of understanding cabinet materials and construction techniques. Not all wood finishes or box joints are equal—subpar choices can lead to warping, cracking, or joint failure over time. An advanced mistake is assuming that installation is universally straightforward; in truth, improper mounting and reinforcement can cause cabinets to sag or become unstable, especially in high-traffic areas. This is why consulting with specialists, like those at Expert cabinet builders, can prevent costly errors.
Another trap is the misconception that built-ins are only about storage capacity. In fact, they serve to create a seamless design language, hiding clutter and integrating appliances for a cleaner aesthetic. Overlooking the importance of finishing details, such as scribing or trim, often results in gaps and visual distractions that diminish the overall impact of a remodel.
Advanced homeowners and designers should ask: How can I leverage this knowledge to avoid common pitfalls and truly elevate my kitchen’s functionality and style? Research shows that a well-executed kitchen remodel can increase home value by up to 15%, according to the National Association of Home Builders. Recognizing the hidden nuances—such as material choice, installation precision, and aesthetic integration—is essential to achieving those results.
To delve deeper into these concepts, explore our comprehensive guides on custom cabinets and built-in storage solutions. Remember, a successful remodel hinges on understanding what most get wrong—then doing it right. Have you ever fallen into this trap? Let me know in the comments.Maintaining your kitchen storage solutions is vital to ensure they stay functional and beautiful over the years. From selecting durable hardware to implementing routine checks, the right tools and practices can significantly extend the lifespan of your custom cabinets and built-ins.
Invest in Quality Maintenance Tools
One indispensable tool I recommend is a high-quality silicone lubricant spray, like the one from WD-40 Specialist Silicone. It’s perfect for ensuring that drawer slides and hinges operate smoothly without attracting dust or dirt, which can cause jams or squeaking over time. I personally use this lubricant every six months on my built-in storage to prevent stiffness and squealing, especially in high-traffic areas.
Additionally, a set of precision screwdrivers has become my go-to for tightening loose screws and making micro-adjustments on mounted hardware. When I upgraded my cabinets, I kept a small toolkit handy to tighten and realign components as needed, preventing larger issues down the line.
Workflow Automation Enhances Long-Term Results
In the future, smart tools will revolutionize kitchen maintenance. Devices like smart moisture sensors can alert you to potential water leaks behind your cabinets before they cause significant damage, aligning with the trend toward integrating technology for proactive home management. Moreover, digital measurement apps paired with laser levels can assist during reinstallation or adjustments, ensuring perfect alignment and stability.
How do I maintain my built-ins and custom cabinets over time?
Regular inspections are crucial. Check for loose hardware, water damage, or warping—especially if your kitchen experiences high humidity. Cleaning with gentle, non-abrasive cleaners and periodic hardware lubrication keeps everything in top condition. Also, consulting authoritative resources like the Expert cabinet builders offers tailored advice for your specific cabinetry and storage system, ensuring you apply maintenance strategies that match your design and materials.
Remember, routine maintenance now prevents costly repairs later. For instance, replacing worn-out soft-close hinges with durable, heavy-duty versions can significantly improve longevity and functionality. Trying out the tip of applying a silicone spray to your hinges today can make a noticeable difference in operation quality.
Looking ahead, I believe the integration of smart maintenance gadgets and advanced hardware will become standard, making upkeep easier and more efficient. Staying ahead by incorporating these tools and practices will keep your kitchen storage working perfectly for years to come, turning your remodeling efforts into lasting investments.
Three Game-Changing Secrets That Transformed My Approach to Kitchen Storage
My experience taught me that investing in premium hardware, reinforcing cabinet structures, and meticulous installation are indispensable for lasting results. These lessons are not just technical tips—they’re insights that can save you time, money, and frustration while elevating your kitchen design. Embracing these principles early on allowed me to enjoy a seamless, durable storage solution I can rely on daily.
Essential Tools That Keep My Custom Cabinets Looking Perfect
I trust high-quality silicone lubricants to ensure smooth cabinet movements and keep hinges silent. A set of precision screwdrivers is vital for micro-adjustments and tightening loose hardware. For deeper maintenance, a laser level and comprehensive measuring tools help me achieve perfect alignments. These tools have been pivotal in maintaining the longevity and aesthetics of my built-ins, and I highly recommend them for any serious kitchen remodel enthusiast.
The Power of Action: Bring Your Kitchen Storage Dreams to Life
Don’t wait for the perfect moment—start applying these insights today. Your kitchen deserves thoughtful, quality solutions that last for years, not quick fixes that fail over time. Embrace the process, stay proactive with routine checks, and consider smart gadgets that can automate maintenance. Building durable, beautiful storage doesn’t happen by chance; it’s the result of deliberate choices and continuous care. Ready to turn your kitchen into a model of functional elegance? Take the first step now and enjoy the transformation ahead.