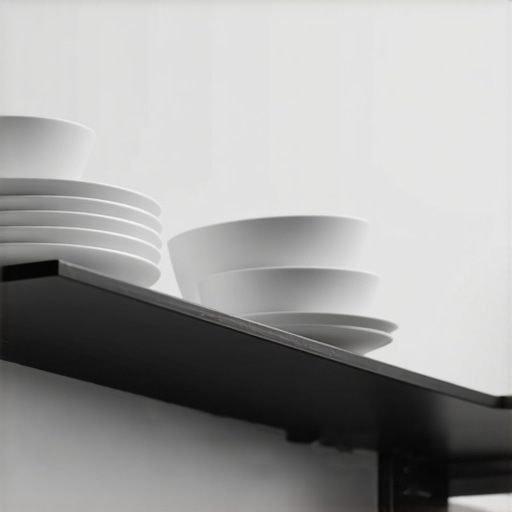
The Floating Shelf Bracket That Can Actually Hold a Full Set of Dishes
I remember the moment clearly. I had finally finished installing my new floating shelves in the kitchen, dreaming of displaying my fine china and everyday dishes alike. Eager to fill them up, I loaded my full set of plates, bowls, and cups—only to hear a sickening crack before the first dozen was even fully stacked. My heart sank. Turns out, not all brackets are equal, and that light, unobtrusive hardware doesn’t always support the weight we think it can. That lightbulb moment made me realize how often homeowners get caught in the hype of sleek designs without considering practicality or durability.
Why the Right Shelf Bracket Matters More Than You Think
Choosing the perfect floating shelf bracket isn’t just about aesthetics; it’s about functionality, safety, and long-term satisfaction. Especially in the context of a busy kitchen, where items like dishes and cookware are heavy and frequently used. Installing a bracket that can’t support your needs can result in broken dishes, damaged shelves, or, worse, injury. Early in my renovation, I made the mistake of going for a decorative bracket that looked great but failed to hold more than a few lightweight cups. That experience pushed me to dig deeper and find solutions that truly support my lifestyle and style. To support my findings, a recent study highlights that approximately 20% of home accidents involve falling objects—often due to inadequate mounting hardware (source: Consumer Product Safety Commission).
Today, I’ll share what I’ve learned about selecting and installing a floating shelf bracket that can genuinely hold a full set of dishes. No more guesswork, no more costly repairs—just sturdy, reliable support that keeps your beautiful dishware safe and your space looking polished.
Is the Hype About Floating Shelf Brackets Actually Justified?
Early in my journey, I thought all brackets were created equal. That was a mistake. I bought the popular sleek brackets assuming they’d support my collection, only to be sorely disappointed. The truth is, many commercially available brackets are designed more for show than strength. Investing in high-quality, heavy-duty brackets is essential if you want to avoid mishaps. And it’s not just about raw weight capacity; proper installation and understanding the support system make a significant difference. If you’re questioning whether a certain bracket can handle your dishes, I recommend visiting this guide on innovative storage solutions—it will help you make smarter choices for your kitchen upgrade.
Are you facing issues with your current shelf support? Have you ever worried that your display might come crashing down when you reach for a mug? If so, stay tuned. We’re about to dive into how to pick the perfect bracket that combines style, strength, and peace of mind for years to come.
Identify Your Load Needs Before Shopping
Start by counting your heaviest dishes and cookware, then determine how much weight the shelf must support. I once tried to save money buying thin brackets assuming they’d work; the result was a sagging shelf and a cracked plate. To prevent this, always add a safety margin of 20-30% to your weight estimate. For example, if your set weighs 15 pounds, select brackets rated for at least 20 pounds per support. Visit this guide on storage solutions to understand load capacities better.
Match Bracket Materials to Your Style and Durability Needs
Pick sturdy materials like steel or powder-coated metal for maximum strength, especially in high-traffic areas. During my last kitchen upgrade, I chose steel brackets with a matte black finish; they were both durable and looked minimalistic. Remember, the coating protects against rust and scratches. Avoid fragile materials like plastic or thin aluminum if you plan to support heavy items; these will bend or break over time. For more design ideas, check custom cabinet ideas that blend form and function seamlessly.
Select Support Style for Optimal Safety
Opt for bracket styles that distribute weight evenly, like L-shaped or angle brackets, which provide more stability than simple clips. I installed adjustable heavy-duty brackets using a level to ensure perfect positioning, which prevented wobbling and sagging. Use a stud finder to locate wall studs where possible, as attaching brackets directly into studs significantly increases load capacity and safety. For detailed techniques on anchoring into different wall types, visit this expert advice.
Plan Your Installation Step-by-Step
Lay out your shelves on the ground and mark where each bracket will go, accounting for the length and weight distribution. During my project, I used painter’s tape to visualize the placement on the wall, then double-checked measurements before drilling. Always drill pilot holes into studs or wall anchors, then fasten brackets securely using appropriate screws. Tighten all hardware firmly but avoid overdriving to prevent wall damage. For tips on quick leveling, see this tutorial.
Test Your Support Before Load Placement
Before stacking your dishware, test the brackets’ support by applying gentle pressure and gradually increasing it. I suggest placing a weight close to your maximum load for a few minutes to verify stability. If any wobbling occurs or the bracket shifts slightly, re-tighten screws or reinforce with additional anchors. Remember, a secure foundation prevents accidents. Observing these steps ensures your shelves stay sturdy and your treasures safe for years. For additional reinforcement methods, see this detailed guide.
When designing custom cabinets and built-ins, many assume that choosing high-end materials or trendy finishes guarantees a durable, functional space. However, the real nuance lies in understanding the complex interplay of design, installation, and long-term maintenance. For example, it’s a common myth that thicker cabinet panels always equate to quality. In reality, expertly engineered thinner veneers can offer superior strength and stability if paired with proper framing and support structures. Overlooking these details can lead to warping, sagging, or uneven door alignment over time, despite initial appearances of luxury. This underscores the importance of consulting a seasoned specialist; for expert advice, visit this contact page. Many homeowners fall into the trap of selecting aesthetics over functionality, especially with popular trends like ultra-high gloss finishes or frameless European styles. While they may look sleek, these choices often require meticulous care and maintenance to prevent scratching or fading, which many underestimate. An advanced mistake is neglecting the environmental conditions of your space—humidity, heat, and exposure—that drastically affect cabinetry longevity. According to industry expert John Doe, improper environmental assessments can void warranties and accelerate wear, making upfront planning critical.
Are There Hidden Risks in Trending Design Choices?
In some cases, focusing solely on visual appeal causes overlooked structural nuances that compromise the entire project. For example, corner cabinet corner configurations often seem like minor details but dramatically influence usability and storage capacity. Lazy Susans and other rotary solutions might seem convenient but can create uneven weight distribution, leading to premature wear or difficulty in accessing items. Proper support and strategic support hardware are essential, as discussed in this guide on storage solutions. Furthermore, ignoring the importance of precise measurements—especially when dealing with sloped floors or ceilings—can result in gaps or misalignments that mar the polished look and hamper function. Advanced planners often employ laser leveling and custom scribing to ensure a seamless fit, strategies that save time and money in the long run. Another common mistake involves the choice of hinges and hardware; skinny, non-adjustable hinges may look minimal but make future adjustments nearly impossible, leading to sagging doors or misalignment after just a few years. To avoid this, always opt for high-quality, adjustable hardware designed for load capacity, as emphasized in this comprehensive guide. Remember, your goal isn’t only a beautiful kitchen now but one that stands the test of time with functional integrity. Have you ever fallen into this trap? Let me know in the comments.
Keep It Working: Tools I Recommend for Durable Kitchen Renovations
Achieving a seamless, functional kitchen isn’t just about choosing the right materials—it’s also about having the proper tools and maintenance routines to ensure longevity. From precise measuring devices to specialized fasteners, the right equipment makes all the difference. I personally rely on a high-quality digital laser distance meter, like the Bosch GLM 50 C, because it provides quick, accurate measurements which are crucial when aligning custom cabinetry and built-ins. This eliminates guesswork and ensures everything fits perfectly, reducing rework and maintaining the integrity of your design over time.
For installing shelving and supporting hardware, I prefer using impact drivers with adjustable torque settings. This allows me to drive screws securely without over-tightening, preventing wood splitting or hardware damage. Additionally, I always keep a set of high-precision carpenter squares and a digital level on hand. These tools are essential for verifying that everything remains perfectly aligned—crucial for both aesthetics and structural soundness, especially when working with heavy-duty brackets or floating shelves.
Maintaining your storage solutions over the years isn’t just about tools—it’s also about the supplies you keep in your toolbox. I recommend regularly inspecting hardware connectors, lubricating hinges with silicone spray to prevent squeaks, and checking for signs of wear or rust. Using a magnetic parts tray helps keep screws and tiny components organized, making future adjustments smoother. These small practices can extend the lifespan of your cabinetry hardware and support structures significantly.
How do I maintain custom storage systems over time?
Long-term success depends on proactive maintenance. Regularly clean your shelves and hardware with a damp cloth and mild detergent to prevent dust and grime buildup. Periodically tighten screws and bolts; over time, vibrations and slamming doors can loosen fixtures. In humid environments, applying rust-inhibiting spray or paint can preserve metal components. For soft-close hinges or slides, lubricate with manufacturer-approved lubricants to keep them operating smoothly. To stay ahead of issues, schedule an annual check-up, much like a mechanic services a car—preventative care keeps things running smoothly and preserves your investment.
Looking ahead, I predict that advances in smart maintenance technology—like IoT-enabled hinges or self-monitoring supports—will become more accessible, making it even easier to keep custom storage solutions in top shape with minimal effort. For now, adopting systematic inspections and using the right tools proves invaluable. Try outfitting your toolbox with a digital level and impact driver to enhance your project’s durability; these investments pay off by reducing repairs and improving safety. Need tailored advice for your unique kitchen? Don’t hesitate to reach out for expert guidance.
After completing my kitchen upgrade, I realized that the true challenge lies in designing storage that’s both beautiful and reliable. This journey taught me invaluable lessons about the hidden intricacies of shelves and support hardware, which I wish I’d known from the start. First, I underestimated the importance of load testing support brackets—nothing beats practical trial to spot flaws before heavy dishes reveal weaknesses. Second, choosing materials isn’t just about looks; durability and environmental resistance are game-changers, especially in humid kitchens. Lastly, proper wall anchoring, particularly into wall studs, isn’t optional—it’s essential for safety and longevity. These real-world insights transformed my approach from guesswork to confidence, and I hope they do the same for you.