Why Inset Cabinets Cost More and When They Are Worth the Spend
It was the worst kitchen nightmare I ever faced: a gorgeous, custom-built-in that looked stunning but felt like a constant battle every time I opened or closed the cabinet doors. I realized too late that my beautiful inset cabinets, while undeniably elegant, were costing me in ways I hadn’t anticipated—both in my wallet and my patience. That lightbulb moment made me dig deep into why inset cabinets tend to cost more and, more importantly, when they actually make sense for your home.
What Makes Inset Cabinets So Pricey and Why Bother?
Inset cabinets, with their doors nestled perfectly flush with the cabinet frame, offer a sleek, high-end look that many homeowners desire. But achieving that refined aesthetic isn’t simple. The precise craftsmanship required, along with the need for well-aligned hinges and carefully finished edges, pushes up the cost. Initially, I assumed that their beauty alone justified the higher price, but I soon learned there’s more to consider. The meticulous installation process, the quality of hinges, and the need for perfect measurements all contribute to their premium pricing.
Beyond aesthetics, inset cabinets bring a sense of custom craftsmanship that can transform your entire kitchen. They blend seamlessly with modern styles and can make the space feel more open and less cluttered. But before diving into a project, it’s wise to understand whether the investment aligns with your home’s design goals and your lifestyle.
Interestingly, according to a study published in Interior Design Magazine, homes with inset cabinetry often see a higher return on investment during resale, especially when paired with other high-end finishes. This suggests that, while pricier upfront, inset cabinets can pay dividends in the long run—if they’re the right fit for your space.
Have you ever faced the dilemma of choosing between aesthetics and budget when remodeling? If so, you’re not alone. Many homeowners stumble on this crossroad, wondering if the extra expense is truly justified.
As we explore this topic, I’ll share some common pitfalls I encountered and how to avoid them. Understanding when inset cabinets are worth the extra spend can save you a lot of frustration—and money. Ready to find out if this stylish upgrade fits your home and budget? Let’s get started with the essentials that will help you make an informed decision.
Plan Your Layout and Measurements Carefully
Start by sketching your kitchen’s layout on paper, noting existing features like plumbing and electrical outlets. Use a measuring tape to record precise dimensions of your space, including wall heights, widths, and ceiling details. I once spent an entire Saturday meticulously measuring and re-measuring my kitchen walls to ensure the inset cabinets would sit perfectly flush. This step is crucial because inset cabinets require exact alignments; even a small miscalculation can lead to doors that stick or gaps that ruin the aesthetic. To streamline this process, I recommend marking measurements directly on the wall with painter’s tape and a pencil, simulating how the cabinet faces will sit.
Choose the Right Materials and Hardware
Select high-quality plywood, like birch or maple, for your cabinet boxes to ensure durability and a smooth finish. The core is the skeleton, so spend wisely here; low-grade materials can cause warping over time. When it comes to hinges, opt for European-style soft-close hinges that allow for precise adjustment, essential for inset doors. I learned this the hard way when my first set of hinges wouldn’t stay aligned, forcing me to replace them with adjustable Blum hinges. For the doors, consider whether you want painted, stained, or natural wood finishes—each will impact the carpentry details needed.
Prepare for Precise Cabinet Framing
Frame your wall opening using 2x4s or other studs, ensuring they are plumb and level. Remember, inset cabinets sit inside the framing, so perfect framing is non-negotiable. Use a level across the top and sides frequently, and shim as needed. During my project, I faced a wall that was slightly out of plumb; I used shims to correct the framing to ensure the cabinet doors would hang correctly without gaps. For added stability, screw corner bracing into the wall frame at strategic points. Consider adding blocking where necessary to support heavy countertops or appliances—this is especially vital in older homes with uneven walls.
Assemble Cabinets with Precision
Assemble your cabinet boxes on a large worktable, making sure all corners are square. Use clamps to hold pieces steady as you drill pocket holes or attach screws. For my first set, I misaligned the cabinet sides slightly, which caused door misfit; I fixed this by re-measuring and disassembling, then reassembling with tighter clamps. Consider dry-fitting doors and hardware before final assembly to double-check your measurements. It’s a lot like fitting puzzle pieces, where small adjustments make a big difference—especially for inset doors that sit flush with the faceframe.
Install Cabinets Into Framed Openings
Mount the cabinets to the wall, starting with the upper units. Use a ledger board temporarily to hold everything in place. Drill pilot holes through the back of the cabinet into the framing, then screw securely. Check alignment continuously—use a straightedge or level—and make micro-adjustments by shimming hinges or cabinet sides. I once had to slightly loosen and reposition a cabinet door after installation, which saved me from having to re-drill holes. For a seamless look, align the inset doors carefully, and make sure hinges are adjusted to prevent any doors from binding or hanging unevenly.
Finish With Adjustments and Final Touches
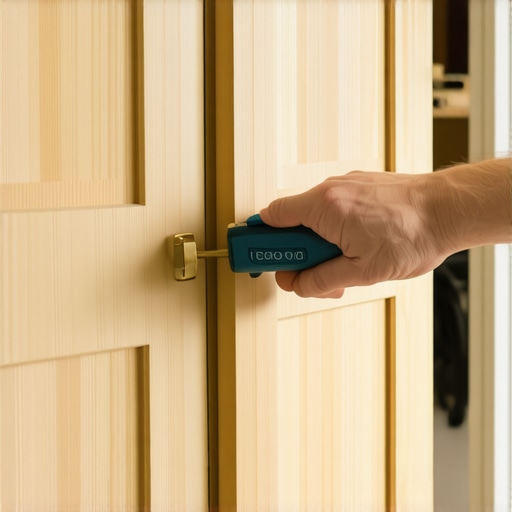
Once all cabinets are in place, tweak hinge adjustments for perfect gaps and flushness. Close and open doors multiple times to verify smooth operation. If doors are sticking, check hinge alignment and consider lubricating hinges with a silicone spray. Fill any small nail holes with wood filler matching your finish. I added custom knobs after fine-tuning the doors, which enhanced the overall sleek appearance. For a polished final look, consider caulking gaps around the frame, and ensure countertops are level if you’re installing them now. This final step transforms a good installation into a professional-looking finish that complements your entire kitchen remodel—making your effort truly worthwhile.Many homeowners assume that choosing custom cabinets or built-ins is a straightforward decision — after all, isn’t more storage always better? However, the reality is far more nuanced. One common misconception I encountered was believing that larger, more elaborate storage solutions automatically mean a better kitchen remodel. In truth, excessive or poorly planned storage can clutter space, hinder accessibility, and even detract from design harmony. An advanced pitfall is overlooking how the placement and depth of cabinets affect usability; for instance, overly deep cabinets can make retrieving items cumbersome, a detail discussed in expert guides like [this](https://artisancabinetworkz.com/expert-tips-on-selecting-storage-solutions-for-a-perfect-kitchen-upgrade). Additionally, there’s a myth that all built-ins are inherently luxurious and elevate property value — but if they don’t align with your home’s architectural style or your daily routines, they may become costly liabilities rather than investments. A major mistake many make is prioritizing stunning aesthetics over functionality, leading to impractical layouts that frustrate retrieval and organization. In high-end designs, subtle nuances like grain matching in wood or precise door gap uniformity play critical roles in perceived quality, details that often escape beginner attention but are crucial for professionals. Moreover, selecting hardware and finishes without considering durability and maintenance needs can cause future headaches; soft-close hinges are great, but not if they squeak or fail prematurely. Have you ever fallen into this trap? Let me know in the comments. For a deeper dive into creating effective yet beautiful storage, explore [seamless kitchen remasters](https://artisancabinetworkz.com/creating-seamless-kitchen-remasters-with-built-in-storage-solutions) or check out [unique cabinet ideas](https://artisancabinetworkz.com/custom-cabinets-ideas-that-transform-your-homes-style) that balance form and function.
Keeping Your Investment in Top Shape
Once your custom cabinets and built-ins are installed, the real work begins—maintenance. Regular upkeep ensures they stay beautiful and functional over the years. I personally recommend setting a weekly schedule to inspect hinges, handles, and surfaces for any signs of wear or damage. A simple wipe-down with a microfiber cloth and a mild cleaner prevents dust buildup and maintains the finish. For hinges and hardware, applying a few drops of silicone lubricant every six months keeps everything operating smoothly and quietly—especially important if you notice any squeaking. Using the right tools, such as a soft-bristled brush or vacuum attachment, helps dislodge dust from corners and crevices where dirt tends to accumulate.
Essential Tools and Supplies for Ongoing Care
In my experience, having a dedicated toolkit makes maintenance straightforward. A small Phillips-head screwdriver, a soft rag, silicone spray, and a gentle cleaner form the core essentials. For more delicate finishes, I prefer a non-abrasive cleaner like mineral oil to polish wood surfaces without risking scratches. Invest in quality hardware cleaners, like the Blum service kit, which can rejuvenate hinges and slides, prolonging their lifespan. Remember, addressing minor issues early prevents costly repairs downstream—inspect your cabinetry annually for loose screws or misaligned doors. Regular checks also allow you to spot potential moisture issues or water damage, especially around sinks and dishwashers, which can compromise the integrity of your wood over time.
Nurture Your Storage and Built-ins
Properly maintained storage solutions and built-ins not only look better but perform more reliably. For pull-out drawers and soft-close mechanisms, a quick wipe with a silicone conditioner can keep them operating smoothly—think of it as a grease job for your cabinetry. When dealing with built-ins, especially in high-traffic areas like kitchens or mudrooms, reinforcement with additional support brackets or blocking can enhance durability. This proactive approach is especially vital in homes with multiple occupants or in humid environments. In fact, incorporating moisture barriers behind cabinetry can prevent warping and mold growth—an approach outlined in [this expert guide](https://artisancabinetworkz.com/expert-tips-on-selecting-storage-solutions-for-a-perfect-kitchen-upgrade).
Looking Ahead: The Future of Kitchen Maintenance
As smart home technology advances, integrating sensors that monitor hinge function or detect moisture levels could revolutionize cabinet maintenance. Imagine receiving alerts when a door needs lubricating or when humidity spikes threaten your cabinetry’s integrity. Developers are already exploring IoT-enabled hardware that can provide real-time diagnostics, making long-term upkeep effortless. Embracing these innovations now can ensure your custom solutions stay pristine and functional for decades. Be proactive—try adjusting hinges with a Blum hinge adjustment tool to perfect door alignment and test the long-term comfort of your cabinetry.
How do I maintain my built-ins and storage over time?
Consistent inspection, cleaning, and small adjustments are key. Regularly lubricate hinges, tighten loose screws, and address water or moisture issues promptly. For inspiration and advanced tips on caring for your custom cabinetry, visit this in-depth guide. Remember, a little effort goes a long way in preserving the beauty and function of your investment. Don’t hesitate to reach out via our contact page for personalized advice or professional maintenance services, ensuring your kitchen remains a masterpiece for years to come.
The Hidden Lessons That Turned My Kitchen Dreams Into Reality
One of the biggest surprises I learned was how crucial precise framing and measurements are—any misstep can turn a sleek, inset cabinet into a frustrating headache. Another lightbulb moment was realizing that not all hardware is created equal; investing in quality hinges saved me countless adjustments later. Lastly, I discovered that planning for future maintenance saves immense time and stress—simple, regular checks prevent major repairs down the line. These lessons transformed my approach from trial-and-error to confident craftsmanship, and I hope they guide you in your own custom cabinet journey.
Tools and Resources That Changed My Approach
For anyone serious about creating stunning custom cabinets, I recommend checking out the Blum hinge adjustment kit—it made aligning doors so much easier. The comprehensive guide Creating Seamless Kitchen Remasters became my go-to resource for planning storage seamlessly. Additionally, investing in high-quality plywood like birch or maple, as recommended in this trusted article, ensures durability. Lastly, a reliable multi-tool and level from my toolkit helped me execute fine adjustments precisely—making sure my custom cabinets not only looked perfect but functioned flawlessly.
Empower Your Next Kitchen Adventure Today
Building custom cabinets and built-ins is more than just a renovation—it’s an opportunity to craft a space that reflects your style and meets your needs. Don’t wait for the perfect moment; start planning, measuring, and sourcing your materials now. Remember, each small step brings you closer to a kitchen that will impress for years to come. Ready to reshape your home with expert-crafted storage solutions? Dive deeper into this topic by exploring our comprehensive guide for 2025 or reach out via our contact page for personalized advice. Your dream kitchen awaits—take the first step today!