Why We Stopped Using Standard MDF for Bathroom Vanities
I vividly remember the day I installed my first bathroom vanity made from standard MDF. It was supposed to be straightforward—a quick project, a cost-effective choice. But within months, I watched in frustration as it warped, chipped, and lost its luster. That moment was my lightbulb—realizing that what I saved upfront cost me far more in headaches down the line. Since then, I’ve been on a quest to find better materials that withstand the humid, demanding environment of bathrooms.
Facing the Moisture Monster: Why MDF Falls Short
Bathrooms are notorious for their high humidity levels—it’s almost like a constant test of your cabinetry materials. Standard MDF, or Medium Density Fiberboard, has been a popular choice for decades because it’s inexpensive and easy to work with. But here’s the raw truth: it simply isn’t built for damp spaces. Over time, moisture seeps in, causing the fiberboard to swell, warp, and eventually crumble. Not exactly the durable solution homeowners hope for, especially in one of the most-used rooms in the house.
Early in my renovation journey, I made the mistake of trusting MDF for a bathroom vanity—mainly because of its affordability and smooth surface. But after a couple of years, I was left with a vanity that looked sad and worn. That experience taught me a pivotal lesson: choosing the right materials isn’t just about aesthetics or initial cost—it’s about long-term resilience. If you’re contemplating your own bathroom upgrade, I strongly encourage you to reconsider MDF and explore more suitable options.
Interestingly, advances in materials science have given us alternatives that outperform traditional MDF in humid environments. For example, high-density fiberboards with moisture-resistant coatings have gained popularity. To see what options are available and how they can transform your space, check out this guide on modern remodel materials.
Is the Material Choice Really That Crucial?
Absolutely. Using the right cabinet materials can mean the difference between a vanity that lasts for decades and one that needs replacing in a few years. I learned this the hard way, starting with MDF and ending up with costly repairs. It’s also worth noting that many DIYers overlook the importance of proper sealing and finishing, which can prolong the life of MDF. But at the end of the day, if the core material isn’t suitable for bathroom conditions, no amount of paint or sealant will fully solve the problem.
So, have you faced similar frustrations with bathroom cabinetry, or are you just starting to plan your remodel? Don’t worry—there are better options, and I’m here to guide you through them. Let’s dive into the solutions that truly stand up to moisture and time, helping you create a bathroom that’s both beautiful and durable.
and get ready to discover why choosing the right materials is the most important decision you’ll make for your bathroom remodel.
Select the Right Material for Bathroom Cabinets
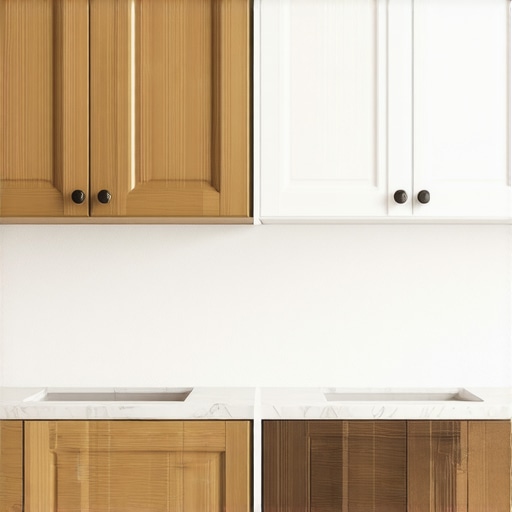
Begin by assessing moisture resistance. Avoid standard MDF, which warps easily in humid environments. Instead, opt for moisture-resistant high-density fiberboards or vented plywood with a waterproof coating. I remember the time I built a custom plywood cabinet with a sealed, water-resistant finish, which stayed pristine even after years of dampness, unlike my previous MDF projects. When shopping, look for cabinets labeled “moisture-resistant” or “bathroom-grade”.
Evaluate Your Storage Needs Before Building
Identify your priorities—need for hidden drawers, open shelving, or space for tall items. Draw a rough sketch or use design software. For my guest bathroom, I designed a targeted layout with deep drawers below the sink—maximizing functionality while keeping a sleek look. Consider how each storage element can serve your daily routines. For inspiration, check innovative storage options.
Create a Precise Construction Plan
Develop detailed measurements based on your actual space. Use a tape measure and a level to ensure accuracy. I cut my first set of cabinet side panels slightly too narrow, causing misalignment. Learning from that, I measured multiple times and double-checked my cuts using a square. For complex joints, consider pocket screws or dowels for alignment. Having a clear plan minimizes errors and speeds up assembly.
Use Visual Guides to Achieve Perfect Alignment
Make templates for hinges and internal shelves. You can use scrap wood to set consistent distances, which will help in installing multiple cabinets uniformly. In a recent project, I built customizable face frames, and using templates saved me hours of adjustments. Proper alignment ensures a professional look and prevents functional issues later.
Secure and Finish Your Cabinets Properly
Follow safety practices—use clamps to hold pieces while gluing or screwing. For added stability, anchor cabinets to studs or wall anchors. When I installed a built-in in my kitchen, anchoring was critical to prevent sagging. Finish with a waterproof paint or laminate that resists moisture. Remember, sealing the edges and joints is key to longevity. For an upgraded look, explore built-in solutions that combine aesthetics with durability.
Test for Functionality and Adjust
Open and close doors and drawers to check for smoothness. Fine-tune hinges and slides as needed. I once installed a set of soft-close hinges, but they initially squeaked—adjusting the tension resolved the issue. Small tweaks now prevent future problems and maintain a polished appearance.
Enhance Longevity with Proper Maintenance
Clean surfaces regularly with gentle cleaners to prevent buildup. Address minor damages immediately—such as fixing loose handles or chips—to avoid bigger issues. In my own bathroom, routine upkeep has extended the life of my cabinets significantly. Regular inspections around moisture-prone areas can catch leaks or damage early, preserving your investment.
Many homeowners jump into custom cabinetry or built-in storage solutions believing they are foolproof or universally perfect. But in my experience, there’s a lot of misconception surrounding these projects. A prevalent myth is that custom always equals better quality—while true in some cases, it often depends on the craftsmanship and materials used. Choosing the cheapest option, assuming it’s equivalent to premium custom work, is a common mistake. Advanced homeowners understand that not all customization is created equal; details like joinery quality, hardware durability, and proper finishing make a significant difference.
Another nuance often overlooked is the importance of spatial planning beyond aesthetics. People tend to focus solely on visual appeal, neglecting how their storage will function daily. Poorly designed custom cabinets can become a nightmare, making access cumbersome or space inefficient. For example, a beautifully crafted corner cabinet that doesn’t optimize deep storage can result in wasted space—something you might not realize until you’ve committed to the build. To avoid this, it’s worth exploring innovative storage solutions that maximize every inch, such as those detailed in this guide on creative storage.
Why Do Many Projects Fail to Meet Expectations?
One overlooked aspect is the precision in installation. Even the most gorgeous custom cabinets can fall apart if not properly mounted or aligned. Many DIYers underestimate the significance of detailed measurements and wall reinforcement, leading to doors that misalign or drawers that stick. Furthermore, neglecting climate considerations can cause warping or damage over time. Moisture-resistant materials and proper sealing, as discussed earlier, are essential to ensuring longevity, especially in kitchens and bathrooms. Fail to account for these nuances, and your investment might not last as long as you hoped. The key is to balance aesthetics with function, supported by expert insights like those found in the ultimate guide to custom cabinets.
What Advanced Mistake Often Trips Up Even Experienced Remodelers?
The subtle trap is in overlooking future flexibility. Many homeowners focus on current needs, designing cabinets and storage that suit their life at the moment. But homes evolve, and so do storage requirements. Installing fixed shelving or static configurations without considering adaptability can lead to regret. For instance, integrating adjustable shelves or modular units allows your space to grow with your needs. This foresight is especially crucial in kitchens where family sizes and hobbies change. Expert remodelers suggest considering not just style but also planning for evolution—something that can significantly impact the lifespan of your investment. For detailed strategies, see this resource on future-friendly cabinetry.
Understanding these nuanced pitfalls and myths can save you time, money, and frustration. Remember, successful remodeling hinges on craftsmanship, precise planning, and foresight. Have you ever fallen into this trap? Let me know in the comments.
Keeping Your Cabinets and Built-ins Working Smoothly Over Time
Investing in custom cabinetry and built-ins is a hefty commitment, but the real work begins after installation. Proper ongoing maintenance ensures these fixtures stay functional and beautiful for years. I personally recommend a combination of targeted tools and smart routines to keep everything in top shape. For example, a high-quality microfiber cloth paired with a gentle cleaner like mineral oil can preserve wood finishes without harsh chemicals that might cause deterioration. Regularly inspecting hinges and slides with a screwdriver can catch issues early before they turn into costly repairs.
Tools That Save Your Time and Effort
When I manage my storage solutions, I lean heavily on a magnetic screwdriver set—specifically, one with interchangeable bits. It’s lightweight, precise, and ideal for tight spots. A quick note: I prefer a ratcheting screwdriver with adjustable torque to prevent overtightening, which can strip delicate hardware mounts. For finer adjustments, I use a small Allen wrench set, especially when fine-tuning adjustable shelves or hardware. For deeper cleaning, I toggle between a soft brush and a textured rubber eraser to remove stubborn grime or residues from hinges and crevices—saving me from more invasive methods that might damage finishes.
Additionally, I swear by a high-precision level—like a digital one—that helps verify the alignment is perfect after adjustments. Misalignment not only looks unprofessional but can cause drawers to stick or doors to sag over time. Invest in quality tools; they make a tangible difference in your results and reduce frustration. As the trend towards smart homes evolves, I see a future where integrated sensors track wear and recommend maintenance proactively—imagine receiving a notification on your phone when a hinge begins to loosen. That integration can preempt failures and extend the lifespan of your cabinetry.
How do I maintain my built-ins and storage solutions to last?
Start with routine inspections—check hinges, slides, and seals every six months. Tighten loose fasteners with your screwdriver, and reapply lubricants sparingly. For moving parts, I use a silicone-based lubricant, which withstands humidity and temperature fluctuations better than oil-based options. Clean surfaces with a soft cloth and avoid abrasive cleaners that can scratch or dull finishes. Also, consider applying a coat of protective wax or sealant every few years; it adds a shield against moisture and dirt. Proper sealing around edges, especially in moist areas like kitchens and bathrooms, is essential to preventing warping or mold growth. Remember, consistency is key: a quick weekly wipe-down can make a massive difference in longevity.
Looking ahead, I anticipate that as materials science advances, we’ll see cabinetry infused with self-healing surfaces and IoT-enabled sensors. These innovations could automatically alert homeowners about potential issues—an exciting next step in the evolution of maintenance. Start implementing some of the routine tips today, like regularly using a microfiber cloth paired with a mild cleaner, and you’ll be surprised at how much longer your custom fixtures stay pristine. For a comprehensive deep dive into maintaining your cabinetry system, enjoy this expert guide.
What I Didn’t Expect About Custom Cabinets and Storage
- Many homeowners, including myself, assume that beautiful finishes or trendy hardware are what make a kitchen last. In reality, solid craftsmanship and precise installation are the true foundations of durability. One overlooked detail I learned early is how crucial proper wall reinforcement and accurate measurements are—skimping on these can lead to misaligned doors or sagging shelves down the line.
- Another lesson was about material quality. Choosing moisture-resistant MDF or vented plywood with waterproof coatings made a dramatic difference in longevity, especially in humid spaces. I now understand that investing in better core materials pays off in the long run, reducing maintenance and preventing costly repairs.
- Designing for flexibility is something I wish I had prioritized initially. Things change—families grow, needs evolve—and cabinets built with adjustable shelves or modular components adapt seamlessly over time. Foresight in layout and materials ensures your kitchen remains functional and beautiful for years to come.
Tools and Resources That Changed My Approach
- My top recommendation is exploring the comprehensive guides on creative storage options. They opened my eyes to maximizing space efficiently and stylishly.
- Investing in quality tools, like a digital level and a set of adjustable torque screwdrivers, has made a noticeable difference in my results. These tools help me achieve professional-level precision without the need for special training or expensive equipment.
- Finally, consulting detailed project planning resources on design and construction has saved me countless headaches, ensuring my builds turn out exactly as envisioned.
Create Now, Innovate Later
Taking the leap into custom cabinetry and storage solutions can feel overwhelming, but remember—every professional started with a simple project that taught them something new. Embrace the process, learn from your mistakes, and invest in quality materials and tools. Your future self will thank you for building a space that’s both beautiful and built to last. Ready to start your own kitchen transformation? Now’s the perfect time to turn those ideas into reality. What’s the first change you’re excited to make in your kitchen or bathroom? Share below, and let’s inspire each other to craft spaces we love.