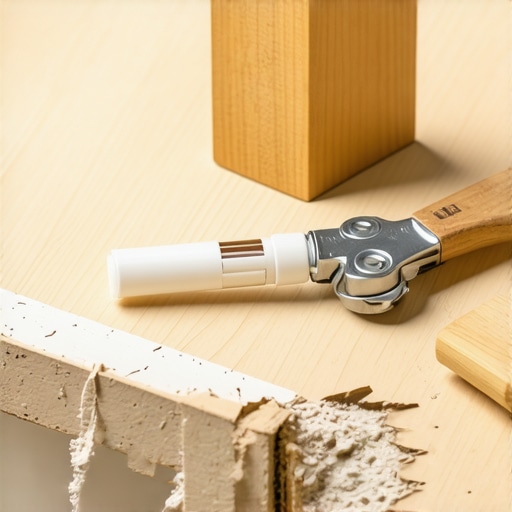
How to Fix a Strip of Peeling Laminate on a Budget
I remember the exact Tuesday morning I realized my kitchen was starting to look tired. I wasn’t doing anything fancy; I was just grabbing a mug for my third cup of coffee. As I reached for the handle, my sleeve caught on a sharp, jagged strip of plastic-looking wood that had decided to part ways with the cabinet frame. It didn’t just look bad; it felt like a personal failure. We spend so much time obsessing over custom cabinets for a stylish kitchen overhaul, but the reality is that life happens to the cabinets we already have. That one little strip of peeling laminate was mocking me, threatening to turn my cozy kitchen into a fixer-upper overnight. I almost called a contractor right then, but I stopped myself. I knew there had to be a way to save my sanity and my wallet without a full demolition.
Stop Worrying About Your Damaged Cabinet Edges
It is tempting to think that once the laminate starts to go, the whole kitchen needs modern kitchen remodels featuring custom cabinets and built-ins. But hold your horses. You do not need a five-figure budget to fix a five-cent problem. Most people see a bit of peeling trim and assume the glue has simply given up on life, likely because of heat or moisture. I have seen homeowners get so frustrated by a bit of peeling trim that they end up choosing custom colors for their cabinetry and ripping out perfectly good boxes. The truth is, edge banding is designed to be the sacrificial lamb of your cabinetry. It takes the hits so the wood underneath doesn’t have to. Have you ever caught your sweater on a piece of peeling trim and felt your heart sink? If so, you are in the right place because we are going to fix it for less than the cost of a fancy lunch.
Will a Cheap Fix Actually Last?
When I first started messing with home repairs, I made a classic blunder: I thought more glue meant a better bond. I slathered some generic super glue behind a loose strip, clamped it, and waited. Not only did it fail within a week, but it also left a thick, crunchy residue that made the real fix ten times harder. This is why skipping cheap thermofoil near the oven is such a common piece of advice; heat is the enemy of low-quality adhesives. According to the Forest Products Laboratory, the effectiveness of an adhesive bond depends more on surface preparation and the specific chemistry of the glue than the sheer volume applied. You need the right technique, not just a bigger bottle of glue. If you do it right, that budget-friendly repair will actually outlast the original factory bond. If you’re feeling overwhelmed by the state of your kitchen, reach out to us for some friendly advice before you start tearing things down. We are going to walk through the process of reactivating old glue and applying the right new stuff so you can get back to enjoying your morning coffee without the fear of a plastic splinter.The first thing you need to do is become a detective of dirt. Grease is the absolute nemesis of any adhesive, and in a kitchen, grease is everywhere—even if you can’t see it. If you’ve spent any time learning how to remove stubborn water rings from natural wood cabinet surfaces, you know that preparation is 90% of the battle. Grab a clean rag and some denatured alcohol or a mild degreaser. Wipe the back of the peeling strip and the cabinet frame itself. I once spent an hour trying to re-glue a strip near the stove without cleaning it first; I used the best adhesive on the market, but it slid right off because of a microscopic layer of bacon grease that had settled into the wood grain. Don’t be like me.
Try the Iron Trick Before Buying New Supplies
Most factory edge banding is applied with a hot-melt adhesive. This is good news for you because it means you might already have the glue you need; it’s just dormant. Set a household iron to the cotton setting (no steam!) and place a thin cotton cloth over the peeling laminate. Press the iron firmly against the cloth for about 10 to 15 seconds. This heat penetrates the laminate and liquefies the old glue. While it’s still warm, use a wooden block or a roller to press the strip firmly back into place. Hold it for a minute until it cools. This simple trick is why custom cabinets as a game-changer in your kitchen remodel journey are often worth the effort—they use high-quality materials that respond well to maintenance rather than cheap fillers that just crumble.#IMAGE_PLACE_HOLDER_B#
When Heat Just Isnt Enough
If the iron trick fails, it usually means the old glue has crystallized or been scorched. In this case, you’ll need to step up your game with contact cement. Unlike standard wood glue, contact cement is applied to both surfaces, allowed to dry until tacky, and then bonded together. It’s like a permanent handshake between the wood and the laminate. However, you have to be precise; once those two surfaces touch, they aren’t moving. While you might be tempted to just slather on some random hardware store glue, remember why you should avoid glue-only joinery for bathroom vanities—in high-moisture areas, the wrong chemical bond will fail in months. Use a small brush to apply a thin, even coat, wait about 15 minutes, and then press them together.
Master the Art of the Clean Edge
The part that separates the pros from the DIYers is the finish. If you’ve replaced a whole section of banding, you’ll likely have a bit of overhang. This is where most people panic. I remember trying to trim my first repair with a dull box cutter—I slipped and left a scar on the cabinet face that looked like a lightning bolt. For a truly professional look, use a dedicated edge banding trimmer or a fine-toothed file. If you use a file, always stroke in one direction—away from the laminate and toward the wood at a 45-degree angle. For those working with raw edges, the secret to making plywood edges look like solid wood lies in this very step: the sanding and filing create a seamless transition. Finally, take a bit of 220-grit sandpaper and lightly knock down the sharp corner. This attention to detail is why skipping cheap thermofoil near the oven is a lesson learned the hard way; once that edge goes, the whole look is compromised.Once you’ve mastered the small repairs, you start seeing the bigger picture. Most homeowners I talk to are convinced that the secret to a perfect layout is simply ‘more space.’ They want deeper cabinets and more of them. However, if you’ve spent any time looking into innovative storage solutions for modern kitchen remodels, you know that volume is a vanity metric. Real efficiency comes from accessibility, not just cubic inches. The biggest mistake you can make is ignoring the ‘working triangle’ in favor of a wall of deep, dark boxes where Tupperware goes to die. Everyone says ‘fill every inch,’ but in my experience, leaving breathing room for a 4-foot clearance rule around your island makes the room feel twice as large as any extra cabinet would.
Stop Chasing Cabinet Volume and Start Targeting Utility
The ‘Oops’ factor usually hits about six months after the contractor leaves. You realize that while your kitchen looks like a showroom, you’re still bending over to dig out a heavy Dutch oven from the back of a cavernous base cabinet. This is why the best way to organize heavy Dutch ovens in a deep drawer involves specialized pull-outs rather than standard shelves. A common trap is assuming that custom means ‘made to fit my wall,’ when it should mean ‘made to fit my life.’ I’ve seen people spend a fortune on custom cabinets for a stylish kitchen overhaul only to realize they didn’t include a single vertical spice drawer next to their range. According to a study by the National Kitchen & Bath Association (NKBA), ergonomic ‘point-of-use’ storage is the number one factor in long-term homeowner satisfaction, far outweighing the aesthetic choice of door style.#IMAGE_PLACE_HOLDER_C#
Why Do My High-End Cabinets Still Feel Flimsy?
If you’ve invested in what you thought was top-tier cabinetry but the drawers feel ‘gritty’ or the doors don’t quite line up, you likely fell for the ‘Furniture Board’ trap. Many mid-to-high-range manufacturers use a dense particle board core because it’s easier to machine, but why plywood box construction still beats particle board for kitchens comes down to screw-holding power and moisture resistance. Over time, heavy drawers cause screws in furniture board to wallow out, leading to that annoying sag. Also, check your hardware. The hardware mistake that makes expensive cabinets look cheap is often as simple as using undersized slides for heavy pot drawers. If your drawers are grinding, it’s rarely the wood; it’s usually the cabinet drawer slides grinding because they weren’t rated for the weight. Have you ever fallen into this trap where you paid for ‘premium’ but got ‘average’ underneath? Let me know in the comments. Before you commit to a full tear-out, reach out to us to see if your current boxes are worth saving with a better internal layout or if you truly need to start fresh with modern kitchen remodels featuring custom cabinets and built-ins.After the dust settles and the contractor’s truck finally pulls out of your driveway, you enter what I call the honeymoon phase. Everything is pristine, the wood smells fresh, and the soft-close drawers glide with a whisper. But here is the reality no one tells you during the sales pitch: a kitchen is a living machine. It breathes, it settles, and it works hard every single day. If you want those modern kitchen remodels featuring custom cabinets and built-ins to look just as good in 2035 as they do today, you have to be proactive about the small stuff. I’ve seen beautiful installs go south because the homeowner didn’t realize that humidity changes cause wood to move, which eventually knocks your doors out of alignment.
Don’t Ignore the Sluggish Slow-Close
When you notice your doors aren’t meeting perfectly in the middle, don’t panic and assume the house is sinking. Most high-end cabinets use European-style hinges that are designed to be adjusted in three dimensions. If you are seeing a crooked gap, you just need to learn how to adjust european hinges for a perfectly level door reveal. I keep a Pozi-drive screwdriver in my kitchen junk drawer specifically for this. Unlike a standard Phillips, it won’t slip and strip those expensive adjustment screws. If things feel sticky, it’s usually just a build-up of kitchen aerosol (that fine mist of oil and dust). Understanding why your slow close hinges are suddenly sluggish and how to clean them is the difference between a five-minute fix and replacing a forty-dollar hinge.
Why Every Homeowner Needs a Cabinet Hardware Jig
If you’re the type who likes to add your own personality later by swapping out pulls, please do yourself a favor and buy a professional-grade hardware jig. I personally use the True Position Drill Guide because it eliminates the ‘measure twice, pray once’ anxiety. It’s the one tool you need for perfectly aligned cabinet knobs every time. I once watched a friend try to eyeball a long T-bar pull on a shaker door, only to realize he was an eighth of an inch off. On a white cabinet, that hole is a permanent scar. Using a jig ensures that even if you’re installing t-bar pulls without them catching your pockets, they are perfectly level and symmetrical across the entire run. #IMAGE_PLACE_HOLDER_D#
How do I maintain my custom cabinets over the long haul?
Maintenance is less about deep cleaning and more about mechanical ‘check-ups.’ Every six months, I do a lap of the kitchen. I check for cabinet drawer slides grinding, which is often caused by a stray crumb or a loose screw. According to the technical documentation from Blum, a leader in functional hardware, their hinges are tested for 200,000 opening and closing cycles. However, that rating assumes the hinge stays clean and lubricated. If you live in a high-moisture area, you should also be checking the base cabinets near the sink. This is why plywood box construction still wins over furniture board in wet areas; it won’t swell and disintegrate if your P-trap develops a tiny drip.
The Future Is Modular and Movable
Looking ahead to 2025 and beyond, I see a massive shift toward ‘adaptable storage.’ The days of fixed shelving are dying. More people are realizing why you should design your pantry with adjustable shelf tracks instead of static wood cleats. We want our kitchens to grow with us—maybe today you need space for baby formula, but in five years, that same cabinet needs to hold a massive air fryer. The future belongs to internal organizers that can be swapped out without a crowbar. If you’re ready to stop fighting your kitchen and start making it work for you, reach out to us for a consultation. My best advice? Go grab a can of dry PTFE spray today and lubricate just one ‘grumpy’ drawer slide; you’ll be amazed at how much better your morning feels when the kitchen actually cooperates.
Three Hard Truths About Living With High-End Cabinets
After years of helping homeowners navigate the mess of renovations, I have realized that the most expensive kitchen is not always the best one; the best kitchen is the one that stays functional and beautiful long after the warranty expires. First, never underestimate the power of cleaning. Kitchen grease is literally an acid that eats through finishes and destroys the bond of even the best adhesives. Second, your kitchen is a moving target. As the seasons change, the humidity in your home will cause doors to shift; if you do not learn how to adjust european hinges for a perfectly level door reveal, you will drive yourself crazy looking at crooked lines. Finally, remember that hardware is the most important ‘moving part’ you own. Spending money on custom cabinets as a game-changer in your kitchen remodel journey only works if you protect that investment with high-quality slides and hinges. I have seen too many people make the hardware mistake that makes expensive cabinets look cheap by trying to save fifty bucks on a set of drawers.
The Tools I Keep in My Kitchen Junk Drawer
You do not need a full workshop to keep your kitchen in top shape, but a few specific items are non-negotiable for my personal toolkit. I always keep a Pozi-drive screwdriver handy for hinge adjustments because standard Phillips heads will strip your screws. A can of dry PTFE spray is a miracle worker for why your soft close slides grind and the quick lubrication fix; it provides a slick surface without attracting more dust. I also swear by a high-quality hardware jig for adding any new pulls later on. If you are feeling stuck on where to start, looking into innovative storage solutions for modern kitchen remodels can give you a roadmap for small upgrades that make a massive difference. These tools turn a frustrating weekend project into a satisfying ten-minute fix.
Give Your Kitchen a Second Life Without the Demo
Transforming your space does not always require a sledgehammer and a dumpster. Sometimes, it is about adding that one specific feature you missed the first time, like realizing why you need a vertical spice drawer next to your range to save your counters from clutter. Every small repair or adjustment you make is a vote for the longevity of your home. You have the power to fix those peeling edges and sagging drawers today. If the project feels too big or you are ready for a professional transformation, reach out to us and let’s talk about how to make your kitchen work for you again. Your home is where life happens—make sure it is ready for the journey. Have you ever tried to fix a cabinet door yourself only to have it come out more crooked than before? Let me know your biggest DIY struggle in the comments below!