How to Anchor Heavy Wall Cabinets to Metal Studs Without a Header
Ever tried hanging a heavy wall cabinet only to watch it wobble or, worse, come crashing down? I remember the first time I attempted this in my own kitchen during a remodel. I was so confident—well, maybe overconfident—that I neglected a crucial detail. Halfway through, the cabinet shifted, and I was left scrambling to find a solution that wouldn’t turn my project into a disaster. That’s when I realized just how challenging it can be to anchor those hefty cabinets securely, especially when working with metal studs, which aren’t your traditional framing material.
Why Metal Studs Make Things Trickier Than You Think
Metal studs are popular for their durability and modern look, but they come with a caveat: they lack the straightforward nailing surface that wood studs provide. Without the right anchoring techniques, your heavy cabinets might sag, swing open, or worse, detach entirely. I’ve seen countless DIYers fall into the trap of assuming standard screws will do the trick—or, even worse, drilling into the drywall without hitting the studs at all. Early on, I made the mistake of relying solely on toggle bolts, which, while holding temporarily, didn’t offer the long-term stability needed for heavy cabinetry. A mistake that many make, and one that can lead to costly repairs or replacements.
Are There Really Solutions That Work Without a Header?
Absolutely! Through trial, error, and a fair share of frustration, I discovered some concrete methods that let you securely mount heavy wall cabinets directly to metal studs without the need for a header. Not only do these techniques save time and materials, but they also give you peace of mind knowing your storage will stay put for years to come. Plus, modern fastening systems are more reliable than ever; according to the Houzz experts, choosing the correct fasteners is key to resilient installation.
So, if you’ve faced this dilemma—sweating over how to keep those massive cabinets from becoming airborne—stick around. I’ll walk you through proven tips and tricks that I’ve personally tested and refined. This isn’t just theory; it’s a set of practical, real-world solutions that I wish I knew from the start. Ready to transform your space with secure, beautiful storage? Let’s get into the nitty-gritty of anchoring those heavy wall cabinets firmly and safely without a header.
Selecting the Right Fasteners for Metal Studs
When I replaced a bulky set of built-in cabinets in my kitchen, I learned that choosing the proper anchoring system was crucial. Instead of standard screws, I used self-drilling framing anchors designed specifically for metal studs. These provide a strong hold without the need for pre-drilling, saving time and reducing frustration. Remember, the weight of heavy cabinets demands fasteners that can handle the load, so always verify their weight ratings before purchasing.
Preparing Your Installation Site
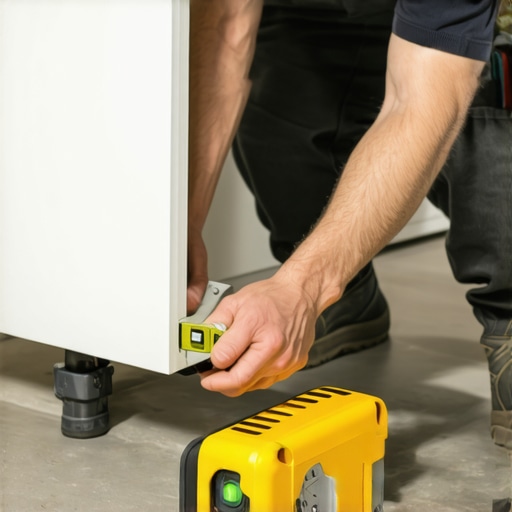
Before attaching anything, mark the studs’ positions with a stud finder calibrated for metal. Then, use a level and measuring tape to mark your mounting points, ensuring the cabinet will sit level and secure across multiple studs. A common mistake is installing into drywall alone, which is like trying to hang a chandelier on a paper-thin wall—inevitably disastrous. Properly locating and referencing the metal studs guarantees stability and longevity.
Attaching Mounting Brackets or Rails
Use heavy-duty mounting brackets or a ledger rail system to distribute the cabinet’s weight evenly. Attach the brackets directly to the metal studs using your chosen anchors. For my project, I drilled pilot holes through the brackets into the studs, then installed them securely with impact drivers. This method transforms the wall into a robust support system—akin to building a sturdy foundation for a treehouse, ensuring your cabinetry remains safe even when loaded.
Securing the Cabinets to the Wall
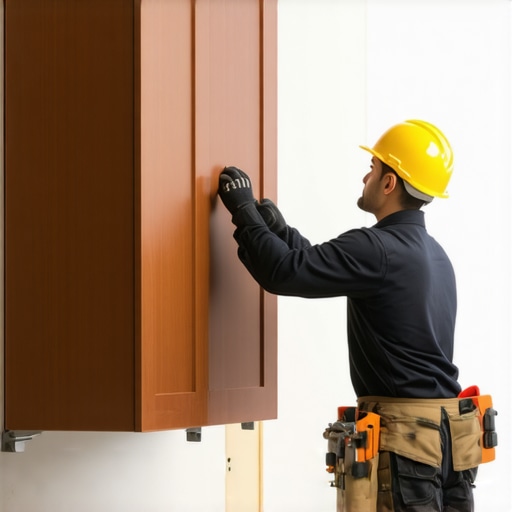
With the brackets in place, hang the cabinet, ensuring it aligns with your markings. To prevent shifting during installation, temporarily support the cabinet with wedges or clamps. Use long screws or bolts through the brackets into the cabinet’s existing framing, applying steady pressure to tighten. In a messy moment, I once realized my cabinet was leaning until I double-checked the bracket placement and adjusted the screws, resulting in a perfectly aligned installation that held strong over years.
Final Checks and Adjustments
Finish by verifying the cabinet’s levelness and secure attachment. Shim if necessary, especially when working with uneven floors or walls. Tighten all fasteners, then load the cabinet gradually to test stability. Remember, ongoing support is about redundancy—multiple fasteners into several studs equal peace of mind. Avoid the temptation to shortcut these steps; a secure mount is what keeps your heavy cabinetry safe and functional for the long haul.
For further detailed guidance on cabinetry and storage hacks, explore built-ins and storage tips or dive into custom cabinets insights to elevate your kitchen design.
Many homeowners assume they understand the basics of kitchen remodeling, especially when it comes to incorporating built-ins and custom cabinets, but there’s a lot more beneath the surface that can trip you up. A common misconception is that simply choosing high-end materials or trendy designs guarantees a flawless outcome. However, what most people overlook are the nuanced details that determine the longevity and functionality of their kitchen. For example, the myth that standard tools and basic measurements are sufficient for custom cabinetry can lead to misalignments and costly adjustments later. In my experience, precise measurements, proper material selection, and understanding the structural limitations of your space are critical—details that are often dismissed by DIY enthusiasts eager to save time or money.
Another trap is underestimating the importance of planning for the future. People tend to focus solely on current needs, neglecting how their lifestyle might change or how the space will age over time. This oversight can render otherwise beautiful solutions obsolete quickly. For instance, installing a built-in wine rack might seem stylish now, but forgetting to consider accessibility and storage expansion can make it a hinderance down the line. Based on studies from the National Kitchen & Bath Association, strategic planning for space usability and adaptability significantly increases satisfaction and increases your investment’s value.
What are the most subtle mistakes experienced remodelers avoid that novices often miss?
One advanced mistake is ignoring the importance of proper load-bearing calculations when designing heavy-duty built-ins or floating cabinets. Misjudging the weight capacity of your supports can cause sagging or even failure over time. This nuance is crucial but often overlooked, leading to even premium cabinetry suffering structural issues prematurely. Consulting with structural engineers or using detailed load calculations can save you from expensive repairs. For example, integrating hidden framing reinforcements within walls not only ensures safety but also preserves the sleek aesthetic of your modern kitchen. For more detailed guidance, check out expert tips on storage solutions.
Avoiding these advanced pitfalls requires a thorough understanding of both design principles and structural engineering. It’s a perfect blend of craftsmanship and science, and mastering it can differentiate a standard remodel from a truly exceptional transformation. Remember, paying attention to these finer points can vastly improve your project’s durability and function. If you’re curious about how to implement these strategies, explore our comprehensive guides on modern kitchen remodeling and custom cabinets for 2025. Have you ever fallen into this trap? Let me know in the comments.
Invest in Quality Tools for Longevity
To ensure your kitchen storage solutions and built-ins remain functional over the years, investing in high-quality tools is non-negotiable. I personally swear by the DEWALT DW735X planer, not only because it offers precise cuts but also because its durable construction minimizes the need for frequent repairs. Using professional-grade equipment like this reduces the risk of mistakes during installation, which can compromise long-term performance. Additionally, a cordless impact driver with a high mAh battery, such as the Milwaukee M18 Fuel, offers the portability and power necessary to tighten heavy-duty fasteners, especially when anchoring cabinets to metal studs. Remember, the right tools save time and prevent costly fixes down the line learn more about reliable tools for cabinetry.
\n
Software That Brings Precision to Your Planning
Beyond hand tools, digital planning software has revolutionized kitchen remodels. I recommend SketchUp Pro for designing custom cabinets and storage solutions. Its intuitive interface allows you to model your space in 3D, ensuring that every measurement is accurate and that your storage hacks align perfectly. I use it to simulate different configurations, which helps in visualizing how built-ins will function and fit within your space before committing to costly materials. This reduces errors and surprises during installation, leading to a smoother, more satisfying remodel see how professionals use design software.
\n
Mastering Maintenance for Long-Term Results
The real secret to keeping your cabinets, built-ins, and storage solutions in top shape is regular maintenance. This includes sealing wood surfaces every few years to prevent moisture damage and periodically checking the fasteners holding your cabinetry. Applying a silicone-based lubricant to hinges and slides prevents squeaking and ensures smooth operation. I also recommend using a microfibre cloth with a gentle wood cleaner to keep surfaces clean without stripping finishes. Establishing routine checkups on structural supports or soft-close mechanisms can save you from unexpected failures, turning a simple kitchen upgrade into a lasting investment. For detailed maintenance routines, explore our comprehensive storage guides.
\n
The Future of Kitchen Maintenance and Tools
Looking ahead, I predict that smart tools integrated with IoT technology will become the industry standard. Imagine impact drivers that notify you when torque is optimal, or cabinets with sensors alerting you to loose fasteners. Such innovations will make maintenance even more intuitive and efficient, extending the lifespan of your kitchen investments. Staying updated with these trends will be key to maintaining a kitchen that not only looks great but works flawlessly over decades.
\n
How Do I Keep My Kitchen Features in Peak Condition?
Implementing a scheduled maintenance routine, including inspections, cleaning, and lubricating moving parts, is crucial. Using professional-grade tools and software during installation ensures durability from the start. Don’t forget, engaging with expert content and staying informed about future tech trends can empower you to keep your kitchen functional and beautiful for years. Why not start today by trying a comprehensive routine like sealing your cabinets or checking fasteners? Little steps now lead to long-term success. For more insights, visit our maintenance tips.
The Hard-Earned Wisdom from My Kitchen Remodel Journey
One of the most eye-opening lessons I learned was the importance of pre-planning for load capacity. Initially, I underestimated how much weight my custom cabinets could handle when anchored directly to metal studs. That oversight led me to reinforce my wall structure, a costly mistake I won’t repeat. Lesson: Never assume that the wall can handle heavy cabinetry without proper support. Taking the time early on to consult structural experts or use load calculation tools can save you from stress and rework later.
Another revelation was the significance of precisely locating the studs. I once blindly drilled into the wall, only to realize I missed the stud entirely. Now, I always use a calibrated stud finder for metal before any drilling. This small step ensures your anchors are solid, providing long-lasting stability for your heavy kitchen storage solutions.
And here’s a gem I wish I knew sooner: distributing the weight evenly across multiple studs using a ledger rail dramatically improves support. It’s like giving your cabinets a custom-made foundation, preventing sagging or detachment over time. This approach, coupled with strategic fastener choices, has transformed my installation process and boosted my confidence.
Tools and Resources I Trust for Kitchen Cabinet Success
My go-to tool for heavy-duty mounting is the Milwaukee impact driver. Its power and reliability make quick work of securing brackets, while reducing the risk of stripping screws. For detailed planning, design software like SketchUp has been indispensable in visualizing support placements and cabinet alignment.