Why Your Laundry Room Needs a Built-In Drying Rack Strategy
I vividly remember the day I crammed yet another laundry basket into my cramped laundry room, only to realize that my drying process felt more like a chaotic battle than a simple task. Clothes draped over chairs, drying racks scattered haphazardly, and the entire space seemed to scream, “There has to be a better way!” That lightbulb moment led me down a journey of transforming my laundry area into a streamlined, functional space. If you’ve ever found yourself frustrated with disorganized drying zones or struggling to find space for your damp clothes, you’re not alone. Many homeowners overlook the impact of a dedicated drying strategy, especially built-in solutions, which can dramatically improve both the look and efficiency of your laundry room.
The Hidden Power of a Built-In Drying Rack
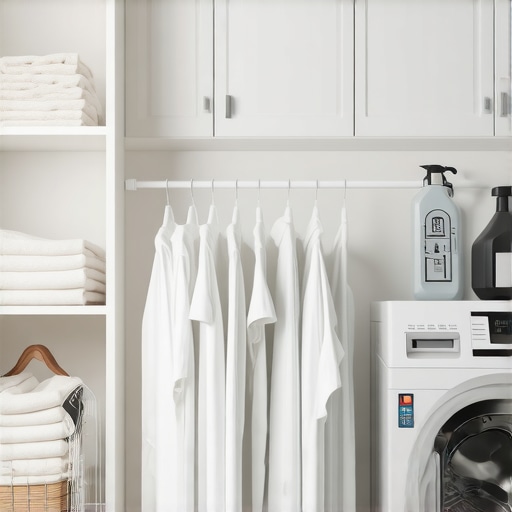
Now, I promise we’ll explore how a thoughtfully integrated drying rack can change your laundry game. Say goodbye to sagging clothes pins and makeshift drying spots. Instead, picture a sleek, built-in drying solution that seamlessly fits into your existing cabinetry or wall space, giving you a designated, tidy area for wet laundry without cluttering the rest of your room.
This isn’t just about aesthetics; it’s about making laundry less of a chore. When I installed a custom built-in drying rack, I noticed immediately how much faster and easier my drying process became. Plus, it kept everything organized and off the floor, which was a game-changer for me and my family. If you are curious about the broader impact of strategic storage, I recommend looking into [custom cabinets and built-ins](https://artisancabinetworkz.com/modern-kitchen-remodels-featuring-custom-cabinets-and-built-ins), which can include features like this and more. Implementing such solutions not only enhances functionality but also adds a touch of sophistication to your space.
Ever Scratched Your Head Over Small Spaces? Here’s Why It Matters
One early mistake I made was assuming I didn’t have enough room for a dedicated drying area. Turns out, with clever planning and custom integration, even small laundry zones can house a built-in drying solution. This tailored approach ensures every inch serves a purpose, which is especially vital in tight or multi-purpose rooms. So, before you dismiss the idea that built-in storage or drying racks are only for spacious homes, consider how smart design can maximize your current layout.
An external study highlights that efficient storage solutions can reduce household clutter by up to 30%, directly impacting daily stress levels and overall home satisfaction. Clearly, organizing isn’t just about looks—it affects our wellbeing too. With that in mind, let’s dive into how to identify the best spot and design for your built-in drying rack, turning this concept into your next smart upgrade.
Select the Perfect Spot for Your Built-In Drying Rack
Start by assessing your laundry room layout. Look for wall areas or cabinetry that can accommodate a recessed solution without interfering with existing appliances. I once identified an awkward corner behind the washer and dryer that was underutilized. After measuring the space, I marked where the rack would sit, ensuring it’s accessible without blocking doors or vents.
Measure Carefully and Plan for Ventilation
Precise measurements are vital. Use a tape measure to determine the width, height, and depth needed for your drying rack. Factor in clearance for air circulation and avoid obstructing airflow paths. When I installed mine, I left an inch of breathing room to prevent moisture buildup and to ensure ease of use.
Designing a Built-In Drying Solution
Think of the drying rack as a piece of custom furniture—cohesive with your room’s style. Decide whether you want slatted wood, metal bars, or a combination based on your aesthetic and drying needs. I opted for sleek stainless steel bars housed within a painted wood frame, which matched my cabinetry perfectly. Incorporate adjustable heights for versatility, especially if you have different types of clothing or bedding.
Leverage Existing Structures for Support
If you’re adding a drop-around version, reinforce surrounding cabinetry or wall studs to support the weight of wet clothes. In my project, I installed brackets into the wall studs behind the drywall, avoiding drywall anchors that can’t handle the weight. This extra support prevents sagging and ensures longevity.
Material Selection and Building the Rack
Choose durable, moisture-resistant materials like cedar, teak, or stainless steel. These materials withstand humidity and prevent mold. I used treated hardwood for the frame with stainless steel bars, which resisted moisture and matched my modern aesthetic. For a more straightforward approach, consider prefabricated solutions available through local carpenters or specialty retailers.
Assembly Tips for a Seamless Finish
Assemble the frame first, ensuring all joints are tight and smooth. Use waterproof adhesive and fasteners suitable for moisture-prone environments. When I built mine, I laid everything out on the floor, dry-assembled to verify fit, then secured each component carefully. Sand any rough edges to prevent snagging clothes and wipe down the surfaces to remove dust before installation.
Secure and Finish Your Installation
Mount the rack securely into the wall, aligning with the measured positions. Check the levelness with a spirit level—an essential step I initially overlooked, causing a slight tilt that made placing clothes awkward. Once confirmed, drill into the support brackets or studs, anchoring with appropriate hardware. Finish by sealing around the edges with paint or trim for a polished look.
Maintain Your Built-In Drying Rack for Longevity
Regularly clean the bars and frame to prevent dust and mildew buildup. Inspect the mounts periodically, tightening any loose screws. In my experience, a quick wipe-down every few weeks kept the rack looking new and functioning smoothly, transforming my laundry routine into an efficient process.
Many homeowners believe that simply installing custom cabinets or built-in storage automatically transforms a kitchen into a functional masterpiece. However, a prevalent misconception is that these features alone guarantee efficiency and style. In reality, the *nuance* lies in how these solutions are designed and integrated—it’s about optimizing *space* and *workflow*, not just adding fancy finishes. For example, some assume that bigger storage is always better, but strategic planning can reveal that well-designed, compact solutions often surpass traditional larger layouts in usability.
A critical mistake is overlooking the importance of *accessibility*. Homeowners sometimes choose high shelves or deep drawers for the sake of aesthetics, but neglect that awkwardly placed or hard-to-reach storage can nullify the intended convenience. Remember, *placement* matters just as much as *capacity*.
Beware of the trap where homeowners focus solely on cabinet material or hardware finishes, ignoring the *organization system* within. Expert insights from industry leaders highlight that a well-structured interior with smart dividers, pull-outs, and tailored inserts can massively increase usable space and reduce clutter. Investing in these details often pays dividends in performance, even if it adds slightly to the upfront cost.
For those contemplating a renovation, it’s vital to understand that *customization is a tool*, not a magic bullet. An over-customized or overly intricate design might complicate maintenance or future updates, leading to long-term frustrations. Instead, aim for balance: harmonious design that adapts to your *routine* and *lifestyle*.
Ultimately, the *hidden nuance* is that successful kitchen remodeling hinges on thoughtful planning and execution that considers *functionality as much as form*. To dive deeper into *innovative storage solutions* that maximize space, check out [this comprehensive guide](https://artisancabinetworkz.com/innovative-storage-solutions-for-modern-kitchen-remodels). Remember, even the best-looking cabinets can underperform if their design isn’t aligned with your daily needs.
Have you ever fallen into this trap? Let me know in the comments. For expert tips on selecting storage solutions that truly work, explore [this resource](https://artisancabinetworkz.com/expert-tips-on-selecting-storage-solutions-for-a-perfect-kitchen-upgrade). Your dream kitchen starts with understanding these subtle yet crucial details.
Maintaining your newly renovated kitchen and built-in storage solutions requires the right tools and a proactive approach. Personally, I rely on a combination of specialized equipment and strategic routines to ensure everything stays in top shape over the years. Regular upkeep not only preserves the aesthetics but also prolongs the lifespan of your custom cabinets and storage systems, making your investment truly worthwhile.
Tools That Make Maintenance Easier
In my toolkit, a few standout items have become indispensable. First, a high-quality microfiber cloth paired with a gentle, pH-balanced cleaner is perfect for daily wipe-downs, preventing dust and grime buildup without damaging finishes. For deeper cleaning of hinges and slides, I use a precision screwdriver set—particularly a magnetic tip version—so I can tighten or adjust hardware effortlessly without stripping screws.
Another essential is a digital level. In the world of custom cabinetry, even slight misalignments can cause doors to stick or drawers to misfit. Checking alignment periodically helps catch issues early. I also recommend investing in a small, handheld vacuum designed for electronics, to remove dust from hard-to-reach areas like inside vented cabinets or between appliances.
The Role of Software in Kitchen Maintenance
While physical tools handle the tangible aspects, digital solutions can streamline your maintenance schedule. I personally use a simple task management app with reminders set for quarterly cleaning, hardware checks, and touch-up painting. There are specialized home maintenance apps, but for most of us, a well-organized checklist works wonders. Additionally, keeping digital records of hardware models and finishes can help when sourcing replacement parts or planning upgrades.
Looking Ahead: The Future of Kitchen Care
Emerging trends point towards smart maintenance systems that integrate sensors into cabinetry and appliances, alerting homeowners of issues like humidity buildup or mechanical wear before they escalate. Companies are exploring moisture sensors embedded in storage areas to warn about potential mold risks, especially near sinks and dishwashers. Embracing these innovations now can position you ahead of future maintenance challenges.
How do I keep my built-ins looking fresh over time?
Regular cleaning with the right tools, periodic hardware inspection, and staying informed about modern maintenance tech are key. Remember, a little effort goes a long way in preserving what you’ve invested in, and it often costs less than repairing or replacing damaged components later.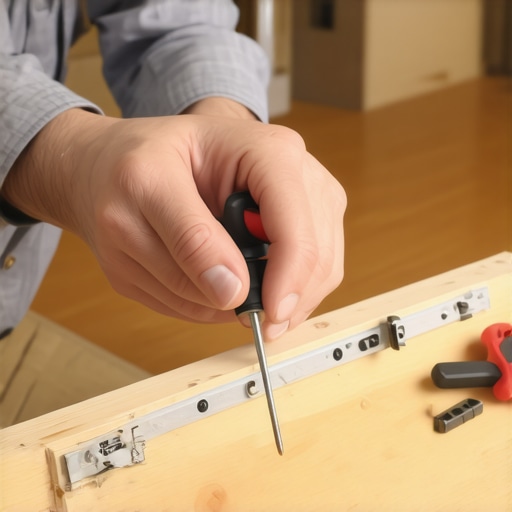
For example, a recent technical report from industry experts highlights how humidity sensors integrated into cabinetry can reduce mildew and prevent wood warping over prolonged periods, extending the life of your custom-built features. Implementing a simple maintenance routine—like using a microfiber cloth weekly and tightening hardware biannually—can make an enormous difference. I encourage you to try one advanced tip: install moisture-detecting sensors in your most vulnerable storage areas to proactively catch issues before they become costly problems. This proactive approach ensures your kitchen remains beautiful and functional for years to come.
Embarking on a kitchen remodel often reveals hidden lessons that reshape our approach to space, functionality, and design. One of the most impactful realizations I had was understanding that the true power of built-in solutions lies in *thoughtful integration* rather than just adding gadgets or cabinetry. For instance, I once installed a sleek built-in drying rack without considering air circulation, which led to moisture buildup. Learning to plan for proper ventilation and material selection transformed my project into a success, emphasizing that every detail—from ventilation paths to moisture-resistant finishes—matters immensely. Additionally, I discovered that strategic placement, such as embedding the drying system behind existing cabinetry, creates a seamless look that others often overlook, elevating the overall aesthetic and usability. These personal insights underscore that mastering built-in solutions requires patience, precise planning, and a keen eye for future-proofing your space—lessons that will undoubtedly serve you well as you upgrade your kitchen.