4 Floating Bathroom Built-Ins to Solve the Morning Rush
It was one of those hectic mornings. Shoes untied, hair half-styled, and the bathroom countertop cluttered with everything from toothbrushes to skincare products. As I rushed to grab my essentials, I realized my bathroom storage was more chaos than calm. That moment was a lightbulb—why was I still dealing with cluttered, inefficient space when a simple change could make all the difference?
How I Discovered the Power of Floating Bathroom Built-Ins
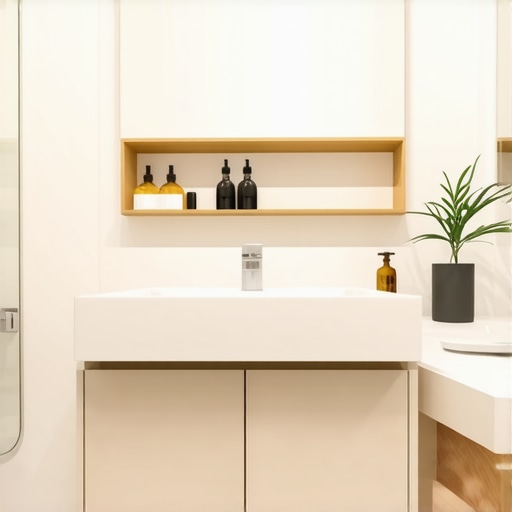
In my quest for a smoother morning routine, I stumbled upon a game-changing solution: floating bathroom built-ins. These sleek, wall-mounted storage units are more than just a modern aesthetic—they maximize space, reduce clutter, and keep everything within reach. After installing four thoughtfully designed built-ins, I found my mornings became less about hunting for essentials and more about starting the day on the right foot.
But why are these floating solutions such a hit? Well, traditional cabinetry can take up precious floor space, making a small bathroom feel cramped. Floating units create an illusion of openness, making your room appear larger and more organized. Plus, they’re customizable, so you can tailor the design to your unique needs—whether you want open shelves, concealed cabinets, or a mix of both.
If your bathroom feels like a constant mess or your mornings are a frantic dash, you’re not alone. Interestingly, according to a study by the National Kitchen and Bath Association, effective bathroom storage can boost not only organization but also your overall well-being, reducing stress and fostering a sense of calm.
Are you tired of knocking over bottles on crowded counters or digging through piles to find your toothbrush? Trust me, once you experience the difference, there’s no going back. Next, I’ll share how these four floating built-ins changed my bathroom’s functionality—and how they can do the same for you.
Is Installing Floating Bathroom Built-Ins Really Worth the Effort?
Initially, I hesitated, worried about the complexity of installation and durability. Early in my project, I made the mistake of overlooking the importance of proper wall anchoring, which caused some units to wobble. That taught me a valuable lesson: quality installation is crucial. But with the right planning and professional help, floating built-ins can be a straightforward upgrade that pays off in daily convenience.
Ready to ditch the clutter and embrace a more organized morning? Let’s dive into how to select and install these space-saving marvels.
Select the Right Materials and Design
Start by choosing durable, moisture-resistant materials like MDF with a waterproof finish or marine plywood, which withstand humid environments. Sketch a detailed plan considering your storage needs, bathroom layout, and aesthetic preferences. Think of your built-ins as modular furniture that seamlessly fits your space, much like assembling a custom bookshelf—measure twice, cut once. During my project, I measured my available wall space and designed a floating shelf unit to hold toiletries, ensuring it didn’t obstruct outlets or fixtures.
Gather Tools and Prepare Walls
Gather essential tools: a drill, level, stud finder, measuring tape, and safety gear. Use a stud finder to locate wall studs—these are your anchor points, providing the stability needed to support weight. Clear the area and mark the wall where the units will hang, creating a blueprint to follow. I learned the hard way that ignoring stud locations led to wobbling shelves, so take your time to identify optimal attachment points.
Install the Mounting Brackets or Back Panels
Install mounting brackets directly into wall studs for maximum support, using appropriate anchors if studs are unavailable. Alternatively, attach a sturdy back panel to the wall, anchoring into studs, which acts like a backbone, distributing weight evenly—similar to building a wall frame for a house. During installation, I temporarily held the shelves in position with clamps to verify alignment, then pre-drilled holes to prevent splitting.
Level and Secure
Use a bubble level to ensure each unit is perfectly horizontal—an essential step that prevents items from sliding off or appearing crooked. Secure the brackets or panels firmly with screws, tightening them into studs or anchors. I double-checked the level after each screw to maintain a consistent, professional look, preventing the unit from tilting over time.
Attach Shelves or Cabinets
Mount your shelves or cabinet components onto the brackets or back panel, ensuring they are flush and secure. Use screws designed for your materials—wood screws for wood, or specialized fasteners for metal brackets. For added stability, consider installing cleats or French cleats for a more seamless and sturdy appearance. During my project, I applied a clear waterproof sealant to the wood surfaces, protecting them from bathroom humidity and prolonging their lifespan.
Finish and Style
Finish the built-ins with paint, stain, or sealant that resists moisture. Add decorative hardware or trim for a polished look. Think of your built-ins as jewelry for the bathroom—details matter. I opted for white semi-gloss paint that reflects light and provides a smooth, easy-to-clean surface, transforming my bathroom into a sleek oasis.
By following these precise steps, you can create custom floating bathroom built-ins that combine functionality with style. For additional inspiration and detailed product options, check out this resource. Remember, meticulous planning and careful execution are key to turning your vision into reality.
While it’s common to focus on choosing the right materials or trendy finishes during a kitchen renovation, many overlook a critical aspect: understanding the real complexities behind custom built-ins and storage systems. Everyone gets caught up in aesthetics, but the devil is in the details, and often, misconceptions lead to costly mistakes. For instance, a pervasive myth is that built-in storage automatically adds value or efficiency. In reality, poorly planned or executed built-ins can clutter spaces further rather than streamline them. **A common trap is oversimplifying the design process**, assuming that a DIY approach will suffice for intricate cabinetry and storage arrangements. Without proper planning, you risk misalignments, weak joints, or materials that don’t withstand humidity—especially in kitchens or bathrooms. *Expert tip:* Always consult detailed guides like [this one](https://artisancabinetworkz.com/expert-tips-on-selecting-storage-solutions-for-a-perfect-kitchen-upgrade) to avoid these pitfalls.
**The subtle nuance is knowing when to opt for custom solutions versus pre-fabricated options.** Many homeowners underestimate the importance of precise measurements, especially in asymmetrical or retrofit spaces, leading to gaps or overlaps that compromise both function and style. Advanced homeowners also recognize the significance of material selection: moisture-resistant finishes and durable hardware are non-negotiable in humid environments. Skimping here results in cabinets that peel, warp, or corrode, and ultimately, a renovation that doesn’t meet expectations.
Additionally, there’s a misconception about the ease of integrating electronics or hidden charging stations into storage units. A lot of people overlook the wiring complexity involved in seamless integration, risking damage to cabinetry or aesthetic compromise. For sophisticated setups, like concealed power outlets or under-cabinet lighting, a thorough electrical plan is essential—something that requires expert insights to execute properly.
One of the most overlooked advanced mistakes involves the dimensioning for accessibility and ergonomic use. Deep drawers or tall cabinets might look sleek but can cause strain if not properly planned. For example, installing a pull-out spice rack at waist height is practical, but placing one too high forces bending or reaching awkwardly. As the [ultimate guide to custom cabinets](https://artisancabinetworkz.com/the-ultimate-guide-to-custom-cabinets-for-a-stylish-kitchen-overhaul) emphasizes, thoughtful proportions ensure that the storage solutions enhance usability and comfort.
**Make sure your renovation isn’t just about looks but about functionality that lasts.** If you neglect these nuanced considerations—material durability, precise measurements, electrical integration, and ergonomic design—you risk ending up with a space that looks good but fails in daily use. Remember, effective storage isn’t just built for today but for years of hassle-free use.
Have you ever fallen into this trap? Let me know in the comments. For a deeper dive into designing storage that truly transforms your kitchen, explore [this resource](https://artisancabinetworkz.com/built-ins-that-elevate-your-living-rooms-functionality). Proper planning and expert guidance can elevate your remodel from average to exceptional.Maintaining the functionality and beauty of your custom kitchen cabinets and built-ins requires the right tools and a proactive approach. I personally rely on a few specialized items that make routine upkeep straightforward and effective. First, a high-quality microfiber cloth is indispensable for dusting and wiping down surfaces without scratching. I use a microfiber cloth paired with a mild, pH-neutral cleaner specifically designed for wood finishes—this preserves the finish and prevents streaks.
For dealing with moisture-related issues or minor repairs, I trust a cordless detail sander with several grit options. It’s perfect for smoothing out touch-up spots or sanding rough edges after minor damage. Over the years, I’ve found that having a small, precise electric drill with torque control helps in tightening hardware or installing new accessories without stripping screws.
When it comes to maintaining hardware, I prefer a specialized hinge and hardware lubricant—WD-40 Specialist Silicone Spray. It repels dust and moisture, ensuring hinges and slides operate smoothly, which is vital for high-use areas. I also keep a set of precision screwdrivers stored neatly in a dedicated toolbox for quick adjustments.
Looking ahead, I predict that smart maintenance tools will become more prevalent, possibly integrating IoT sensors to alert homeowners about humidity levels or hardware wear before issues escalate. Incorporating such technology could revolutionize long-term cabinet care.
How do I keep my cabinetry and built-ins in top shape over time?
Routine inspections are key. Check hinges, slides, and hardware every six months to catch any signs of wear early. Wipe surfaces regularly with a microfiber cloth and a gentle cleaner; avoid harsh chemicals that can degrade finishes. For wood, periodically apply a breathable, moisture-resistant finish or polish—this not only preserves the appearance but also adds a protective layer against humidity and spills. If you notice any loose hardware, tighten it promptly—this prevents bigger issues and prolongs the lifespan of your investment.
Invest in simple maintenance tools like a good quality screwdriver set, a microfiber cloth, and occasional lubricants. These items are affordable but invaluable in maintaining the seamless functionality of your custom cabinetry. Don’t wait for a problem to arise—regular upkeep ensures your kitchen stays sleek and fully operational for years.
For detailed guidance on selecting suitable storage solutions and tools, I recommend checking out [this expert resource](https://artisancabinetworkz.com/expert-tips-on-selecting-storage-solutions-for-a-perfect-kitchen-upgrade). Taking small, consistent actions today can save you time, money, and headaches in the future.
Start by testing one maintenance tip—maybe applying a lubricant to your hinges—and see how it improves smooth operation. Small steps like this empower you to keep your kitchen in perfect working order long after the remodel wraps up. Curious about more tailored maintenance strategies? Feel free to reach out through [this contact page](https://artisancabinetworkz.com/contact-us) and I’ll help you develop a customized plan.
3 Lessons That Transformed My Approach to Kitchen Remodels
First, I realized that meticulous planning is the backbone of a seamless renovation, especially when integrating custom cabinets and built-ins. Rushing into installation without precise measurements led to misalignments that took extra time to fix. Second, investing in high-quality, moisture-resistant materials saved me from costly repairs down the line. Choosing durable finishes and hardware meant my storage solutions stayed looking pristine despite the humidity and daily wear. Lastly, consulting with experts—whether for electrical wiring or structural support—prevented many beginner mistakes. Their insights turned a good project into a truly exceptional transformation that I could enjoy for years.
The Art of Selecting Your Number-One Renovation Ally
For anyone tackling kitchen upgrades or custom storage, I swear by this expert guide. It helped me understand the nuances between stock and fully custom solutions, especially how materials impact durability and aesthetics. Additionally, I rely on tools like a dependable cordless drill and moisture-resistant sealants—trustworthy resources that make DIY so much easier. For inspiration, books about space-efficient designs, such as Smart Storage Magic, opened my eyes to innovative ideas I hadn’t considered. Knowing where to turn when selecting the right tools and resources makes all the difference between frustration and success in your project.
Carve Out Your Path with Confidence Today
Remember, every renovation journey begins with a single step—be it designing that perfect floating shelf or choosing resilient finishes for your custom cabinetry. Your dream kitchen with smart storage solutions and bespoke built-ins is within reach, and the knowledge you’ve gained here propels you forward. Don’t hesitate to reach out and turn ideas into actions—your perfect kitchen upgrade awaits. Ready to take the plunge? What’s the first step you feel excited to tackle in your own remodeling adventure? Let me know below!
,