Why Your Sheet Pans Belong in a Slim Vertical Divider Drawer
I still remember the moment it hit me—standing in my cluttered kitchen, drawers bursting with mismatched utensils and a jumble of baking sheets. It was chaos, and I couldn’t find my favorite sheet pan amidst the mess. That lightbulb moment made me realize something essential: your kitchen storage solutions can make or break your cooking groove. If you’re tired of digging through clutter to find that one sheet pan, stick around. Today, we’re going to explore how a simple, often-overlooked design element—placing sheet pans in a slim vertical divider drawer—can revolutionize your kitchen organization.
Transforming Chaos into Convenience with the Right Storage
There’s nothing more frustrating than rummaging through deep, disorganized cabinets or overflowing drawers to grab a baking sheet. Not only is it time-consuming, but it also risks damaging your pans and creating a mess. Early in my remodeling journey, I made the mistake of stacking my sheet pans horizontally, which caused scratches and warping over time. That realization led me to discover vertical storage solutions that save space and protect my cookware.
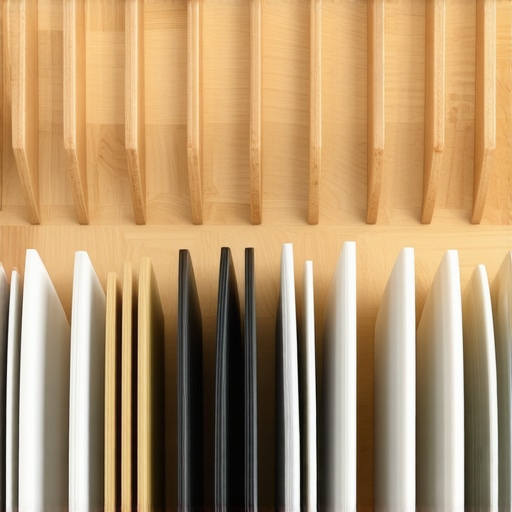
A well-designed vertical divider isn’t just about tidiness; it’s a game-changer for accessibility and safety. By integrating a slim, dedicated drawer specifically for sheet pans and cutting boards, you keep everything within easy reach while maximizing your cabinet space. Trust me, this small change dramatically improves your workflow. Many homeowners are surprised to learn that a custom-built drawer can be seamlessly incorporated into their existing kitchen layout, especially when paired with innovative [built-in storage options](https://artisancabinetworkz.com/built-ins-that-elevate-your-living-rooms-functionality).
Have you ever struggled to find space for your baking sheets without stacking them into a precarious tower? If so, you’re not alone. In fact, according to a recent survey, disorganized kitchen cabinets lead to an average of 30 minutes of extra prep time each week—a waste most of us can’t afford. Implementing vertical storage solutions can drastically cut down this inconvenience and bring a new level of order to your culinary space.
As we dive deeper, I’ll show you how to identify the perfect spot for this drawer, choose the right materials, and ensure your pans stay protected while accessible. Ready to leave the chaos behind? Let’s get started with some practical, easy-to-implement ideas that will make a noticeable difference in your daily cooking routine.
Identify the Ideal Location for Your Vertical Drawer
Start by evaluating your current kitchen layout. Choose a cabinet where adding a slim, dedicated drawer won’t interfere with existing appliances or plumbing, like near your baking or prep zone. I once repurposed an underutilized side cabinet by removing shelves and installing a vertical divider. This immediate transformation made my sheet pans accessible in seconds—saving me from the pancake breakfast chaos.
Select Materials That Stand the Test of Time
Opt for durable, moisture-resistant materials such as maple or plywood with a water-based finish. These materials prevent warping and scratches, especially in high-humidity kitchens. When I built my drawer, I used marine-grade plywood, which held up beautifully over years of heavy use, proving that quality materials are worth the investment.
Design a Custom Divider to Fit Your Pans Precisely
Create a divider that matches the depth of your cabinet and the width of your pans. Use a simple dado joint to secure vertical slats, ensuring stability. During my project, I measured each pan carefully and fashioned a divider that snugly held each sheet, preventing sliding and potential damage. This precise fit kept my pans organized and prevented stacking, which can cause scratches and warping.
Incorporate a Slim, Easy-Open Drawer Mechanism
Choose a smooth-acting slide system with a soft-close feature. Side-mount or undermount slides can work, but I prefer undermount for a sleek look and easy cleaning. When I installed mine, I used concealed undermount slides, which made opening and closing effortless without compromising aesthetics. This ensures daily convenience and preserves the integrity of your custom cabinet.
Ensure Proper Ventilation and Protection
Line the interior with a non-slip, heat-resistant liner or felt pads to protect your pans and reduce noise. I added a thin cork sheet to the bottom of my drawer, which cushioned the pans and kept them from shifting. Proper ventilation prevents moisture buildup—a crucial factor for longevity—especially if you live in a humid climate.
Trust the Experts for Seamless Integration
While DIY is satisfying, consulting professionals can ensure your vertical drawer fits perfectly and functions flawlessly. They can advise on precise measurements, material selection, and hardware options. I collaborated with a custom cabinet maker, which resulted in a seamless integration that looked built-in and professional, elevating my whole kitchen remodel. Looking to explore more about integrating built-ins? Check out how built-ins enhance your home’s style.
When embarking on a kitchen remodel, many homeowners read articles and settle into the notion that choosing the right materials and designs is enough for success. However, even seasoned enthusiasts often underestimate the subtle complexities that can make or break their project. *Contrary to popular belief*, selecting a trendy finish or the latest hardware isn’t the only factor; understanding the nuanced construction details and functional intricacies is what elevates a good design to a truly exceptional one. For instance, many assume that all wood is created equal, but expert sources highlight the importance of moisture content and grain orientation in ensuring longevity and stability, especially for built-ins that need to withstand daily use. In my experience, overlooking these details can lead to warping, cracks, and early deterioration, undermining years of excellent craftsmanship.
A common myth is that custom cabinets are inherently expensive and only for luxury homes, but savvy designers know that strategic choices—like using engineered wood components where appropriate—can maintain quality while controlling costs. Moreover, integrating innovative storage solutions within seamless built-ins not only maximizes space but also enhances usability, a detail often missed by DIY enthusiasts who focus solely on aesthetics. You can explore how to create such efficient integrations by visiting this guide on seamless built-in storage.
Be cautious of the traps that many fall into when planning their storage designs. One of the most overlooked pitfalls is poor space planning, especially in corner cabinets. Instead of relying on standard lazy Susans, advanced setups like deep pull-out shelves or custom-designed pantry drawers can provide better access and organization. The *’Oops’* here is investing in a beautiful cabinet system without considering the ergonomics of how you will access it daily. According to a recent study by the National Kitchen and Bath Association, improper storage planning can add up to 15% to your overall project costs due to reconfigurations and modifications.
For the more experienced remodelers looking to go beyond basics, consider the sophisticated question: How can I ensure that my built-ins blend seamlessly with the existing architecture while maintaining maximum functionality? A refined approach involves not only custom finishes but also integrating hidden features like charging drawers or concealed trash bins—details that require precision in both design and execution.
How can advanced joinery techniques improve the durability of your custom cabinetry?
Expert craftspeople emphasize techniques like dovetail joints and reinforced dado connections, which greatly enhance structural integrity and longevity. For instance, traditional finger joints may look appealing but lack the strength needed for heavy-use applications, whereas modern engineered solutions can provide both aesthetic and durability benefits. Here, meticulous attention to joint type and assembly process distinguishes professional results from amateur attempts, saving you from costly repairs down the line.
Considering these nuances helps you avoid the common mistake of opting for off-the-shelf solutions that look good on the surface but fall short in long-term performance. It’s vital to partner with skilled artisans who understand the intricate balance between form and function—someone who can advise on how material choices, joint techniques, and hardware selections converge to produce a truly lasting result. Want to deepen your understanding? Check out their insights on built-ins and storage hacks.
Remember, the secret to a flawlessly executed custom cabinet or built-in lies in the details that many overlook. Do you have a design nuance you’ve encountered or a hidden feature you wish you knew about earlier? Share your thoughts in the comments or contact us to discuss how to bring lasting quality and sophistication to your home.
Choose Tools That Stand the Test of Time
When it comes to maintaining your custom cabinetry and built-in storage, investing in quality tools is paramount. I personally rely on a high-precision drill like the Makita XFD10Z, which offers cordless convenience and consistent power, making adjustments or minor repairs straightforward. A digital caliper helps me measure joints and door gaps accurately, ensuring alignment remains perfect over time. For cleaning, I prefer a soft, microfiber cloth combined with a mild cleaning solution tailored for wood finishes—this prevents scratches and preserves the finish, especially for matte or satin surfaces. Using dedicated tools maintains the integrity of your cabinets and prevents unnecessary wear.
Implement Regular Checkups for Long-Term Results
Schedule routine inspections every six months to catch issues before they escalate. Tighten loose hinges, lubricate sliding mechanisms with silicone spray (avoiding WD-40, which can attract dust), and check for signs of moisture ingress, especially in humid climates. I also monitor hardware like pulls and handles, replacing any that show signs of corrosion or loosening. This proactive approach ensures your storage solutions remain both functional and beautiful, reducing costly repairs down the line. Incorporating yearly professional assessments can further prolong the life of your investment, as experts can spot structural or hardware issues early.
Master the Art of Proper Maintenance Records
Keep a dedicated maintenance log—digital or analog—that tracks your repairs, hardware replacements, and cleaning schedules. Not only does this help you stay organized, but it also provides valuable insights into the lifespan of materials and hardware. Over years of refurbishing different kitchen elements, I’ve found that having detailed records simplifies planning for upgrades or future repairs. This habit ensures your custom solutions continue to perform at their best well into the future.
Adopt the Right Software to Plan and Document Changes
Utilize design software like SketchUp or cabinet-specific apps such as 20-20 Design for planning adjustments or upgrades. These tools help visualize hardware replacements or repositioning of built-ins before committing physically. For ongoing maintenance, some homeowners find value in apps that remind them of periodic checks—my favorite is Todoist, which I customize with alerts for hinge oiling and hardware tightening. Staying organized with these tools optimizes your efforts, ensuring your cabinetry remains both functional and aesthetically pleasing for years ahead.
How do I keep my built-ins functioning smoothly over time?
Consistent maintenance is key. Regularly inspect hardware, lubricate moving parts, and clean surfaces with appropriate materials. Incorporate the use of quality tools like a cordless drill and precision measuring devices to make adjustments easy and accurate. Remember, maintaining your cabinetry isn’t a one-time effort but an ongoing process that pays off through long-term durability and beauty. For more advanced storage ideas and maintenance tips, check out how built-ins can serve your home’s needs. Start by trying the simple step of scheduling biannual inspections—your future self will thank you for the hassle-free, pristine storage spaces.
What I Wish I Knew When I Started Building Custom Cabinets
One of the most eye-opening lessons I encountered was the significance of moisture content in wood selection. Using high-quality, properly dried materials prevented warping and cracking over time, saving me from disappointment and costly repairs. Additionally, I underestimated the power of meticulous measurements; a tiny mistake can throw off the entire alignment. These lightbulb moments taught me that patience and precision are the backbone of lasting craftsmanship.
Tools That Turn Dreams Into Reality
Investing in reliable, professional-grade tools like a high-precision drill and digital caliper made my projects smoother and more enjoyable. These tools ensure that hardware is perfectly aligned and joints fit snugly, which elevates the overall quality of the finished piece. I trust brands like Makita and Starrett because they deliver consistent performance, helping me craft furniture and built-ins that stand the test of time.
Imagine Your Space Transformed
Envision walking into your kitchen with perfectly organized built-ins that seamlessly blend style and function. By harnessing expert strategies like hidden storage compartments or charging drawers, you can elevate everyday convenience. Remember, the future of your home’s kitchen design is in your hands—start with small changes today, and watch as your space becomes more beautiful and functional. Interested in exploring creative storage ideas? Check out this resource on innovative storage.”;,