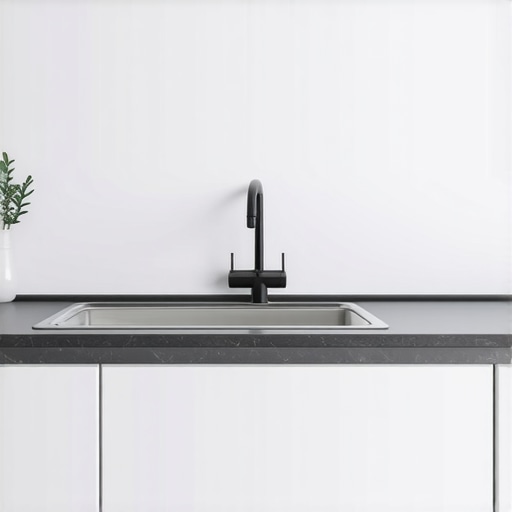
Why Every Kitchen Sink Base Needs a Waterproof Liner from Day One
I remember the moment vividly—fighting with a stubborn, leaking kitchen sink cabinet that seemed to soak up every spill without ever drying out. It was after my last remodel, thinking I had checked all the boxes, only to deal with water damage months down the line. That lightbulb moment made me realize: a waterproof liner in my sink base wasn’t just a good idea; it should have been part of my blueprint from Day One.
The Hidden Danger of Ignoring Waterproofing Right from the Start
Many homeowners overlook this critical step, assuming a sealant or simple water-resistant paint will do the trick. But water seeps into even the tiniest cracks, especially around sink fixtures and seams, leading to rot, mold, and costly repairs. The truth is, if you don’t create a reliable barrier early, water damage becomes inevitable—sometimes sooner than you expect.
Research indicates that water-related issues in kitchens are among the top causes of home repairs, accounting for nearly 40% of interior damage costs (source: homeinspectioninsider.com). That’s a sobering statistic, especially considering how simple safeguards can prevent most of these problems. My own mistake early on? I skipped installing that liner, thinking it was an extra expense. Turns out, that was the most expensive oversight I made.
Is a Waterproof Liner Overhyped or Essential? Surprise: It’s a Must-Have
I used to think that a waterproof liner was just a fancy upgrade, not a necessity. But after facing water leaks that warped my cabinets and fostered mold, I realized how foolish I’d been. Now, I advocate for making this investment immediately. Not only does it protect your cabinetry, but it also saves you from the headaches of ongoing repairs.
If you’ve ever had to replace warped plywood or deal with mold lurking behind your sink, you know how frustrating it can be. And trust me, the fix isn’t as simple as cleaning—it’s installing the right barrier from the beginning. Think of it as a shield that keeps water where it belongs, preventing damage before it starts.
In this post, I’ll guide you through why a waterproof liner is your best friend in your kitchen remodel. From choosing the right type to installation tips, you’ll learn how to safeguard your investment—so you don’t have to deal with regrets later. Ready to get proactive? Let’s dig into how you can ensure your sink base stays dry and damage-free for years to come.
Select the Right Waterproof Material
Start by choosing a durable, water-resistant liner like peel-and-stick membrane or liquid waterproofing designed for cabinetry. Approach this step with the same precision as selecting the perfect hardware for your cabinets—it’s the foundation of a leak-proof base. I once experimented with a peel-and-stick membrane in my own kitchen, which proved to be a game-changer in preventing water seepage. Ensure the material you pick is compatible with kitchen environments and easy to apply without bubbles or tears.
Prepare Your Cabinet Base for Installation
Remove all contents and clean the interior thoroughly. Sand down any rough patches and dry the surface completely. Think of this like preparing a foundation before laying a new tile—clean, flat, and dry ensures the liner adheres perfectly. During my project, I used a utility knife to trim excess insulation and wiped down the surfaces with a damp cloth, which helped the liner stick seamlessly and prevented future leaks.
Apply the Waterproof Liner Effectively
Lay the liner flat against the cabinet base, smoothing out air pockets with a squeegee or a plastic spreader. Use a utility knife to trim excess material neatly along edges and around fixtures. This step is crucial; a poorly applied liner resembles a wobbly cabinet door—ineffective and prone to failure. I learned this firsthand when I rushed the application, which led to bubbling and eventual water seepage—costing me later repairs. Take your time, and ensure every fold is smooth to maintain integrity.
Seal Edges and Corners for Complete Protection
Use waterproof sealant to secure the liner edges and seal around pipe holes or fixtures. This prevents water from escaping through gaps—think of it like sealing the seams of a raincoat. During my own upgrade, I sealed every corner meticulously, which kept my cabinets dry even during heavy use. Remember, paying attention to these small details prevents major headaches down the line.
Reinstall Fixtures and Check for Gaps
Once the liner’s in place, reinstall sink fixtures, ensuring they fit tightly and do not puncture the liner. Run water briefly to test for leaks—like a stress test for your cabinet’s new waterproof integrity. I once missed sealing around a pipe and discovered a leak a week later; don’t make the same mistake. Tighten fixtures carefully and confirm there are no leaks before replacing cabinet panels or finishing trim.
Additional Tips to Enhance Waterproofing
Consider adding a secondary barrier if your sink is prone to heavy water exposure. For more advanced storage and remodeling techniques, explore options like smart storage solutions to keep your kitchen organized and prevent clutter from interfering with waterproofing areas. Applying these steps will prolong your cabinetry’s lifespan and save you from costly repairs.
When it comes to custom cabinets and built-in storage, many homeowners fall prey to myths that can sabotage their remodeling success. One of the biggest misconceptions is that opting for cheaper, off-the-shelf solutions saves money in the long run. In reality, these generic options often lack the tailored functionality and durability of custom designs, leading to frequent repairs and replacements. Another common mistake is believing that maximizing storage volume should be the sole goal, ignoring the importance of accessibility and workflow. For example, poorly planned deep cabinets can become black holes for seldom-used items, wasting space and causing frustration.
What Advanced Homeowners Overlook in Designing Storage Spaces?
Many seasoned renovators focus on aesthetic details like door styles or finishings, while neglecting the underlying architecture of their storage solutions. An overlooked nuance is understanding the dynamic relationships between cabinet heights, pull-out accessories, and user habits. For instance, incorporating innovative storage hacks—like angled drawers or modular organizers—can dramatically improve usability. According to industry expert Mark Kinsley, “The secret lies in customizing not just the look, but how the space functions daily” (source: https://artisancabinetworkz.com/innovative-storage-solutions-for-modern-kitchen-remodels). This insight emphasizes the need for thoughtful planning over superficial design choices.
A trap many homeowners fall into is underestimating the importance of detailed joinery and material quality. Cheap veneers or particleboard may seem appealing initially but tend to fail under regular use, especially in humid kitchens. High-end materials like solid wood or moisture-resistant plywood ensure longevity, reducing long-term costs. Also, neglecting proper hardware choices, such as soft-close hinges or heavy-duty drawer slides, can lead to malfunction and customer dissatisfaction.
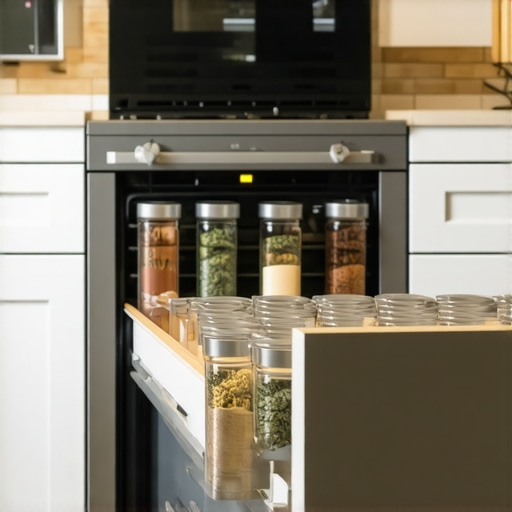
The importance of seamless integration cannot be overstated. Custom cabinetry should complement the overall kitchen layout, creating a harmonious flow rather than an assemblage of disjointed elements. For example, quirkier storage solutions like hidden compartments or pull-out spice racks add functionality that standard cabinets can’t offer—yet they are often omitted by DIYers who focus only on exterior appearance.
If you’re about to embark on a remodeling project, beware of the pitfalls that come from underestimating these nuances. Investing in well-designed, custom storage solutions tailored to your specific habits and space can elevate your kitchen’s efficiency and style. Want to see how smart storage can revolutionize your home? Explore innovative ideas at https://artisancabinetworkz.com/smart-storage-solutions-for-small-kitchens-in-2025 or get expert advice by reaching out through our contact page. Remember, the devil is in the details—don’t let misconceptions cost you your dream kitchen. Have you ever fallen into this trap? Let me know in the comments.
Keep Your Cabinets Perfect with the Right Tools
Maintaining custom cabinets and built-ins begins with selecting the tools that deliver precision and durability. I swear by a high-quality orbital sander, like the DeWalt D26451K, which balances power with fine sanding capabilities. It’s essential for removing old finishes or polishing surfaces before applying protective sealants, ensuring a smooth, professional look over the years. A cordless drill with adjustable torque settings helps in tightening hardware without overdriving screws, prolonging the life of your cabinetry.
For cleaning, I rely on microfiber cloths and a spray bottle with gentle, pH-neutral cleaners. Regular dusting prevents buildup, while occasional deep cleans prevent moisture and grime from settling into joints or hardware. Using these tools consistently simplifies ongoing maintenance and keeps surfaces looking fresh.
The Software That Simplifies Long-Term Storage Planning
When I designed my kitchen storage, I used Cabinet Vision, a CAD-based software that models cabinet configurations before cutting any material. It helps visualize how hardware placement and internal accessories will function, reducing costly errors down the line. This foresight is invaluable as your storage needs evolve, especially if you plan to scale your system with modular components like smart storage solutions.
This software’s predictive analytics feature lets me simulate daily use, spotting potential ergonomic issues before they become problems. As trends move toward automation and smart integration, such tools are likely to grow more intuitive, helping homeowners plan for future upgrades easily.
How do I maintain built-ins over time?
Simple routine checks make a huge difference: tighten loose screws, lubricate sliding hardware with silicone spray, and inspect seals for wear. For example, adding a thin layer of wax on drawer slides reduces squeaking and prolongs their lifespan. Additionally, I recommend periodically applying a specialized cabinet conditioner, like Howard Feed-N-Wax, which nourishes wood surfaces and prevents cracking—especially critical if your cabinetry faces seasonal humidity swings.
Predicting future trends, I believe the evolution of maintenance tools will include IoT-enabled sensors that monitor humidity and structural integrity in real-time. These innovations could alert homeowners to potential issues before visible damage occurs, making upkeep more proactive and less reactive.
Smart Storage Maintenance in Action
Don’t overlook the effectiveness of thoughtful organization as a maintenance strategy. Reorganizing seldom-used items into less-trafficked zones frees up space for daily essentials, reducing clutter that can hide signs of moisture or pests. Discover creative hacks like built-in storage hacks that help keep your kitchen functional and easy to clean.
To really amp up your system, try installing a magnetic strip for metal tools or spice containers; it keeps everything accessible and reduces wear on cabinet interiors. Regularly updating your organization system keeps maintenance manageable and your cabinetry looking sleek for years.
Investing in the right tools and software, combined with routine checks and smart organization, ensures your cabinetry remains a reliable, beautiful feature of your home. Want to explore innovative storage ideas? Check out these smart storage solutions, and start planning your maintenance routine today. With consistent care, your custom cabinets can last a lifetime.Reflecting on my journey, I realize that the true secret to lasting kitchen upgrades lies in a few critical lessons I learned the hard way—lessons about foresight, quality, and intentional design that go beyond surface appearances. First, I discovered that rushing through the planning phase often leads to overlooked details, like leaving insufficient space for future tech integrations or underestimating the importance of sturdy joinery. Taking the time to map out your storage needs and understanding how every inch interacts with daily habits can save you countless headaches later. Second, investing in high-quality materials and craftsmanship isn’t just about aesthetics; it’s about durability and peace of mind, especially in humid or fluctuating climates where cheaper options may fail prematurely. And finally, I learned that ongoing maintenance and smart organization are not afterthoughts but integral to preserving your investment—simple routines like periodically tightening hardware or reorganizing rarely-used items can keep your kitchen fresh for decades. If you’re embarking on a remodeling adventure, keep these insider insights in mind—they’re the game-changers that turn a good remodel into a great one.