The Heavy-Duty Slide Trick for Your Cast Iron Collection
I’ll never forget the moment I almost dropped my beloved cast iron skillet while rummaging through a cluttered shelf. It was a chaotic scene—pans sliding, clanking, and threatening to crash to the floor. That lightbulb moment hit hard: my storage solution was more chaos than convenience. If you’ve ever struggled to find the right skillet or seen your heavy pots tumble every time you open a cabinet, you’re not alone. That frustration led me to discover a simple yet effective heavy-duty slide trick that transformed my kitchen organization—and I promise, it can do the same for you.
Why Your Cast Iron Collection Deserves Better Storage
Cast iron is heavyweight, durable, and truly a chef’s best friend. But if it’s stored poorly, it becomes a safety hazard and a constant headache. Traditional shelves and flimsy racks often fail under the weight, leading to dangerous piles or scratched surfaces. I learned this lesson early on when a falling skillet bruised my foot—and even worse, chipped my favorite pan. According to home organization experts, properly supported storage is key to both safety and longevity of your beloved cookware. A reliable storage method not only saves space but also preserves the quality of your pans, ensuring they’re ready to use whenever you need them.
Skeptical About Heavy-Duty Slides? Think Again
Initially, I thought that heavy-duty slides were overkill for my cast iron, fearing they might be expensive or complicated to install. I also worried they might slide out too easily, causing more mess. But I made a rookie mistake early on—assuming all slides are created equal. After some research and trial, I realized that investing in robust, full-extension slides was a game-changer. The secret is choosing the right hardware designed for heavy loads—a tip I learned from a seasoned cabinetmaker. Using the best slides prevents dangerous jams and provides smooth access, making your cookware retrieval effortless and safe. For more tips on customizing your storage, check out my guide on [custom cabinets ideas that transform your home’s style](https://artisancabinetworkz.com/custom-cabinets-ideas-that-transform-your-homes-style).
Interested in discovering how to make your cast iron and other heavy cookware both accessible and secure? Keep reading. The upcoming steps will help you implement this heavy-duty slide trick with confidence, turning your cluttered kitchen into an organized oasis.
,
Install Heavy-Duty Slides with Precision
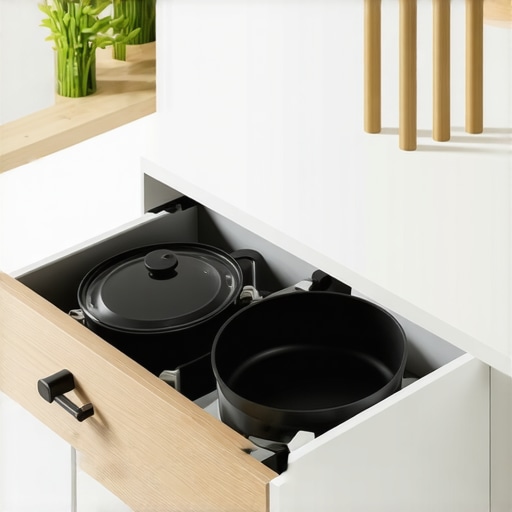
Start by measuring the width and depth of your cabinet opening where you plan to install the slides. Use a heavy-duty, full-extension slide rated for at least 100 pounds—these are essential for supporting the weight of cast iron. Secure the slides to the cabinet sides with the provided screws, ensuring they are level and flush. I once measured twice and drilled once, which prevented misalignment that could cause jars to fall. This meticulous approach guarantees smooth operation and maximum support.
Prepare Your Shelving Surface Carefully
Remove existing shelves and support brackets. Use a level to mark the exact height for your new sliding shelves, considering clearance for the cookware’s handles. Attach sturdy cleats or brackets on the inside of your cabinet at these marks. When I retrofitted my pantry with these steps, I found that securing the supports firmly prevented sagging over time—an issue I previously faced with lighter supports. Remember, the quality of your supports directly impacts the durability of your storage solution.
Design the Sliding Shelf for Easy Access
Cut a plywood platform matching the interior dimensions of your cabinet, leaving a slight overhang for easy gripping. Attach the slide mechanisms underneath the platform, then mount it onto the slides inside the cabinet. Test for smooth operation before loading heavy cookware. I once made a mistake by choosing a platform that was too narrow; it made sliding in and out cumbersome. Ensure your platform is wide enough to support your pans comfortably and avoid tipping.
Secure and Test the Setup
Once assembled, load your cast iron pans incrementally—starting with lighter items—and slide them in and out multiple times. Observe for any sticking or uneven movement. Tighten screws or readjust supports as needed. I encountered a jam when my slides weren’t fully seated; correcting this eliminated the issue instantly. Proper installation is critical for safety and longevity.
Optimize Your Storage Logic
Arrange your cookware by frequency of use—place everyday pans at the front and specialty items toward the back. Use vertical dividers or tiered racks to prevent pans from nesting and scratching each other. Incorporate labels or color-coding to streamline retrieval. This method turned my cluttered cabinet into a well-organized station, saving me time and avoiding frustration. For more innovative ideas, explore smart storage solutions.
When it comes to kitchen renovations, many homeowners believe that installing built-ins or customizing their cabinets is a straightforward process that guarantees a perfect design. However, this common misconception can lead to costly mistakes and suboptimal results. Let’s dig deeper into what most people get wrong about these features and how to avoid falling into these traps.
A prevalent myth is that all built-in solutions are automatically space-saving and functional. In reality, the effectiveness of built-ins depends heavily on thoughtful planning and understanding the nuances of kitchen layout. For instance, a poorly designed built-in pantry might look sleek but can hinder accessibility if not correctly sized or positioned. Industry experts emphasize that bespoke solutions require a meticulous assessment of user habits and spatial dynamics to truly optimize performance. For more insights on integration, explore my detailed guide on creating seamless kitchen remasters with built-in storage solutions.
Many homeowners overlook the impact of material choices and hardware when opting for custom cabinets. Choosing aesthetically pleasing but low-durability finishes can result in premature wear, especially in a high-traffic kitchen. Additionally, selecting hardware without considering weight and frequency of use can cause hinges and slides to fail sooner than expected. An advanced mistake is underestimating the importance of structural reinforcement—especially for heavy-cabinet doors and open shelving—leading to sagging or damage over time. Investing in high-quality hardware and consulting with experts can mitigate these issues. To get started, review expert tips on selecting storage solutions.
A common trap many fall into is assuming that customization always means higher costs and longer timelines. While it can be true, savvy planning and choosing the right craftspeople can actually reduce expenses by minimizing future repairs and optimizing layout efficiency. It’s crucial to balance aesthetics with functionality—otherwise, the investment might not pay off. For example, incorporating hidden storage or multi-use features enhances usability and can reduce clutter significantly.
Advanced homeowners might ask: How does integrating built-in features influence overall kitchen ergonomics and workflow? Achieving a truly functional design involves understanding the ideal work triangle and ensuring that storage, prep areas, and appliances are arranged for maximum convenience. Innovative solutions such as built-in pull-outs, corner cabinets with Lazy Susans, and integrated tech help streamline tasks. To explore these ideas, check out my post on revolutionize your kitchen remodel with built-ins and storage.
Remember, the key to a successful kitchen upgrade isn’t just aesthetics but how well the space functions for your specific needs. Avoid the trap of following trends blindly; instead, tailor your design with careful planning and expert advice. Want to learn more about designing with purpose? Visit our privacy policy page for insights or reach out through contact us for personalized guidance. Have you ever fallen into this trap? Let me know in the comments.
Embarking on a kitchen remodel requires more than just artistic vision; it demands reliable tools and proven methods to keep your project on track. Over the years, I’ve refined my toolkit to include equipment and software that streamline processes, ensure quality, and save time. One cornerstone of my approach is utilizing digital design programs like SketchUp, which allows me to visualize space and test storage solutions before any actual construction begins. This proactive planning minimizes costly mistakes and helps clients see exactly how custom cabinets and built-ins will harmonize with their existing space.
When it comes to physical tools, high-quality precision measuring instruments are non-negotiable. I swear by a digital laser measure because it provides instant, accurate measurements, even in tricky corners. Accurate measurements are critical to avoid gaps, misalignments, or uneven surfaces, especially when installing custom cabinetry. Complementing this, I use a cordless impact driver—it’s lightweight yet powerful enough to handle cabinet screw-holes typically requiring high torque, ensuring fast, precise assembly.
Long-term results hinge on maintenance tools and habits. I recommend periodically checking hinges and slides with a torque screwdriver to prevent over-tightening, which can cause misalignments over time. Keeping equipment clean and rust-free is essential; for this, I use a lubricant spray specifically formulated for metal parts. This routine maintenance diminishes wear, preserves hardware efficiency, and extends the lifespan of your investment.
Advancing in this field, I foresee technology integrating smarter, more intuitive tools. Imagine selecting cabinet hardware through augmented reality or utilizing AI-driven software to optimize storage patterns automatically. These innovations could drastically reduce design time and improve execution precision, making remodeling more accessible for DIY enthusiasts and professionals alike.
How do I maintain built-in storage systems over time?’
Proper maintenance of built-in storage is crucial for long-term functionality. Regularly inspect slides, hinges, and hardware for signs of wear or damage. Clean components with a soft cloth and mild cleaner to prevent dust buildup, which can impair operation. Keep lubrication points well-oiled with items like silicone spray, and tighten any loose screws promptly. Implementing these simple steps ensures your investment remains smooth-operating and aesthetically appealing for years to come. For more expert advice on selecting durable hardware, check out this comprehensive guide.
Ready to take your cabinetry game further? I highly recommend trying advanced measuring tools like a digital laser level—this precision gadget can drastically improve your installation accuracy, especially when aligning multiple cabinets or installing intricate built-ins. It’s a game-changer that offers peace of mind and ensures your work looks professionally done. Explore the latest models and see how they’ll elevate your renovation projects to new heights.

What I Wish I Knew When Starting My Built-In Adventure
Turning chaos into order with custom storage taught me that patience and meticulous planning are non-negotiable—each mistake was a stepping stone towards mastery. I learned that investing in high-quality hardware, especially heavy-duty slides, can save you time and money long-term, even if it seems expensive upfront. The most profound lesson? That tailored solutions, although initially demanding, transform your kitchen into a space that truly works with your lifestyle, not against it. These insights became the foundation of my ongoing passion for perfecting built-in design, making every project more satisfying than the last.
My Top Picks for Deepening Your Built-In Knowledge
- Creative Storage Solutions by Julia Marcum – Her innovative approaches inspire me to think outside the box, especially for tricky corners and tight spaces.
- Kitchen Design Masterclass by George Olivieri – A treasure trove of detailed insights on planning efficient workflows and choosing durable materials that stand the test of time.
- Professional Hardware Guides – Trusted manufacturers like Blum and Salice provide reliable, heavy-duty slides that ensure safety and smooth operation for years to come.
- The Art of Cabinetmaking by James Krenov – For sophisticated craftsmanship techniques that add personality and strength to custom built-ins.
Your Next Step: Embrace the Build-In Mindset
Designing built-ins and custom cabinets is more than a renovation—it’s a chance to reclaim your space and craft a kitchen that reflects your personality and needs. Each step, from choosing hardware to planning storage logic, contributes to a sanctuary that simplifies life and inspires cooking. Remember, every challenge is an opportunity to learn and improve. If you’re ready to elevate your kitchen, explore the modern approach to kitchen renovation that combines style with function. What’s the one built-in solution you’re excited to try next? Drop your thoughts below—I love hearing about your projects!