The Drawer-in-Drawer Move That Doubles Your Cutlery Storage
It hit me like a thunderclap one busy Saturday morning—my oversized, cluttered utensil drawer was a nightmare. Forks, knives, spoons all tangled together, overflowing beyond the edge, making every simple task feel like a scavenger hunt. Why had I let it get this bad? In that frustrating moment, I realized I needed a real solution—something simple, effective, and customizable.
The Hidden Power of a Simple Trick to Maximize Cutlery Storage
Imagine opening your kitchen drawer and finding every utensil perfectly organized, easy to access, and freeing up valuable space. That’s exactly what the transformative “drawer-in-a-drawer” move offers. It’s a strategy I’ve adopted after countless reorganizations—turning a chaotic mess into a sleek, functional space that makes cooking and cleaning a breeze.
Could this method really double my storage?
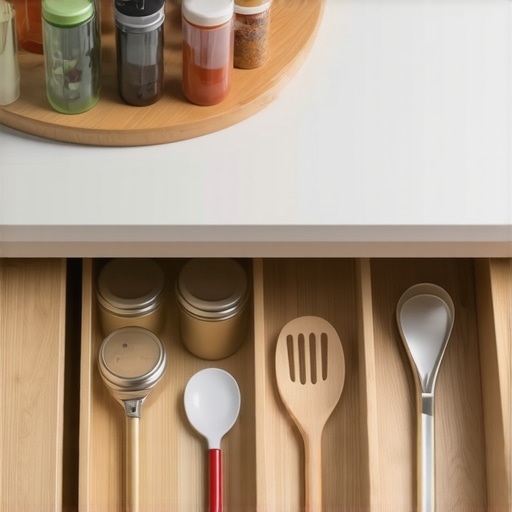
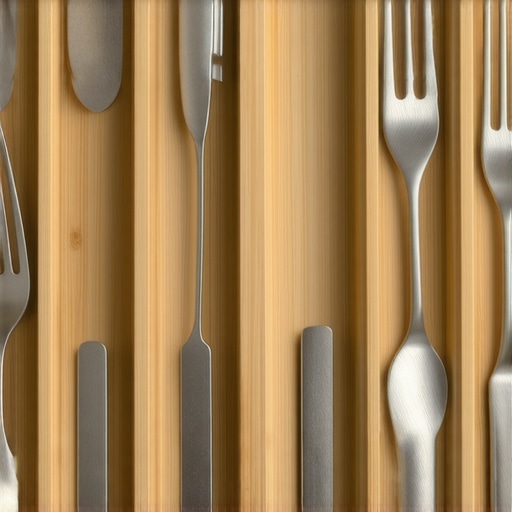
Absolutely. The trick lies in creating an inner compartment within your existing drawer—think of it as building a mini-drawer inside your drawer. This way, you separate your daily essentials from less-used gadgets, optimizing every inch of space. Plus, it’s customizable to fit your utensils’ sizes and your drawer’s shape.
Early in my DIY journey, I made the mistake of simply buying a generic utensil organizer and stuffing it in recklessly. It looked good at first but quickly became a jumbled mess. Not until I realized the importance of tailoring the insert to my drawer’s specific dimensions did everything change. You can see more about innovative storage ideas that work for small kitchens on this [smart storage solutions page](https://artisancabinetworkz.com/smart-storage-solutions-for-small-kitchens-in-2025). That step made all the difference.
Are you tired of digging through a mountain of silverware every time you need a spatula? Or maybe your drawer feels more like a junk drawer than a place for essentials? If so, read on. I’m going to show you how to implement this simple yet powerful trick to reclaim your space and sanity. Soon, your kitchen will work for you, not against you.
Build Your Mini-Divider for Custom Utensil Separation
Start by measuring your current drawer’s interior dimensions. I learned this the hard way when I skipped this step and bought an organizer that barely fit, leading to more frustration. Use a tape measure to note the width, length, and height, then select materials like plywood or acrylic to craft a divider tailored precisely to your space. Cut the pieces accurately using a saw, and sand the edges smoothly to prevent damage.
Create a Stable Base for Your Divider
Place the bottom piece of your divider on the drawer’s base, ensuring a snug fit. To prevent shifting over time, attach adhesive-backed pads or small brackets to secure the divider in place—this is crucial if your drawer gets frequent use. I once left the divider loose, and utensils kept jamming into each other, disrupting the entire setup. Fixing it with non-slip pads made a noticeable difference in stability.
Design Compartments for Different Utensil Types
Arrange your cuts into sections dedicated to forks, knives, spoons, and gadgets. Think of it as creating mini-closets within your drawer, which maximizes both space and efficiency. For instance, a shallow compartment for small utensils prevents them from slipping to the back, much like how zone-based storage works in custom cabinets. This organization method reduces clutter and saves time when cooking.
Implement Adjustable and Flexible Elements
If your utensils vary significantly in size, incorporate adjustable dividers made from sliding tracks or removable panels. I added magnetic strips to certain compartments to keep metal tools upright, which kept everything neat and accessible. The ability to tweak compartments as your collection changes means your storage solution remains functional without frequent overhauls. Want more innovative ideas? Visit smart storage solutions for small kitchens.
Maintain and Tweak Your Setup Regularly
After installing your custom divider, step back and evaluate ease of access and overall organization—think of it as fine-tuning a piece of furniture. Periodically remove and clean the sections to prevent buildup of debris or grease. Small adjustments, like adding extra compartments or resizing existing ones, can prevent clutter from creeping back, much like customizing built-ins to fit your evolving needs. For ideas on elevating your storage, explore built-ins and storage hacks.
When it comes to integrating built-ins and custom cabinets into a kitchen remodel, many assume that following popular design trends guarantees success. However, as an expert in kitchen organization and renovation, I’ve observed subtle pitfalls that can sabotage even the most well-intentioned projects. One common myth is that larger, more elaborate storage solutions automatically improve functionality. In reality, overbuilt or overly complicated systems often lead to clutter and underuse. A study by the National Kitchen & Bath Association emphasizes that excellent design hinges on user-specific needs rather than sheer size or complexity.
Why do some seemingly perfect built-in plans fail in practice?
Often, it’s due to neglecting the nuances of your home’s architecture and daily routines. For example, installing a spacious pantry without considering door clearance can hinder accessibility and cause frustration. Similarly, placing tall, narrow cabinets without adjustable shelves can limit usability for items of varying sizes. Advanced homeowners and designers recognize that a successful built-in combines precise measurements, flexible features, and an understanding of movement flow within the space. Failing to do so can result in drawers that jam or cabinets that remain underutilized. I advise reviewing your plans meticulously and consulting with a pro who understands these subtle dynamics—such as those found in expert articles on intelligent storage. Another mistake is overlooking the importance of acoustic and thermal zoning, which can affect noise levels and temperature fluctuations in appliances stored within cabinets. Consider your home’s insulation and the proximity of noisy appliances, and design accordingly. Incorporating these advanced considerations ensures your built-ins enhance both aesthetics and practicality. Don’t underestimate the value of detailed planning; small oversights can lead to costly modifications later. For innovative ideas that go beyond basic planning, explore custom cabinet ideas that elevate your home’s style. Remember, creating a seamless, functional kitchen demands attention to these finer details—it’s within these nuances that true quality lies. Have you ever fallen into this trap? Let me know in the comments.Maintaining your custom storage and built-ins over time is vital to ensuring their longevity and continued functionality. I rely on a few key tools and methods that have proven invaluable in my ongoing kitchen remodel projects. First, a high-quality multi-bit screwdriver allows me to adjust and tighten hinges, pulls, and fasteners effortlessly—keeping cabinets and drawers smooth and secure. For precision alignment, I use a digital laser level, which ensures everything remains perfectly straight, especially after seasonal shifts or settling. Regularly checking and adjusting these components prevents issues before they escalate, saving you money and frustration.
To keep your storage solutions looking their best and functioning smoothly, I recommend applying a coat of silicone-based lubricant to drawer slides and hinge pivots every six months. This simple step reduces squeaking and sticking, extending the life of your hardware. Additionally, clean your cabinet interiors with a gentle, non-abrasive cleaner to prevent buildup of grease or dust that can hamper movement or cause staining.
When it comes to software, I swear by design tools like SketchUp or CAD programs tailored for cabinetry planning. These allow me to simulate and tweak storage configurations virtually, preventing costly mistakes and ensuring everything fits perfectly during installation. Using these tools also helps in scaling plans for future expansion, which is increasingly relevant as homeowners look to adapt their spaces over time.
Now, where do I see this trend heading? The future of kitchen storage is undoubtedly leaning toward smart, automated solutions. Imagine drawers that open with a simple voice command or sensors that alert you when a cabinet needs tidying—these innovations could revolutionize how we approach everyday organization.
Curious about how to keep your built-ins in top shape? Make it a habit to inspect and tighten hardware quarterly, and consider investing in a quality lubricant. A straightforward tip like this can drastically improve the lifespan of your storage investments. Want more tailored advice? Visit our contact page to get personalized recommendations for your remodel project.
What I Wish I Knew Before Starting My Built-In Journey
One of the toughest lessons I’ve learned is the importance of meticulous planning—sketching out every detail before cutting a single piece. Rushing into a remodel without understanding the subtle nuances of your space can lead to costly mistakes and frustration. Remember, small miscalculations in measurements can cascade into larger setbacks, so take your time to measure twice and plan thoroughly.
Another lightbulb moment was realizing that quality hardware often makes the biggest difference in longevity and smooth operation. Investing in high-quality, adjustable hinges and slides has saved me countless headaches down the line, ensuring my custom cabinets remain pristine and functional for years.
Tools and Resources That Transformed My Approach
For me, the game-changer was expert tips on selecting storage solutions—guidance that helped me understand how to optimize every inch of my space. Additionally, using modern kitchen remodel ideas provided inspiration and practical insights into blending aesthetics with function.
My favorite planning software, like SketchUp, allowed me to virtually simulate the layout before any physical work began. This step prevented errors, saved money, and gave me confidence that my vision would come to life just as I imagined.
Empowering Your Kitchen Transformation Starts Today
Taking control of your built-in and custom cabinet projects can be incredibly rewarding—your kitchen can truly become a haven tailored perfectly to your needs. Embrace the process, trust your planning, and don’t be afraid to incorporate innovative solutions. Now is the time to turn your dream space into reality with the right knowledge and tools.
Have you ever hesitated to start a custom storage project because of uncertainty? Share your experiences or questions below—let’s build better kitchens together!