Why You Should Never Use Standard Wood Screws for Cabinet Installation
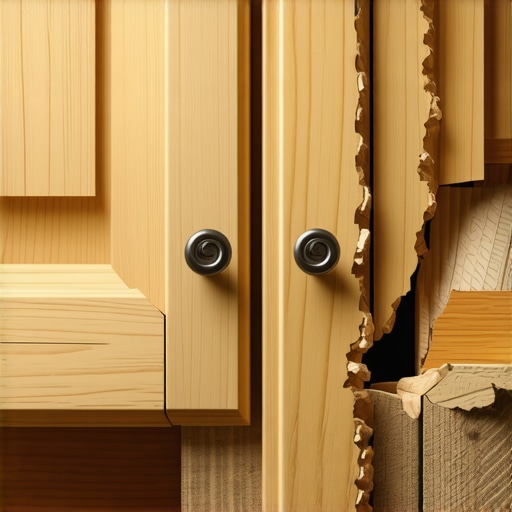
It was a moment of kitchen chaos that finally made me question everything I knew about cabinet installation. As I watched the entire wall of newly hung cabinets wobble and sway after a few weeks, I realized I had made a simple but costly mistake: I used standard wood screws. That lightbulb moment told me that not all screws are created equal—especially when it comes to securing something as important as your built-ins or custom cabinets. Today, I want to share my experience and show you why relying on standard wood screws might be a mistake, and what you should do instead to ensure your cabinets stay secure and functional for years to come.
Choosing the right fasteners can make or break your cabinet project
When I first started my kitchen remodel, I assumed that any screw labeled “wood screw” would do the job. How wrong I was. From my own blunder, I learned that using standard screws can lead to sagging, loosening, and even structural damage over time. Cabinets are heavy, and the constant opening and closing, as well as the weight of stored items, demand something more robust and reliable than the typical hardware store options. Trust me, the extra effort to select specialized fasteners is a small price to pay for peace of mind.
If you’re considering a kitchen upgrade or installing built-ins, this initial investment in proper hardware can save you countless headaches later. Once I switched to screws designed specifically for cabinet applications, the difference was immediately noticeable. My cabinets felt sturdy and stable, ready to handle daily use without squeaks or wobbles.
A mistake I made early on was underestimating the importance of the right fasteners. I thought all screws would hold equally well—but that’s simply not true. The wrong screws can compromise the integrity of your cabinetry, causing misalignments and even damage to delicate materials. To prevent that from happening to your project, I recommend consulting expert sources, like [Artisan Cabinetry Expert Tips](https://artisancabinetworkz.com/expert-tips-on-selecting-storage-solutions-for-a-perfect-kitchen-upgrade), which emphasize the importance of hardware suited specifically for cabinetry.
Are you tired of dealing with wobbly cabinets or cabinets that seem to come apart at the worst moments? If so, keep reading. I’ll walk you through the types of fasteners you should be using and how to choose them for your unique project. Proper hardware matters—more than you might think—and it could be the difference between a kitchen that lasts a lifetime and one that falls apart after a few years.
Let’s get started on ensuring your cabinets are built to last, not just to look good on day one.
Identify the Load and Use Cases for Your Cabinets
Before diving into hardware options, assess what your cabinets will carry and how they’ll be used. Heavy-duty storage or frequent opening demands require more robust fasteners. I once installed a set of built-ins designed for a laundry room, which held heavy detergent bottles and cleaning tools. Choosing screws with higher shear strength prevented wobbling and future repair needs.
Choose the Correct Screw Material and Finish
Screw materials impact durability; stainless steel or coated zinc screws resist rust and corrosion, especially in humid kitchens. For my own kitchen upgrade, I replaced generic steel screws with stainless steel ones, ensuring longevity regardless of moisture exposure—much like selecting marine-grade hardware for outdoor furniture.
Pick the Right Screw Type and Head Style
Use screws designed specifically for cabinetry—preferably cabinet-specific screws with fine threads for better grip. Avoid coarse-threaded drywall or lag screws, which can crack delicate materials. I opted for #8 or #10 star-drive screws for best grip and easier installation, minimizing stripping and slip-offs, especially when working overhead or detailing tight corners.
Determine Appropriate Length and Diameter
The screw length should penetrate the material at least 1-1.5 inches into the support structure. For wall cabinets, I measured precisely, using 2-3 inch screws for 3/4-inch thick cabinet frames. Using too short screws leaves the structure insecure, while too long can puncture through the other side—making careful measurements essential.
Utilize Pilot Holes and Spacers
Drill pilot holes slightly smaller than the screw diameter to prevent wood splitting. When installing adjustable shelving, I used plastic spacers to maintain uniform distances, which ensured smooth, aligned doors and drawers. Proper pre-drilling also makes insertion easier and reduces screw cam-out.
Implement Proper Fastening Techniques
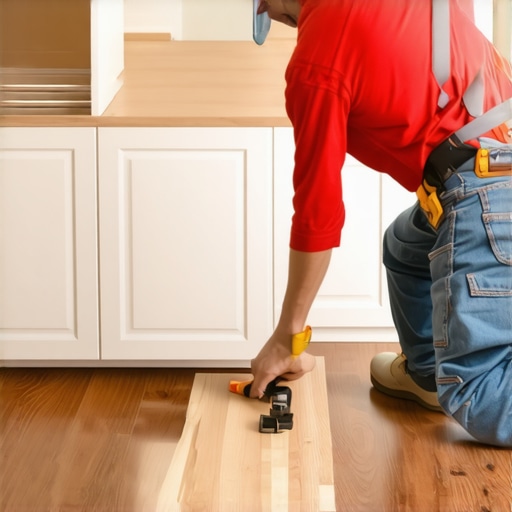
Consistent driving speed and steady pressure yield tight, flush connections. I held my drill perpendicular to the surface to avoid angled screws that compromise stability. Using a countersink bit allows screw heads to sit flush or below the surface, providing a cleaner finish and preventing snagging during use.
Account for Structural Reinforcements
In high-stress areas, reinforce with metal brackets or corner blocks to distribute weight. For my recent project, I installed metal L-brackets behind heavy wall cabinets, which prevented sagging over time, extending their lifespan significantly.
Test and Adjust After Installation
Once all fasteners are in place, open and close doors and drawers to check for smooth operation. Tighten any loose screws and replace damaged ones immediately. I once noticed a slight wobble in a cabinet door, which I resolved by repositioning a screw and installing a new, longer one for a more secure hold.
For more insights on modern kitchen upgrades and detailed hardware tips, visit this expert guide to ensure every component supports your project’s success. Remember, investing in the right fasteners now saves you from future frustrations and costly repairs down the line.
Many homeowners operate under the assumption that choosing standard-sized cabinets and off-the-shelf storage options will suffice for a customized, functional kitchen. However, this mismatch often leads to overlooked nuances that can sabotage even the most well-designed remodel. One prevalent myth is that custom cabinets are only about aesthetics; in reality, they’re an extension of an intricate process involving precise measurements, material selection, and tailored hardware that must work in harmony for optimal performance. Relying solely on generic solutions neglects the importance of these details, which can result in wasted space, poor ergonomics, and costly adjustments down the line.
Let’s challenge the misconception that one-size-fits-all storage solutions are adequate, especially in complex layouts. For instance, many assume that deep shelves and wide drawers will accommodate everything, but without considering item size variations and usage frequency, these features become inefficient. An advanced mistake is ignoring the importance of detailed workflow analysis during planning, which ensures that every tool, utensil, and ingredient has a dedicated, accessible spot—significantly improving daily efficiency.
What often escapes notice is the subtlety of material choice and finish that influences durability and maintenance. Homeowners frequently select finishes based on appearance alone, overlooking how certain woods, veneers, or laminates respond to humidity, heat, and wear. As expert cabinetmakers warn, choosing materials with a low durability profile can lead to warping, staining, or delamination in as little as a few years, especially in kitchen environments.
From an advanced perspective, the benefits of integrated features like built-in charging stations, concealed trash bins, or custom spice racks are sometimes underestimated or viewed as mere luxury upgrades. Yet, these innovations stem from a nuanced understanding of space utilization and user habits, transforming ordinary kitchens into seamless, intelligent work areas. Incorporating such elements requires meticulous planning and expertise, often overlooked by DIY enthusiasts who underestimate the complexity involved.
For a deeper dive into how these subtle but vital choices can elevate your project, explore Artisan Cabinetry’s comprehensive guides on seamless storage solutions or expert tips on selecting the right storage. Recognizing and avoiding these common pitfalls truly makes the difference between a forgettable renovation and a lasting, personalized masterpiece.
Have you ever fallen into this trap? Let me know in the comments.
Mastering Long-Term Care for Your Cabinets and Storage Solutions
After investing significant time and resources into custom cabinetry and built-ins, maintaining their appearance and functionality becomes crucial. Regular upkeep not only preserves their aesthetic appeal but also extends their lifespan. One of the most effective approaches involves using specialized tools and proven methods that make upkeep manageable and efficient.
I personally rely on a combination of precision tools and advanced cleaning techniques to keep my cabinets looking pristine. For instance, a soft-bristle detailing brush, like the OXO Good Grips Precision Brush, proves invaluable for reaching into grooves and corners, removing dust and debris without scratching surfaces. Additionally, a microfiber cloth paired with a gentle, pH-balanced cleaner helps maintain the finish without stripping protective coatings.
When it comes to hardware, employing a small rubber mallet is excellent for gently realigning doors or drawers that drift over time. For hinges and slides, I recommend applying a high-quality lubricant like dry silicone spray to ensure smooth operation and prevent squeaks. Regularly inspecting hardware for signs of wear and promptly tightening loose screws prevents sagging or misalignment.
Enhancing long-term results involves adopting a scheduled maintenance routine. I set aside a quarterly date to inspect, clean, and lubricate all moving parts. This proactive approach catches minor issues before they escalate into costly repairs, saving both time and money. Moreover, investing in protective finishes, such as matte or semi-gloss polyurethanes, can shield surfaces from moisture and scratches, especially important in humid kitchen environments.
Tools I Recommend for Optimal Maintenance
For routine care, I recommend keeping a set of quality screwdrivers and a magnetic bits holder—these simplify adjusting or tightening hardware without stripping screws. A vacuum with a soft brush attachment is also essential for removing dust from vents and tight spots. If your cabinets feature glass or delicate finishes, a specialized cleaning sponge can prevent smudges and fingerprints.
Looking ahead, I predict that advancements in smart cleaning systems and automated maintenance will become more prevalent, potentially integrating sensors that alert homeowners to hardware issues or finish wear. Embracing these innovations now can set the stage for a truly maintenance-free kitchen in the future.
How do I maintain my custom cabinets over time?
Start by establishing a routine of gentle cleaning with appropriate tools and keep an eye on hardware. Regular inspections and lubrication prevent misalignments, while protective finishes and strategic repairs maintain their appearance. Incorporate high-quality, specialized equipment, and consider scheduling professional check-ups for more complex issues—much like how dedicated maintenance is key to preserving a high-end vehicle’s performance.
If you’re ready to elevate your maintenance game, try using a dry silicone spray on hinges and slides regularly. It’s a small but impactful step that keeps everything moving smoothly and prolongs the life of your cabinetry. For more expert insights, visit this guide on creating durable kitchen upgrades.
The Hardest Lesson I Learned About Custom Cabinets and Storage Solutions
One of the most valuable insights I gained was the importance of precision in hardware selection. Early in my projects, I underestimated how a small detail—like screw type—could dramatically impact longevity. Misjudging this led to wobbly cabinets, teaching me that expert-level results hinge on paying attention to the tiniest components.
Secrets That Changed My Approach to Kitchen Remodels
- Choosing the right fasteners isn’t just a detail—it’s the backbone of long-lasting craftsmanship. I now always opt for screws specifically designed for cabinetry, which hold up better under daily use.
- Understanding material interactions, like moisture-resistant finishes and hardware, helps me select components that resist wear and tear, especially in humid environments.
- Pre-planning for structural reinforcements with metal brackets or reinforced joints can prevent sagging over time, saving me from costly repairs down the line.
Tools and Resources That Elevate My Work
- Creating seamless storage solutions guide: This resource provides innovative ideas for integrating technology and aesthetics seamlessly into my cabinetry projects, ensuring both form and function are optimized.
- Expert tips on selecting storage solutions: Trusted advice that sharpens my decision-making process, highlighting the nuances between different hardware materials and configurations for durability.
- Modern kitchen remodels inspiration: Showcases current trends and innovative techniques that keep my projects fresh and up-to-date with design evolution.
Your Move to Lasting Results Starts Today
Choosing quality custom cabinets and storage solutions isn’t just about aesthetics—it’s about creating spaces that endure. Armed with the right knowledge and tools, you can turn your renovation dreams into reality. Don’t wait until minor issues turn into costly repairs; start applying these insights now and transform your kitchen into a durable masterpiece.