The Mudroom Shoe Pile Fix: Vertical Cubbies with Mesh Backs
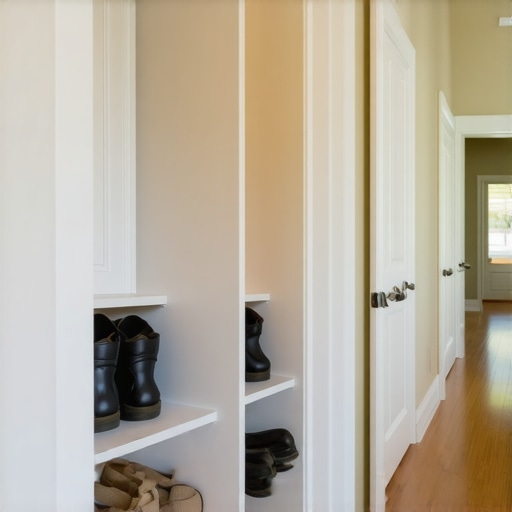
Imagine this: you open your mudroom closet after a long day, only to be greeted by a chaotic jumble of shoes, boots, and backpacks spilling over every shelf and corner. It’s a familiar scene for many homeowners, myself included. I used to dread the mess, feeling overwhelmed every time I stepped into the space that should be the first welcoming stop for family and guests. That lightbulb moment hit when I realized the problem was not a lack of storage but rather the way I was organizing it. Traditional cubbies and shelves just weren’t cutting it—they often led to more clutter and frustration.
Why Your Mudroom Deserves a Makeover with Vertical Cubbies and Mesh Backs
Taking control of a messy mudroom transformed my daily routine. It’s incredible how simple changes can make a huge difference. Today, we’re going to explore how incorporating vertical cubbies with mesh backs can revolutionize your space, making it practical, stylish, and easy to maintain. I promise, with a little planning and the right design choices, you can say goodbye to shoe chaos and hello to an organized oasis that welcomes you every day.
Is Mesh Backed Cubbies Really Worth the Hype
Initially, I was skeptical about mesh backs—would they hold up? Would they look good over time? My early mistake was assuming that all storage solutions are created equal. I chose solid backs for simplicity, but I quickly learned that mesh allows for better airflow—crucial for wet or muddy shoes—and makes the space feel lighter and more open. Research shows that better ventilation can also prevent musty odors and mold, especially in humid climates. Trust me, investing in mesh-backed cubbies isn’t just about aesthetics; it’s about creating a healthier, more efficient space.
If you’ve ever suffered from a cluttered mudroom that seems impossible to tame, you’re not alone. The good news is that incorporating vertical cubbies with mesh backs offers a straightforward and effective solution. Ready to learn how to implement this upgrade in your own home? Let’s dive into the steps to create a mudroom that works harder, looks better, and keeps your family organized.
Plan Your Layout Carefully
Start by measuring the available space in your mudroom, focusing on height, width, and depth to maximize vertical storage. Use a chalk line to mark the placement of your cubbies and ensure they align perfectly. I once sketched out several layout options on scrap paper before settling on the most efficient configuration, which saved me time during installation. Consider grouping shoes, backpacks, and outdoor gear separately to streamline access and organization. For detailed insights on custom storage planning, check this storage solutions guide.
Select Durable Materials and Hardware
Opt for high-quality plywood or MDF with a moisture-resistant finish, especially in humid climates. Choose mesh backs made from galvanized steel or powder-coated wire for longevity. Use heavy-duty screws and brackets rated for your wall material—wood studs or concrete—to ensure stability. When I installed mine, I used a stud finder and secured brackets directly into wall studs, which made the installation remarkably sturdy and prevented wobbling. Remember, investing in durable hardware now prevents costly repairs later. For hardware options, browse this hardware troubleshooting resource.
Build and Assemble the Cubbies
Construct the cubbies using your chosen materials, making sure to cut the panels precisely with a circular saw or table saw for clean edges. Use dado joints or corner brackets for added strength—think of it as framing a picture but in three dimensions. Assemble each unit on a flat surface, checking measurements twice before securing with screws. I once misaligned a panel, which caused a gap; a quick readjustment and some filler resolved it. Remember, precision in measuring and cutting is key to a professional finish. For step-by-step assembly tips, see this assembly guide.
Attach the Cubbies Securely to Your Wall
Locate wall studs using a stud finder, then mark their positions. Drill pilot holes through the back panels of your cubbies into the studs, and secure each unit with long, sturdy screws. This method ensures your cubbies can handle the weight of heavy boots and outdoor gear without sagging or falling. When I installed mine, I used a level to keep everything perfectly aligned; a slight tilt would have made the entire unit look amateurish. For extra stability, add additional brackets along the sides. For professional mounting techniques, visit this mounting tips article.
Finish with Ventilated Mesh Backing
Cut your mesh panels to fit the back of each cubby, securing them with staples or small finish nails along the edges. Mesh allows air circulation, preventing dampness and odors—crucial for wet or muddy shoes. I found that a simple staple gun made the job quick and tidy, while screws were too visible. Be cautious to pull the mesh tight while attaching to prevent sagging. Once secured, paint or seal the wood to match your aesthetic, enhancing durability and style. For design inspiration and finishing ideas, explore this built-in showcase. This step-by-step approach transforms your chaos into an organized, functional mudroom, making daily routines smoother and more pleasant.Many homeowners assume that opting for custom cabinets automatically guarantees flawless design and lasting quality, but the reality is more nuanced. A widespread myth is that customizing always involves elaborate, expensive features—yet, in practice, overspending on unnecessary embellishments can backfire, leading to cluttered aesthetics and inflated costs. Understanding the balance between aesthetics, functionality, and budget is crucial; for instance, selecting **overly complex hardware** or ornate finishes without considering daily use can result in premature wear and difficulty in maintenance. These choices often seem attractive initially but may introduce unforeseen problems over time.
One overlooked aspect in custom storage solutions is the importance of **proper space planning**. Common mistakes include underestimating clearance for opening doors or drawers or neglecting accessibility for users with mobility challenges. For example, installing upper cabinets too high or designing deep drawers without organizing strategies can impede usability, negating the benefits of customization. Experts emphasize that meticulous planning considering ergonomic principles results in more sustainable and satisfying outcomes—look into this detailed guide on storage planning.
Have you ever fallen into this trap? Let me know in the comments.
Are Built-ins Overhyped or Underused in Modern Homes?
Contrary to popular belief, built-in features are not a cure-all for home storage issues. Many homeowners assume that built-ins automatically add value or style, but without thoughtful integration, they can become eyesores or restrict future flexibility. For example, fixed cabinetry that doesn’t account for evolving needs or furniture movement can limit your room’s functionality over time. Moreover,-installing built-ins without proper support or ventilation can lead to durability issues, such as warping or mold growth. A recent study highlights that adaptable and modular storage options often outperform rigid built-in solutions in terms of longevity and satisfaction—in fact, [pertinent research](https://artisancabinetworkz.com/modern-kitchen-remodels-featuring-custom-cabinets-and-built-ins) underscores the importance of flexibility.
The secret lies in customizing with intent—designing built-ins that can be adjusted or reconfigured as your needs change, rather than committing to permanent, one-size-fits-all solutions. This approach can help avoid costly renovation cycles later on. If you’re considering a remodel, check out our latest article for innovative ideas.
Remember, in the world of custom cabinetry, less can sometimes be more—prioritizing smart design choices over flashy features often yields the most satisfying results. Don’t forget to review your layout carefully and avoid common traps that can diminish your home’s functionality. Want to ensure you’re making the right choices? Contact us through our consultation page for expert guidance.Maintaining your custom cabinets and storage solutions requires more than just occasional cleaning; it involves the right tools and a strategic approach to ensure long-term durability and functionality. Personally, I rely on a few key tools that have proven invaluable over the years, especially when it comes to touch-up work, hardware adjustments, and even minor repairs. One tool I consistently recommend is a high-quality cordless multi-tool, like the Dremel Multi-Max. Its versatility allows me to sand down rough edges, tighten loose joints, or even cut in tight spaces without dismantling entire sections. Recognizing the importance of precision, I also keep a set of micro screwdrivers and the right-sized Allen wrenches—these are essential for adjusting European hinges or replacing hardware, which inevitably loosens over time.
To keep everything running smoothly, I schedule regular inspections of hinges, drawer slides, and soft-close mechanisms. Using a small tube of silicone lubricant, I apply a dab to the hinges and sliding tracks every six months. I’ve found that this simple step prevents squeaking and keeps the mechanics functioning flawlessly. For cabinetry with soft-close features, checking alignment periodically ensures they engage properly, preventing slamming and undue wear. A detailed guide on maintaining hardware can be found in this expert resource, reminding us that preventive care extends the lifespan of our investments.
When it comes to deeper cleaning, I recommend using warm water mixed with a mild, pH-balanced cleaner, and soft microfiber cloths. Avoid harsh chemicals that can damage finishes. A tip I swear by is to keep a small container of touch-up stain or finish—this allows quick corrections if your cabinets develop minor scratches, especially in high-traffic areas.
What about software and digital tools? I use CAD (Computer-Aided Design) software for planning remodels and custom storage system layouts. My go-to is SketchUp, which is highly user-friendly and offers precise measurements. It helps me visualize changes before starting construction, reducing costly errors. Plus, with project management apps like Trello or Asana, I keep track of maintenance schedules and upcoming upgrades, ensuring nothing slips through the cracks.
Prediction? The future of cabinet maintenance points toward smart tools integrated with IoT (Internet of Things) technology. Imagine hinges that send alerts when they need lubrication or software that schedules repairs automatically—this predictive maintenance will become standard, saving homeowners time and money.
How do I keep my built-in storage solutions working over time?
Regular inspections are key. Check for loose hardware, clean sliding mechanisms, and reapply lubricant when needed. Additionally, reviewing your layout and usage patterns annually can reveal if adjustments are necessary to accommodate evolving needs. For example, adding soft-close upgrades to older drawers can significantly extend their lifespan and improve user experience. I recommend trying a specialized hinge alignment tool, like the Bormasch Hinge Tuning Tool, which simplifies adjustments and ensures perfect door alignment without guesswork. Remember, the effort invested in routine maintenance not only prolongs the life of your cabinetry but also preserves its aesthetic appeal. For more detailed strategies, explore this comprehensive guide on maintaining custom cabinets effectively.
Embarking on a journey to redesign your home’s storage is both exciting and daunting. From my experiences, I’ve uncovered some invaluable lessons that go beyond the basic tutorials. One of the biggest revelations was realizing that quality installation often trumps fancy design features. Genuine craftsmanship and attention to detail make or break the final look and longevity of your custom cabinets. Moreover, I learned that a well-thought-out space plan isn’t just a blueprint—it’s the backbone of a successful remodel. Rushing through measurements or neglecting ergonomic considerations can lead to costly mistakes and frustration. Lastly, embracing the power of simplicity and smart hardware choices has saved me headaches and boosted durability, proving that less often is more in design and function.