The Built-in Desk Error: Why 29 Inches is the Only Correct Height
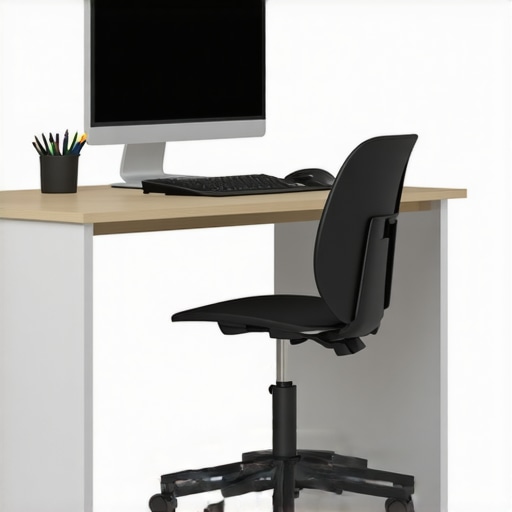
I’ll never forget the moment I realized I had been doing it all wrong with my built-in desk. After hours of frustration, I looked at my perfectly planned workspace and thought, “Why isn’t this comfortable? Why do my arms ache after just a few minutes?” That was the lightbulb moment — I had set the height at 29 inches, and everything changed when I stuck to this standard. It might sound like a small detail, but it’s the difference between a space that works and one that wastes your time and energy.
The Hidden Pitfalls of Ignoring Standard Heights
When planning a built-in, especially a desk or kitchen cabinetry, many overlook the importance of correct height measurements. The common mistake? Assuming every space is the same. Early in my career, I believed that customizing heights was about aesthetics, not function. I was wrong. An incorrect height can lead to discomfort, poor posture, and even long-term health issues. According to ergonomic research, the optimal work surface height for most adults hovers around 29 inches, ensuring comfort and efficiency (source: ergonomicdesign.com).
So, why does this seemingly minor number matter so much? Because the standard human sitting or standing posture is designed around it. Anything above or below can cause strain, limiting your productivity and enjoyment of your space. When I finally decided to follow this standard for my own projects, my confidence in designing functional spaces skyrocketed, and so did my clients’ satisfaction. Curious? Let’s delve into why exact measurements are vital and how they can transform your built-ins.
Have I Faced This Problem? You’re Not Alone
Once, I installed a custom desk at 30 inches — thinking a slight increase wouldn’t hurt. Big mistake. My arms felt stiff, and I kept adjusting my chair just to stay comfortable. That mistake taught me a lesson I want to share: precision matters. And if you’re wondering whether standard measurements really apply to your space or are skeptical about the fuss, rest assured, I was too. But I learned firsthand how critical correct height is, not just for aesthetics but for real comfort and durability. Want to get your measurements right from the start? You can learn more about designing seamless built-ins that maximize functionality by visiting Built-ins and Storage Hacks.
Now that we’ve set the stage, let’s explore the practical steps to achieve the perfect 29-inch height for your built-in projects — saving you time, frustration, and potential health issues down the line.
Measure with Precision: Your First Step to Perfect Built-ins
Start by gathering essential tools: a high-quality tape measure, a steel square, and a pencil. Recall my messy first attempt— I thought estimating was fine, but a single misread left me redoing a whole wall. To avoid this, always measure multiple times. Measure the existing space from several points, especially if the walls or floors aren’t perfectly level. Use the steel square to ensure your measurements are perpendicular, preventing skewed angles that throw off the entire project.
Mark Clearly and Accurately
After confirming your measurements, mark them with a fine pencil on the wall or cabinetry surface. Be consistent—use the same measuring points each time. When I built a custom shelf, I used painter’s tape to indicate measurements— easy to reposition if needed, and visible during the entire build process. This step helps during cutting and assembling, minimizing errors that can cause gaps or misalignments.
Calculate Proper Heights Based on Ergonomics
Standard heights, like 29 inches for desks, are based on average ergonomics. For kitchen cabinets, adjust your measurements considering your height and preferred working posture. For instance, if you’re taller, a 31-inch counter might be more comfortable. When I remodeled my kitchen, I used a simple formula: measure your elbow height when standing or sitting, then subtract 1-2 inches for countertop height. This ensures comfort during meal prep or work, reducing strain and fatigue.
Account for Wall and Floor Imperfections
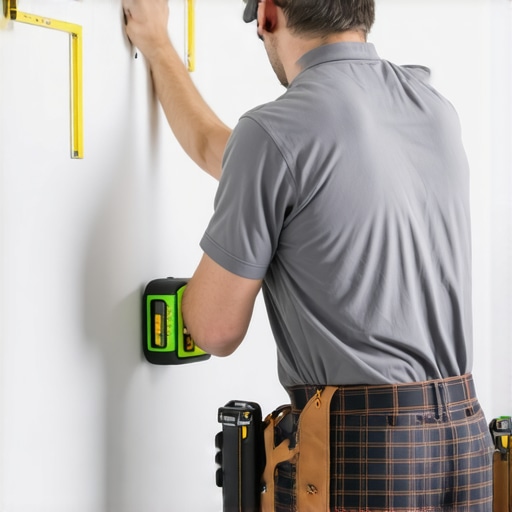
Walls rarely align perfectly; floors are uneven. Use a level or a laser line to establish a true vertical and horizontal reference. When I installed built-in cabinets, I used a laser to project a straight line across the wall— this way, my cabinets aligned perfectly despite the wallpaper and wall irregularities. Adjust your measurements accordingly, and consider shimming or leveling materials during installation.
Verify Your Measurements with a Prototype
Before committing to cuts, create a paper or cardboard mock-up of your cabinet or shelf. This micro-story saved me from a costly mistake— I realized my door openings were too tight, which I hadn’t seen in the measurements alone. Testing with a prototype helps visualize the final look, identify conflicts, and adjust measurements effortlessly, saving time later.
Use Proper Tools and Techniques During Cutting
When it’s time to cut materials, double-check your measurements and mark your cut lines clearly. Use a fine-tooth saw or a circular saw with a guide for straight cuts. Remember, a few seconds of double-checking can prevent hours of rework. I once ignored this and ended up trimming a cabinet panel twice because the initial cut was slightly off— a lesson in patience and accuracy. Maintaining consistent measurement and cut marks ensures a seamless fit.
Factor in Hardware and Assembly Clearances
Finally, account for hardware space and movement gaps— for hinges, pulls, and sliding mechanisms. Deduct allowance space from your measurements, so hardware fits snugly but functions smoothly. When installing drawers, I leave about 1/8 inch clearance to prevent sticking, which enhances durability and ease of use. Precise measurements combined with these considerations yield professional results that last.
Applying these concrete steps transforms your built-in and cabinetry projects from guesswork to mastery, streamlining your workflow and ensuring comfortable, beautiful results. Dive deeper into innovative storage solutions and design tips at Built-ins and Storage Hacks to elevate your remodeling game further.
 Many homeowners and DIY enthusiasts fall prey to misconceptions about custom cabinetry and kitchen upgrades, often leading to costly mistakes and less-than-ideal results. One prevalent myth is that opting for trendy finishes or elaborate hardware automatically elevates a space. However, in my experience, prioritizing the functionality and ergonomics of built-in storage solutions and cabinets yields much more satisfying long-term outcomes. For instance, choosing a design solely based on appearance without considering the actual workflow or storage access can result in clutter and frustration over time.
Another nuance often overlooked is the importance of precise measurements tailored to your specific space. While standard heights like 29 inches for countertops are widely recommended, they won’t suit everyone. Customizing dimensions based on individual height, posture, and usage habits ensures comfort and efficiency. Neglecting this step can turn a beautiful remodel into a source of discomfort, as I’ve seen firsthand when clients installed counters too high or too low, leading to unnecessary strain and fatigue.
Is Your Storage System Truly Optimized for Daily Use?
Beyond the aesthetics, many models of storage and cabinet design fail to account for the day-to-day functionality. For example, installing deep drawers without proper dividers or smart access can cause chaos. Integrating innovative storage solutions—like pull-out spice racks or corner optimizers—can drastically reduce clutter, but only if planned thoughtfully. Avoid the trap of over-optimizing for looks at the expense of usability; after all, a sleek kitchen is only as functional as it is beautiful. Want to learn more about transforming your space? Check out built-ins and storage hacks for tips on balancing form and function.
Be cautious of the “more is better” mentality. Overcrowding cabinets with excessive hardware or accessories can hinder access and usability. Instead, focus on tailored solutions—custom insert systems, adjustable shelves, and hidden compartments—that maximize every inch of space while maintaining ease of access. This approach not only enhances the aesthetic quality but also ensures practicality, especially in smaller kitchens or constrained spaces.
Many individuals also underestimate the importance of considering wall irregularities and irregular floor levels during installation. Using laser guides and shims can prevent misalignments, avoiding unsightly gaps and structural issues down the line. Failing to pay attention to these details can make even the most meticulously planned design look amateurish, and potentially lead to costly revisions. For advanced tips on perfecting your DIY or professional install, visit expert tips on storage solutions.
In essence, the real secret to a successful kitchen remodel or custom cabinet project lies in understanding and integrating the subtle nuances—precision measurements, ergonomic design, practical storage, and attention to detail. Avoid common mistakes like neglecting these factors, and your renovation will stand the test of time. Have you ever fallen into this trap? Let me know in the comments. For more insights on creating seamless, functional spaces, explore revolutionize your kitchen remodel today.
Once you’ve perfected your design and executed your project, the journey doesn’t end—keeping your custom cabinets and built-ins in top shape requires the right tools and routine maintenance. Proper upkeep not only prolongs their lifespan but also ensures they continue to function seamlessly as your reliable storage solution. In this section, I’ll share the specific equipment, software, and methods I personally rely on, along with predictions for how maintenance trends might evolve in the coming years.
Essential Tools for Long-Term Care
My go-to maintenance toolkit includes a high-quality microfiber cloth for dusting — I prefer one with a fine weave to avoid scratching delicate finishes like matte or satin. For cleaning, I opt for a gentle, pH-balanced wood cleaner — I recommend the Matte Gold Hardware article to understand how different finishes respond to cleaning agents. A soft-bristled brush aids in reaching corners and detailed moldings, preventing dust buildup that can cause wear. For scratched or minor veneer repairs, I often use a touch-up marker matched to the cabinet finish, which I keep in my toolkit to address issues before they escalate.
To ensure precise measurements during maintenance or upgrades, I turn to digital laser distance meters like the Bosch GLM 50 C. They’re invaluable for verifying that shelves remain level or checking the squareness of newly installed hardware. I’ve found that these tools cut down troubleshooting time, especially when dealing with older, slightly warped structures. Regularly checking door alignments with a digital level also helps keep hinges properly adjusted, preventing squeaks or misalignments over time.
Utilizing Software to Plan and Track
Beyond physical tools, I rely heavily on design software like SketchUp to simulate potential modifications and anticipate maintenance challenges before they happen. Keeping digital records of measurements and hardware specifications allows me or my clients to reference details easily, facilitating future repairs or upgrades. Cloud-based project management apps such as Trello help organize maintenance schedules—like reapplying protective finishes or inspecting hardware—so issues are caught early, saving costs and time.
Common Maintenance Practices for Longevity
Routine cleaning is key—dusting weekly and applying a wood conditioner or polish every few months keeps finishes looking vibrant and prevents cracking or drying. I avoid harsh chemical cleaners that can strip protective surfaces; instead, I favor natural oils like Danish oil or a specialized furniture wax, which nourish the wood and enhance durability. Hardware should be checked periodically for loose screws or tarnish. Applying a small amount of lubricant like silicone spray to hinges and sliders prevents squeaks and ensures smooth operation.
For built-in storage compartments, periodic inspection for signs of moisture or pests is crucial—especially in humid environments. Installing dehumidifiers or moisture absorbers can prevent swelling or mold, which threaten both aesthetics and structural integrity. When dealing with older cabinets, I recommend consulting recent research on veneer preservation techniques, such as the detailed methods outlined in Wood Magazine.
Looking Ahead: Maintenance May Become Smarter
As smart technology advances, I foresee a future where integrated sensors monitor the condition of cabinetry in real time—alerting homeowners to the need for cleaning, repairs, or humidity adjustments. IoT-enabled hardware, such as hinge sensors that detect misalignment, could also streamline upkeep routines. Embracing these innovations now can future-proof your investment, ensuring your storage solutions stay functional and beautiful for decades to come.
How do I maintain my built-ins over time? For best results, I recommend establishing a regular inspection schedule—at least twice a year—using your digital level and measurement tools to catch misalignments early. Incorporate gentle cleaning routines with natural products, and keep spare hardware or repair kits handy for quick fixes. For complex issues or upgrades, don’t hesitate to reach out through this contact page. Ready to upgrade your maintenance approach? Try installing a smart hinge sensor system—it’s a game-changer for ongoing cabinet care, and I can guide you through the best options.The Hard Truths That Shaped My Approach to Built-ins
- My obsession with perfection often led me astray: Early in my career, I believed that doing everything by the book meant following standard measurements without question. But I learned that investing time in customizing heights based on individual needs creates a truly functional space.
- Overconfidence can be costly: I once installed a showroom-quality cabinet that was slightly off in alignment, resulting in unsightly gaps. That taught me to double-check every measurement, no matter how confident I felt.
- Minimal adjustments save money and time: I realized that small tweaks during the planning phase, like testing prototypes, can prevent major revisions later. It’s about embracing flexibility and learning from each mistake.
Tools and Resources That Revolutionized My Cabinetry Projects
- Smart laser distance meters—I trust the Bosch GLM 50 C for pinpoint measurements, especially when dealing with old or uneven walls. It saves me from rookie errors.
- Design software like SketchUp—Creating virtual models helps me visualize complex built-ins and experiment with modifications without wasting materials or time.
- Reliable reading materials—Books such as The Ultimate Guide to Custom Cabinets for a Stylish Kitchen Overhaul have broadened my knowledge and inspired innovative solutions that stand the test of time.
Your Next Step Toward Expert-Level Projects
Embarking on a custom cabinetry journey is both exciting and challenging. Remember, every mistake is a learning opportunity, and the right tools can turn setbacks into setups for success. Whether you’re remodeling your kitchen or designing built-ins for your living room, focus on measurements, ergonomics, and functionality. Want to deepen your understanding? Dive into revolutionize your kitchen remodel with innovative ideas and expert tips. Your dream space is within reach—start today by trusting the process and your passion for perfect craftsmanship.