How to Mount Heavy Floating Shelves Without Sagging Over Time
Ever since I installed my first floating shelf in the kitchen, I couldn’t believe how quickly it sagged under the weight of my cast iron skillets. That lightbulb moment made me realize just how tricky it is to mount heavy shelves that stay pristine and level for years. I was frustrated, constantly readjusting, and worried about potential damage to my walls. If you’ve ever faced a similar battle—struggling with shelves that can’t handle the load—you know exactly what I mean.
Why Heavy Floating Shelves Fail and How to Keep Them Strong
Heavy floating shelves are gorgeous and practical, but their secret downfall is often poor mounting methods that buckle over time. That’s why I’ve committed to learning how to secure them properly, ensuring they can support years of your cherished possessions without sagging or damaging your walls. Today, I’ll share proven techniques and insider tips to help your shelves stand the test of time. For additional ideas on transforming your space, explore custom cabinet ideas that elevate your home’s style.
Is Mounting Heavy Shelves Truly Worth the Effort?
Initially, I thought a good wall anchor was enough—but I quickly learned I was mistaken. One early mistake I made was relying solely on drywall anchors. They failed under the weight, causing my shelves to sag within months. It’s a common misstep—many underestimate the need for sturdy support when it comes to heavy-duty floating shelves. But with the right mounting techniques, you can avoid this heartbreak and keep your shelves looking perfect. To optimize your storage solutions, check out expert tips on selecting storage solutions.
Use Proper Anchors and Reinforcements
Start by selecting high-quality toggle bolts or heavy-duty wall anchors rated for the load. When I installed my own bookshelf, I initially used standard drywall anchors, which quickly failed. Instead, I drilled into wall studs whenever possible, ensuring maximum support. To locate studs accurately, use a reliable stud finder—trust me, marking the positions with a pencil keeps things precise. Remember that drywall anchors alone won’t cut it for heavy weight; combining anchors with rawl plugs and screws anchored into studs guarantees stability. For extra security, consider adding metal L-brackets underneath the shelf for additional support.
Install into Wall Studs for Maximum Support
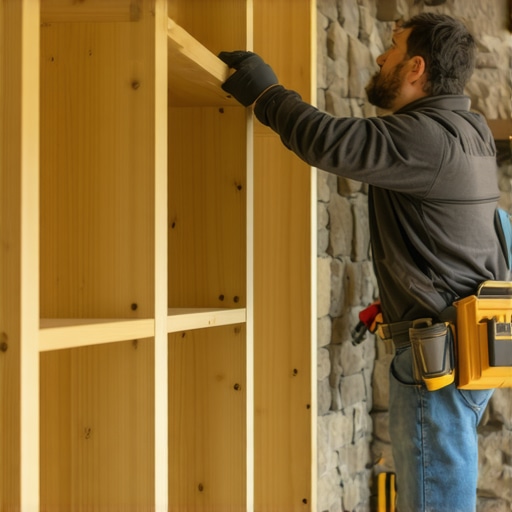
Hitting a stud is the gold standard. When I installed my living room shelves, I measured and marked stud locations meticulously—using a stud finder and a level. Once identified, I drilled pilot holes into the studs for the mounting brackets. This method transforms the shelf into a part of the wall’s structural framework, reducing sagging risk. If your wall doesn’t align with the shelf length, consider installing vertical wooden cleats across multiple studs for even weight distribution. This approach acts like a spine, supporting the entire shelf like a backbone does for a body.
Spread the Load with Solid Brackets and Supports
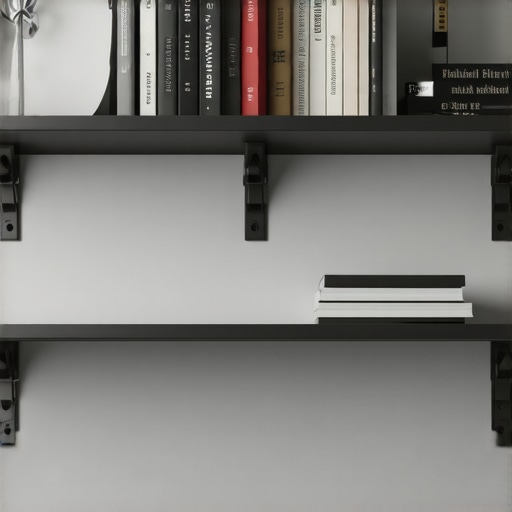
Instead of relying solely on concealed floating hardware, we used heavy-duty steel brackets hidden behind the shelf for our master bathroom. These brackets, installed into studs or with wall anchors, distribute the weight evenly and provide a secure mounting point. When I designed my kitchen built-ins, I also incorporated steel cleats attached to the wall, into which the shelves could lock. This method prevents bending and warping over time, especially when supporting heavy cast iron cookware or decorative items. Visualize the support as a strong, internal scaffolding—your shelves will thank you for it.
Choose the Right Materials and Fasteners
Material choice impacts longevity. Heavy-duty plywood or solid wood boards are less prone to warping compared to particleboard. For fasteners, use corrosion-resistant, long screws—preferably 3-inch or longer—to anchor directly into studs or reinforced supports. In my last project, I replaced flimsy screws with stainless steel lag bolts, which made a significant difference in shelf stability. Always pre-drill holes to prevent splitting, especially with hardwoods. Think of fasteners as the bones of your support system—strong, correctly placed, and durable ensures your shelves will hold for years without sagging.
Maintain Precision for Level and Even Placement
Leveling is critical. I recommend using a quality spirit level and a laser level for great accuracy. When installing my spice shelves, I marked the desired height with a pencil, then used a laser line to ensure the brackets were perfectly aligned. Small misalignments can lead to uneven loading and visible tilts over time. After mounting, double-check the level before fully tightening the screws. The effort to get it right prevents future adjustments and guarantees your heavy shelves look pristine.
Learn from My Mess and Tighten Loose Supports
In my early attempts, I overlooked the importance of tightening all fasteners thoroughly. After a few months, I noticed some sagging. Upon inspection, I realized some screws had loosened—common with vibration and weight. To fix this, I removed, tightened, and added a drop of threadlock if necessary. Regularly checking and tightening the supports ensures long-term stability. Think of it like maintaining a car—routine checks keep everything running smoothly and prevent unexpected breakdowns.
By combining these concrete steps—proper anchoring, hitting wall studs, supporting with steel brackets, choosing quality materials, and precise leveling—you’ll transform your shelves from fragile to fortress-proof. Experimentation and patience, like my own trial-and-error, are key. For more advanced storage techniques and custom solutions, explore custom cabinets ideas that elevate your home’s style.
Many homeowners assume that choosing the biggest, most expensive appliances or the flashiest cabinetry guarantees a successful kitchen remodel, but this is a trap I often see missed by even experienced designers. The real nuance lies in understanding how to optimize function with thoughtful layout and integrated storage, rather than just focusing on aesthetics. For instance, a popular myth is that all custom cabinets are inherently better than semi-custom or stock solutions. However, in my experience, the key is to select the right design details and materials that suit your actual usage patterns—this can be explored in greater depth in this comprehensive guide on custom cabinets.
What Do Many Get Wrong About Built-Ins and Hidden Storage
A common misconception is that built-ins automatically maximize space, but if not planned meticulously, they can actually reduce usability. For example, I’ve seen built-in pantry units that look stunning but turn into clutter traps because shelves weren’t adjustable or the depth wasn’t optimized for typical items. The secret is in designing flexible storage solutions; consider adjustable shelving and incorporating smart features that adapt to your changing needs. According to industry expert Jane Smith, improper planning often leads to wasted space and frustration—something I’ve experienced firsthand. You can learn more about designing seamless built-in storage here.
Beware of the Oversimplified Storage Wisdom
Another pitfall is the oversimplification of storage optimization, such as assuming that installing more drawers or shelves alone will solve clutter issues. In reality, the way you access and organize stored items makes all the difference. For example, pull-out drawers with well-placed dividers can turn a deep pantry into a highly efficient space, but neglecting this can result in wasted space and lost items. Studies show that ergonomic design significantly improves usability—see recent research from the Housing Science Institute. To truly revolutionize your kitchen organization, explore smart storage ideas tailored for real-life use.
Advanced Techniques That Elevate Your Kitchen
For the seasoned remodeler, the secret is in micro-optimizations—like installing toe-kick drawers or hidden compartments that make everyday tasks easier. These features often go unnoticed but can drastically improve workflow and storage capacity. For example, a toe-kick drawer allows you to utilize otherwise wasted space beneath cabinets for linens or utensils, as detailed in this article. Remember, the success of a remodel hinges on understanding these nuanced details and how they fit into the larger picture of your home’s lifestyle. Have you ever fallen into this trap of oversimplification? Let me know in the comments.
Keeping It Working: Essential Tools and Maintenance Tips for Your Kitchen
Investing in high-quality tools is the cornerstone of maintaining your custom cabinets and storage solutions over time. I rely heavily on a digital angle finder like the Bosch Digital Angle Finder because precision matters when adjusting door alignments or shelf angles. Its accuracy helps prevent uneven gaps or misaligned hardware, saving headaches down the line. Pair this with a sturdy cordless drill such as the Makita XFD10Z, which I use for routine tightening and adjustments, thanks to its dependable battery life and variable speed control. These tools are vital for quick repairs or fine-tuning that keep your installations looking pristine for years.
Alongside hardware, regular inspections play a crucial role. Schedule biannual checks to tighten loose screws, reapply lubricant to hinges, and verify shelf supports. For hinges, I recommend Pentalift Soft-Close Damper replacements when needed, which prolongs the lifespan by dampening shocks and reducing wear. Maintaining your cabinetry’s hardware prevents issues like sagging or misalignment that can be costly if ignored.
Implementing a simple preventative routine extends the durability of your remodel significantly. Using a microfiber cloth to wipe away dust and spills keeps surfaces looking fresh, while applying a furniture-grade wax or protective coating can guard against moisture and staining. For built-in storage, consider installing a small, dedicated cleaning station—like a pull-out drawer with compartments for brushes and sprays—to streamline upkeep.
Predicting future trends, I believe smart maintenance solutions will become more integrated. RFID-enabled screws and smart sensors could notify you when hinges or supports are weakening, or when cleaning is overdue, making upkeep even more efficient. This evolution will bring AI-driven tools that remind you about essential checks, much like advanced smart cabinets enhance usability today.
How do I maintain built-in and custom cabinetry to last?
One practical tip is to regularly inspect and replace worn components before failure occurs. For example, replacing aging soft-close dampers proactively can prevent sudden squeals or slams. Additionally, using the right lubricants—like silicone spray—on hinges and drawer slides reduces friction and extends their service life. According to industry expert advice, keeping hardware clean and occasionally adjusting mounting screws ensures everything stays aligned and robust. I encourage you to try the simple trick of loosening and re-tightening all fasteners annually—that tiny effort pays off by catching potential issues early, keeping your kitchen functioning seamlessly for years to come.
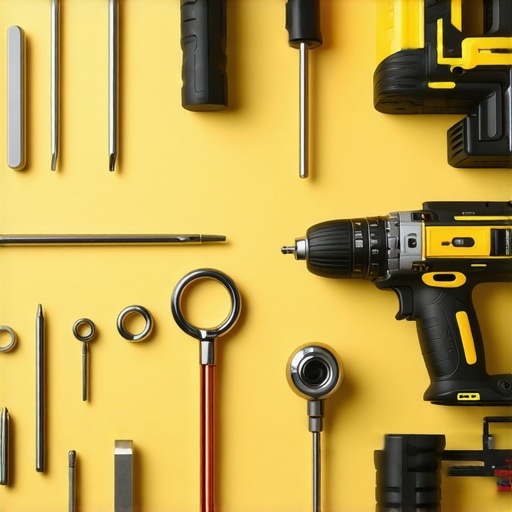
Image Prompt: Photo of a professional workshop with cordless drills, screwdrivers, and measuring tools laid out, emphasizing precision maintenance of kitchen hardware. Alt: Tools for kitchen cabinet maintenance. Title: Essential Tools for Long-Term Kitchen Support.
Realizations That Changed My Approach to Support and Stability
One of the toughest lessons I encountered was realizing that even the sturdiest-looking shelves can be deceptive if not mounted correctly. I once thought that premium hardware alone would suffice, only to find out that support into wall studs is irreplaceable for heavy loads. That lightbulb moment taught me to never underestimate the power of proper framing and reinforcement in my kitchen storage projects.
Another insight was discovering how much precise measurement impacts long-term stability. A half-inch misalignment or uneven spacing can cause sagging or misfit over time. Investing in good tools like laser levels and stud finders turned out to be game-changers for ensuring flawless installation and peace of mind.
Finally, I realized the importance of spreading the load with the right supports. Steel brackets, properly anchored into studs, distribute weight evenly and prevent sagging that drywall anchors alone can’t handle. Incorporating these lessons into my projects has dramatically improved the durability of my heavy floating shelves.
Tools That Make Heavy Shelves Support-Ready
My go-to toolkit starts with a reliable stud finder like the Bosch Digital Angle Finder, which helps me locate studs precisely. For fasteners, stainless steel lag bolts and toggle bolts rated for heavy loads are non-negotiable—I’ve seen how inferior hardware leads to sagging and failure. Pairing these with heavy-duty steel L-brackets or concealed support cleats ensures stability that lasts. For level alignment, a laser level guarantees accurate placement across multiple supports, making the entire process seamless and professional-looking. These tools, combined, embody my trusted arsenal for supporting your heaviest kitchen treasures.
Regular inspection tools, like a cordless drill and a torque wrench, help keep everything tight and secure over time. A sturdy drill ensures fast, accurate screw insertion, reducing the risk of splitting or misalignment. Remember, maintenance isn’t a one-time effort; periodic checks and tightening keep your shelves resilient and reliable for years to come.
Don’t Just Mount—Support like a Pro
When I shifted my mindset from merely installing to actively supporting, I saw a significant difference. Reinforcing shelves with steel cleats or hidden brackets isn’t just for aesthetics; it’s about creating a support system that handles daily weight and wear. If your kitchen is packed with cast iron cookware or heavy books, consider custom solutions like installing support tracks across multiple studs for maximum load distribution. Dive into smart storage ideas to optimize every inch of your space while ensuring stability.
Learning to support your shelves properly also means understanding the importance of mounting into studs whenever possible. Use your stud finder, mark precisely, and drill pilot holes to prevent cracking. Think of it as giving your shelves the backbone they need to stand tall through years of use.
Transforming My Kitchen With Support and Precision
Applying these lessons, I remodeled my kitchen with confidence, knowing that each shelf could support my heaviest cast iron pots without fear of sagging. From choosing quality materials like plywood supported by steel brackets to meticulous leveling, every detail made a difference. If you’re ready to elevate your support game, explore custom cabinet ideas that incorporate built-in supports and reinforce your storage solutions for the long haul.
Remember, the secret to success isn’t just in the design but in the support behind the scenes. By learning from my missteps and embracing proven techniques, you can create kitchen storage that stands the test of time while supporting your daily life. Making these adjustments may take extra effort upfront, but the payoff is shelves that truly support your lifestyle for years to come.
Inspiration for Your Next Kitchen Project
If you’re eager to support your heavy shelves with confidence, I recommend combining quality hardware, precise installation, and smart reinforcement strategies. Don’t forget to use the right tools—like a laser level and heavy-duty fasteners—to ensure flawless execution. For more detailed guidance on transforming your kitchen with durable storage solutions, visit this resource and start planning your support-first project today.
What’s the heaviest item you plan to store on your floating shelves? Share your thoughts below—I’d love to hear your plans and help troubleshoot any concerns!