How to Scribe a Bookshelf to a Brick Fireplace for a Zero-Gap Look
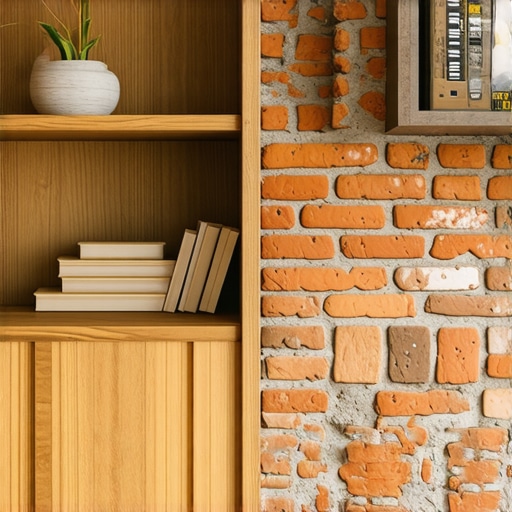
I’ll never forget the afternoon I proudly lugged my first oak bookshelf into the living room, ready to flank the brick fireplace and finally achieve that high-end look I’d seen in every magazine. I pushed it into place, expecting a perfect fit, but instead, I was staring at a jagged, wandering half-inch gap that made my hard work look like a cheap weekend project. I tried the “caulk and prayer” method—spoiler alert: it doesn’t work on brick—and ended up with a sticky, grey mess that I had to scrape off with a putty knife. It was a humbling moment that taught me one vital lesson: walls, especially brick ones, are never actually straight.
The Pain of the Jagged Fireplace Edge
Today, I’m going to show you how to avoid my early mistakes and get that flawless, built-in appearance. We are talking about the “scribe,” a technique that separates the amateurs from the pros. Whether you are working on built-ins that elevate your living rooms functionality or a simple storage unit, the goal is a zero-gap finish that looks like the wood grew right out of the masonry. According to the Journal of Light Construction, scribing is essential because even professional masonry can have a surface variation of up to 1/2 inch over a small vertical run.
Wait, is this scribing thing actually worth the trouble?
I get it. The idea of taking a compass to your beautiful wood and then cutting it with a jigsaw feels terrifying. You might think, “Can’t I just use a piece of trim?” Sure, you could, but you’ll always see that extra layer of molding screaming, “I’m hiding a gap!” If you want the secret to seamless built-in bookshelves around a fireplace, you have to be willing to customize the cabinet’s side panel itself. I once ruined an entire side gable by being too impatient with my scribe line, so I’ve learned the hard way that a little prep saves a lot of lumber. Have you ever stood back from a project only to realize the “straight” wall you were working against was actually bowed like a ship’s hull?
How a Simple Compass Solves the Problem
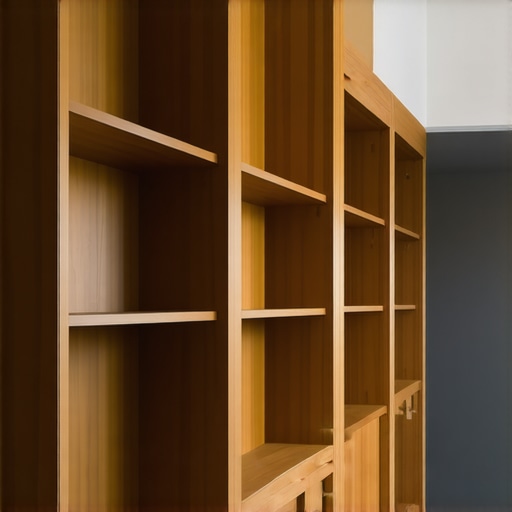
The magic happens with a simple carpenter’s compass. By setting the point on the high spot of the brick and the pencil on your wood, you can mirror every bump, mortar joint, and dip directly onto the bookshelf. This is the same logic used when learning how to scribe a built-in bookshelf to a crooked stone wall, and it is the foundation of any high-quality custom cabinets ideas that transform your homes style. Before we pick up the saw, we need to make sure the unit is plumb and level, because a perfect scribe on an unlevel cabinet is just a very pretty disaster. [image_placeholder_1] We start by temporarily shimming the bookshelf so it is perfectly vertical. If the bookshelf is leaning away from the brick, your scribe line will be useless the moment you try to fix the tilt later. It’s these tiny details—the stuff I ignored back in the day—that make the difference between a project that looks “DIY” and one that looks like seamless kitchen remasters with built-in storage solutions.
Secure the Cabinet Before You Trace
The most common mistake I see—and I’ve made it twice while working on innovative storage solutions for modern kitchen remodels—is trying to scribe without securing the cabinet first. If the unit shifts even a millimeter after you’ve marked your line, the entire cut will be off. I use a few heavy-duty clamps or temporary screws to lock the bookshelf into its final, perfectly plumb position. When I was younger, I thought I could just hold the panel with one hand and scribe with the other. One sneeze later, I had a wavy line that looked like a toddler’s drawing, and I had to start over with a fresh piece of oak. Trust me, stability is your best friend here.
Lock Your Compass for a True Match
Think of the compass as a bridge between the chaos of the brick and the order of your cabinetry. Open the compass to the widest gap between the wood and the wall, then add about an extra eighth of an inch for safety. This ensures you have enough material to work with. As you drag the metal point along the brick, keep the compass perfectly horizontal. If you tilt it up or down as you move, the distance between the point and the pencil changes, distorting the line. I always apply a strip of blue painter’s tape to the edge of the wood first. This makes the pencil mark pop, preventing you from squinting to see your line against dark grain.
Cut at an Angle for a Knife-Edge Finish
Once your line is marked, it is time for the jigsaw. This is where most people panic, but here is the trick: don’t cut straight through the wood. You want to ‘back-bevel’ the cut. Tilt the base of your jigsaw about 5 to 10 degrees so you are cutting away more material from the back of the panel than the front. This creates a sharp, thin leading edge that meets the brick. This is the same principle I use when teaching people how to scribe a bookshelf to a wonky plaster wall. Because the back is hollowed out, that front edge can press tightly into every nook and cranny of the masonry without hitting any obstructions behind it. If you don’t back-bevel, the slightest bump in the brick will stop the entire panel from sitting flush.
Fine-Tune the Fit with a Power Sander
Rarely does a jigsaw cut come out 100% perfect on the first try. I usually stop about 1/16th of an inch away from my line and finish the job with a belt sander or a flap disc on an angle grinder. This gives you surgical control. I remember a project involving custom cabinets as a game changer in your kitchen remodel journey where the brickwork was so aggressive I had to sand and test-fit the panel four times. It’s tedious, but that ‘click’ moment when the wood finally slides into place against the stone is incredibly satisfying. Always check for seasonal movement; knowing why solid wood doors warp and how to prevent it can help you decide how tight that fit should really be. If you are working toward the top of the room, you might also need to employ the trick to installing crown molding on cabinets that reach the ceiling to hide any remaining ceiling gaps.Everyone tells you that a ‘zero-gap’ finish is the gold standard, but here is where I’m going to go against the grain. In my years crafting innovative storage solutions for modern kitchen remodels, I’ve learned that a fit that is *too* tight is actually a ticking time bomb. Wood is a living material, even after it’s been planed and stained. If you jam a solid oak gable into a brick alcove with zero room for expansion, something is going to give. Usually, it’s the cabinet joints or the brick mortar.
The Zero-Gap Obsession Might Be Your Downfall
The ‘Oops’ factor here is ignoring relative humidity. According to the USDA Forest Products Laboratory, wood can expand or contract significantly based on the moisture in the air. If you scribe your unit in the dry winter and make it fit like a glove, come July, that wood will swell. I’ve seen beautiful side panels literally buckle and pull away from the cabinet box because they had nowhere to go. This is a common reason why solid wood doors warp and how to prevent it—the material is fighting against its environment. I now leave a microscopic 1/32-inch ‘breather’ gap, which is invisible to the eye but saves the project long-term.
How much breathing room does your oak really need?
The answer depends heavily on your local climate and the season of installation. In humid coastal regions, you have to be even more cautious about these tolerances. No foundation is truly static, and if you are doing a perfect kitchen upgrade, you have to account for the fact that the floor might drop or the wall might shift over time. One mistake I see pros make is over-securing the scribe. You want the panel to look tight, but you don’t want it to become a structural member of the house. If the house settles and your bookshelf is too rigid, you’ll start seeing cracks in your crown molding or gaps opening up at the base because the wood is being compressed.
Don’t ignore the hidden physics of your walls
Another ‘hidden nuance’ is the quality of the core material. You can follow the secret to a seamless built-in look using integrated appliance panels perfectly, but if you’re scribing into cheap MDF or low-density particle board, the edge will crumble under the pressure of the jigsaw. You need to know how to tell if your cabinet maker is using low-grade plywood because a high-quality veneer core is the only thing that will hold that back-beveled edge without splintering. Furthermore, when you are dealing with an exterior brick wall, you also have to consider thermal bridging. Cold air can seep through masonry and cause condensation on the back of your wood panels. This is why why plywood box construction still wins over furniture board in wet areas; it handles that occasional dampness without swelling into a sponge. Most beginners think the scribe is just about the look, but it’s really about managing the intersection of two completely different materials. Finally, for the love of your flooring, why you should never use standard wood screws for cabinet installation cannot be stressed enough. When you’re mounting these heavy units against brick, those brittle gold screws will snap the moment the wood tries to move. Use specialized cabinet screws that allow for slight movement. Have you ever fallen into the ‘too tight’ trap and watched your work warp a few months later? Let me know in the comments.
Stop Guessing and Start Measuring with My Favorite Scribing Kit
I spent way too many years trying to make do with a cheap plastic compass from a school supply aisle, and my projects suffered for it. If you are serious about achieving custom cabinets ideas that transform your homes style, you need an AccuScribe Pro or a similar articulated offset tool. This isn’t just about drawing a line; it’s about the ability to maintain a consistent angle even when the wall is doing something truly bizarre. When I’m working on built-ins that elevate your living rooms functionality, I pair that scribe tool with a dedicated jigsaw—specifically the Festool PS 420. Why? Because the triple-blade guidance system prevents the blade from deflecting during a back-bevel. If your blade bends while you are cutting that 15-degree angle, you’ll end up with a gap on the front face that no amount of sanding can fix.
How can I keep my custom built-ins looking new for decades?
The work doesn’t end once the last screw is driven. Because wood is hygroscopic, it will react to the changing seasons in your home. I always tell my clients that they should expect to do a ‘tuning’ session every six months. This usually involves learning how to adjust european hinges when your doors are crooked or checking why your soft-close slides are failing and the quick cleaning fix. Dust and debris are the silent killers of high-end hardware. A quick blast of compressed air in the runner tracks and a microfiber wipe-down of the scribed edges will prevent the finish from wearing down where the wood meets the brick. According to the Architectural Woodwork Institute (AWI), maintaining a consistent interior humidity between 25% and 55% is the single most important factor in preventing your scribed joints from opening up over time.
Scale Your Success with Modular Thinking
If you are planning a stylish kitchen overhaul, don’t just think about the cabinets—think about the future of the space. I’ve started implementing smart storage ideas to maximize your kitchen space this year by using modular scribe strips. This allows you to remove a side panel if you ever need to access the wall behind it without tearing the whole unit apart. It’s a technique I borrowed from high-end commercial millwork, and it makes maintenance a breeze. As we look toward the future of home renovation, I predict we will soon see 3D-scanning apps on our phones that can send a digital ‘map’ of a crooked wall directly to a CNC machine. We aren’t quite there for the average DIYer yet, but the precision of seamless kitchen remasters with built-in storage solutions is only going to get tighter. My challenge to you: don’t just settle for ‘close enough.’ Grab a scrap piece of plywood this weekend and practice a back-beveled scribe against the most uneven surface in your garage. Once you master that ‘click’ fit, you’ll never look at a piece of trim the same way again.
The Scribing Truths I Learned After Ruining a Few Oak Gables
Don’t underestimate the power of blue painter’s tape. It does more than show your pencil line; it actually reinforces the wood fibers, preventing that jagged ‘fringe’ you get when cutting thin veneers. Scribing isn’t just about the brick; it’s about the mortar. If you don’t trace deep into the mortar joints, your panel will ‘float’ on the high points of the bricks, leaving a visible gap every few inches. Always remember that ‘tight’ is relative. I’ve seen scribes that looked perfect in the shop but buckled once they hit a humid living room. Giving the wood a hair of room to breathe is the mark of a true craftsman who understands custom cabinets ideas that transform your homes style. If things do shift, knowing how to adjust european hinges when your doors are crooked will help keep the aesthetic sharp.
The Tool Chest That Makes Pro-Level Scribing Possible
I stopped using cheap school compasses a decade ago. Tools like the AccuScribe Pro allow for a rock-solid offset and have a built-in level to ensure you aren’t tilting your mark. For the cut, I always reach for T-Shank jigsaw blades (extra fine), specifically the Bosch ‘Clean for Wood’ series. When you are performing a back-bevel, you want a blade that won’t wander or vibrate. Finally, abrasive flap discs on an angle grinder are my secret weapon. When the jigsaw gets me 95% of the way there, the flap disc handles the last 5% with surgical precision. It’s faster and cleaner than hand-sanding against masonry. Once the exterior is perfect, make sure the interior is too by checking why soft-close hinges fail and the simple tension adjustment. #IMAGE_PLACE_HOLDER_E#
Stop Worrying About the Gaps and Start Building
Scribing is the barrier between a ‘furniture kit’ and a truly integrated architectural feature. It takes patience, but the result—a bookshelf that looks like it was poured into place—is what defines high-end custom cabinets for a stylish kitchen overhaul. Don’t be afraid to fail on your first attempt; every master woodworker has a pile of ‘oops’ scraps in the corner. If you find yourself in over your head, you can always contact us for professional guidance on your next project involving built-ins that elevate your living rooms functionality. Master this one skill, and your home will never look like a DIY project again. Have you ever tried to scribe wood to a wall and ended up with a gap you could fit a finger through? Let me know your biggest scribing nightmare in the comments below!