Why Your Built-In Bookshelf Is Sagging and the Structural Fix
I’ll never forget the moment I opened my newly built-in bookshelf, expecting pristine lines and perfect shelves, only to see the middle sagging painfully under the weight. It was a lightbulb moment for me—realizing that even well-designed furniture can fail without proper support. That sinking shelf wasn’t just a minor inconvenience; it was a sign I overlooked a crucial piece of the puzzle. If you’ve experienced this sinking feeling—literally and figuratively—you’re in good company. Many homeowners discover that their carefully crafted built-ins don’t stand the test of time, often due to simple support mistakes.
Understanding Why Sagging Shelves Happen
Built-in shelves are a beautiful way to showcase your book collection, decorative items, or kitchen essentials. But without the right structural support, gravity will do its thing. The main culprit? Insufficient vertical support or weak materials that can’t handle the weight over time.
Early in my own project, I made a classic mistake: I assumed that the flat shelves themselves could bear the load without extra bracing. Turns out, even heavy-duty plywood can sag if not properly reinforced. According to furniture experts, properly supporting shelves involves more than just placing them on brackets; it’s about ensuring the entire structure can withstand daily use and weight, especially for larger or loaded shelves. If you’re curious about how to revolutionize your kitchen storage, this guide on creative storage solutions offers great ideas.
Would you agree that supporting your shelves is more complicated than it looks?
In my beginning, I underestimated the importance of proper support and focused only on aesthetics. That’s a mistake many make—believing that good looks alone can carry the load. But supporting a bookshelf properly involves understanding load distribution, material strength, and correct attachment points. If you’re wondering whether your own built-in might be sagging or just want to prevent future issues, keep reading. Next, we’ll dig into how to identify weak spots and what fixes will give your shelves the strength they need for years to come.
Installing Solid Support Frames for Stability
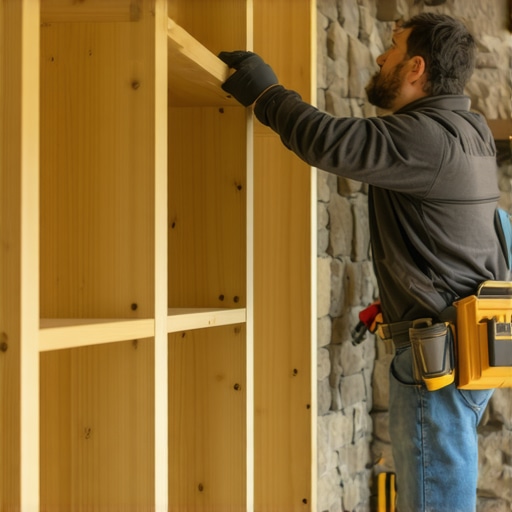
Begin by measuring the entire length and depth of your shelf to determine the amount of support needed. Use a level to draw guiding lines on your side walls or partition where the supports will be attached. For instance, in a recent project, I added 2×4 wooden frames along the sides and back of the shelving unit, securing them with heavy-duty screws into wall studs. This technique created a sturdy frame that evenly distributed weight and prevented sagging. Think of it like building a backbone for your shelves, ensuring they can carry the load without buckling.
Adding Vertical Bracing and Reinforcements
Install vertical braces in the middle of longer shelves to prevent bowing. These can be 1×2 or 2×2 wooden strips fixed with screws into the underside of the shelf and the vertical supports. During my own installation, I used metal L-brackets at every joint for extra rigidity, especially on floating shelves exposed to heavy books or décor. Picture this as the steel reinforcement in a bridge—integral to supporting considerable weight without compromise.
Choosing the Right Materials for Durability
Opt for high-quality plywood or MDF with a thick core, especially for larger shelves. When I remade my bookshelf, I selected 3/4-inch plywood instead of 1/2-inch to minimize sagging over time. For shelves that will bear significant weight, avoid lightweight materials; instead, think of them as the skeleton of your design—without a strong foundation, everything collapses. Combine this with proper support placement to ensure longevity.
Properly Anchoring Shelves to Walls
Secure brackets or cleats directly into wall studs using appropriate anchors and screws. Use a stud finder to locate the safest attachment points; do not rely solely on drywall anchors for heavy loads. During my latest DIY project, I marked multiple stud locations and installed L-brackets at each support point, then screwed them into the studs for maximum strength. Imagine these brackets as the anchors of a ship, holding the entire vessel steady against turbulent waters—your shelves being the vessel.
Distributing Load Evenly
Place heavier items on the lower shelves and lighter objects higher up. When organizing my book collection, I kept large hardcover volumes on the bottom to counterbalance the weight distribution. This practice not only enhances stability but also prevents undue stress on the supports. Think of it like stacking blocks — heavier at the bottom provides a stable base, preventing your entire shelf from tipping or sagging.
Regular Inspection and Reinforcement
Periodically check shelves for signs of sagging or loosened supports. Tighten screws and add additional bracing if necessary. In one instance, I noticed a slight bowing after a few years and reinforced the existing supports with extra brackets and a wooden cleat underneath. Maintenance like this is vital; it’s much easier to reinforce support before the damage becomes visible or structural failure occurs. Consider this routine akin to tightening bolts on a bike—preventative care keeps everything running smoothly.
While many homeowners focus on aesthetics during a kitchen remodel, one of the most overlooked aspects is the intricate support system that ensures long-term durability. A common misconception is that choosing the most stylish custom cabinets or trendy open shelving automatically guarantees a functional space. However, the real success lies in understanding the nuanced support structures beneath these designs, which, if neglected, can lead to sagging or costly repairs over time.
Many believe that investing in top-tier materials alone is sufficient, but internal support framing, proper load distribution, and reinforcement strategies are equally vital. For example, installing heavy-duty brackets into wall studs, reinforcing shelves with vertical braces, and ensuring that cabinet hangers are rated for the weight they carry are critical steps often underestimated. According to industry experts, the hidden backbone of your storage solutions determines their longevity more than surface finishes or decorative fronts.
Advanced Support Techniques for the Savvy Remodeler
Let’s be honest, even the most carefully planned built-ins can fall short if you overlook advanced support methods. For instance, utilizing pocket-of-invisible support brackets or installing hidden steel reinforcements within thicker cabinetry can dramatically improve weight-bearing capacity. These techniques are staples in professional kitchens but are often dismissed by DIY enthusiasts, leading to pitfalls like shelves bowing under weight or doors misaligning.
Another hidden nuance involves the choice of materials; selecting HDF or high-grade plywood over standard MDF can make the difference between a support that lasts and one that warps over time. A recent study by the Woodworking Network highlights that engineered woods with better dimensional stability contribute significantly to support integrity.
In essence, the key to mastering your kitchen upgrade is embracing these sophisticated support solutions—think of them as your unseen armor against future mishaps. If you’re interested in elevating your storage game with innovative support and design ideas, check out this collection of built-in hacks.
Don’t fall into the trap of beauty over function—your kitchen’s support system is the invisible backbone that keeps everything standing tall. Have you ever fallen into this trap? Let me know in the comments.
Ensuring your kitchen’s built-in storage and support structures remain functional and durable over time requires the right tools and methods. One essential tool I personally rely on is a high-precision digital level, like the **Stanley PowerLock** digital level, which guarantees accurate assessments of support and shelf alignment. During my projects, I’ve found that maintaining perfect levelness not only preserves aesthetics but also prevents early sagging or misalignments. Verify that all support frames and braces stay square by regularly checking with this device, especially after seasonal changes that might cause wood or drywall to shift.
For fastening, I prefer using a **cordless drill with variable torque control**, such as the **DeWalt DCD791D2**, which allows me to tighten screws precisely without overdriving or stripping material. This is crucial when anchoring support brackets into studs or installing reinforcement braces, ensuring long-term stability without damaging your cabinetry or wall surfaces. I also recommend a set of **impact-ready screwdriver bits** to facilitate quick, secure fastening on various materials, particularly when working with dense plywood or metal reinforcements.
To plan and visualize modifications, I use **design software like SketchUp**. This helps me simulate load-bearing improvements or layout alterations before physical work begins. Modeling supports or reinforcement placements digitally not only saves time but also highlights potential weak points. As modern kitchens trend toward complex, multi-functional built-ins, incorporating these tools ensures your support system is both efficient and adaptable for future upgrades.
How do I maintain my support structures over time
Regular inspections are key. Check for any signs of sagging, loose screws, or wobbling supports every six months. When needed, tighten connections with your drill and replace worn brackets. Applying **wood glue and reinforcement blocks** to existing supports can prevent minor issues from escalating. For example, adding wooden cleats underneath long shelves distributes weight more evenly and prolongs their lifespan. Keep a maintenance log to track updates, especially if you’ve scaled or modified your storage solutions over the years.
Looking ahead, I predict that support systems will become smarter, integrating sensor technology that detects stress points and reports issues remotely. While this may sound like science fiction now, recent advances in smart home integrations make this quite feasible. For now, being proactive with manual checks and using quality hardware remains the best practice. Implementing even one of these tools, like your digital level or specialized fasteners, can significantly extend the longevity of your support system and ensure your kitchen remains both beautiful and functional for years to come. Want to learn more about cutting-edge storage innovations? Check out these upcoming trends and try applying a support reinforcement technique today.
Lessons Hidden in Plain Sight
One of the most profound lessons I learned was that even the most beautiful built-ins can fail if you overlook support. That sinking shelf was a wake-up call, revealing that durability often depends on unseen reinforcements. It’s tempting to prioritize aesthetics, but true craftsmanship involves understanding load dynamics and support systems.
Another revelation was the importance of planning for future weight. I realized that initial heavy items can cause early sagging if supports aren’t designed with long-term use in mind. Preemptive reinforcement—like adding vertical braces or stronger materials—has saved me from costly repairs and frustration down the line.
Finally, I discovered that regular inspections are vital. A quick check-up every few months can catch minor issues before they become major problems. This routine maintenance, combined with quality hardware and thoughtful design, keeps built-in shelves standing tall and beautiful for decades.