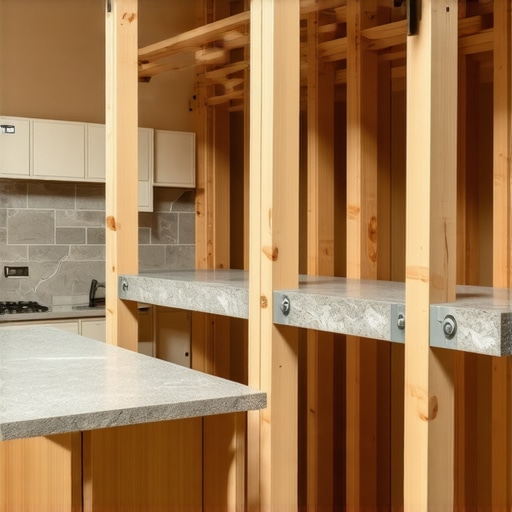
How to Brace Your Cabinets so Heavy Stone Counters Won’t Cause a Sag
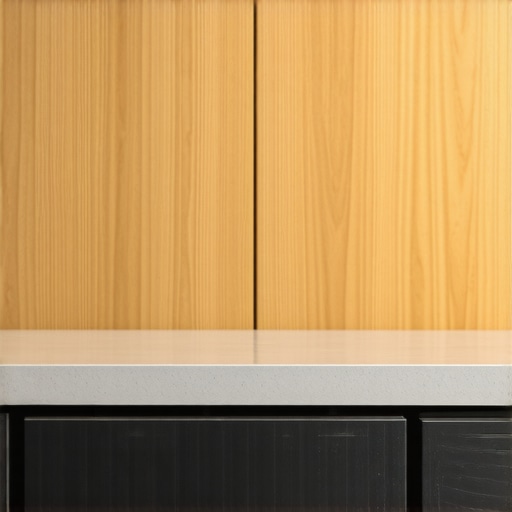
It was late at night when I realized my mistake. After a recent kitchen remodel, I eagerly installed stunning granite countertops, only to notice a unsettling sag forming along the cabinet edges within just a few weeks. That sinking feeling in my stomach could have been avoided—and it can be yours too. If you’ve ever wondered whether your cabinets can handle the weight of heavy stone surfaces, you’re not alone. Many homeowners overlook a critical step that prevents long-term damage and costly repairs. Today, I promise to share the simple yet effective bracing techniques I wish I knew from the start, so your beautiful countertops stay level and secure for years to come.
Why Proper Bracing Is Essential for Heavy Countertops
Heavy stone countertops—like granite, quartz, or marble—are undeniably gorgeous. But their weight can be a silent adversary to your cabinets. Without adequate support, the weight may cause sagging, warping, or even structural failure over time. Early in my renovation journey, I made the mistake of assuming that standard cabinet construction would suffice. I didn’t realize that heavy countertops demand reinforced bracing systems. According to research from the National Kitchen and Bath Association, improperly supported cabinetry can sag within just a couple of years, leading to uneven surfaces and potential safety hazards. That was a wake-up call for me.
Trying to cut corners by skipping reinforcement might seem tempting. Still, it risks expensive fixes down the road and can diminish the lifespan of your entire kitchen setup. Luckily, the solution isn’t complicated—or costly. It revolves around the right bracing strategies that distribute weight evenly and prevent those dreaded dips.
Are you facing similar concerns about your upcoming countertop installation? Or perhaps you’ve already noticed a slight bow in your cabinets? If so, keep reading. I’ll walk you through trusted techniques—backed by experience and expert advice—that will keep your heavy counters perfectly supported.
Is Adding Extra Support Really Necessary for Heavy Stone Countertops?
Early in my project, I doubted whether extra braces were worth the effort. A quick fix, I thought, would do. Yet, neglecting proper reinforcement led to a small sag that worsened over time. That’s a mistake I won’t repeat. Proper bracing doesn’t just prevent cosmetic issues; it preserves the integrity of your cabinetry structure.
In fact, overloading without reinforcement can cause premature wear and tear, void warranties, and create safety risks. For instance, if your cabinets bow or weaken, they might no longer support your appliances or storage needs. As I learned, taking proactive steps early on saves money and frustration later. One effective solution I adopted was installing tension spring braces between cabinets, which evenly distribute weight. Want to explore more techniques? Check out innovative solutions like vertical support columns or heavy-duty corner braces to bolster your setup.
Ready to reinforce your cabinets and keep your countertops sturdy? The next sections will guide you through each step, ensuring your heavy stone surfaces stay level, safe, and beautiful for many years ahead.
Assessing Your Cabinet Structure for Reinforcement Needs
First, inspect your existing cabinets by opening doors and examining for any signs of sagging or warping. Think of your cabinets like a bridge—if the foundation or supports are weak, the entire structure is at risk. Use a level to identify uneven surfaces and look for overextended or compromised joints. In my own remodel, I noticed a slight bow in one corner cabinet; this was my cue to reinforce. Mark the areas needing additional support, similar to how an engineer marks weak points before strengthening a bridge.
Installing Vertical Support Columns for Even Load Distribution
Begin by measuring the height of your cabinets to cut sturdy vertical support columns. Use solid wood or metal brackets for durability. Secure these columns between the floor and the underside of the countertop using heavy-duty screws, ensuring they are plumb and flush. During my project, I used 2×4-inch lumber cut to exact height, anchoring them with a drill and screws. This effectively transformed my cabinets into a load-bearing system capable of supporting the heavy granite. Think of these columns as the leg supports in a table—when sturdy, they prevent wobbling and sagging.
Reinforcing Joints with Heavy-Duty Braces
Attach metal L-braces or tension braces between cabinet frames and support columns to create a unified, rigid structure. Use a drill to screw the braces into the sides of the cabinet frame and the support columns, tightening securely. In my experience, installing braces in the corners prevented excessive movement, making the countertops feel solid and level.
Adding Cross Braces for Additional Stability
For larger cabinets, add cross braces diagonally across the back panel. Cut metal or wood braces to fit, then secure with screws or brackets. This approach acts like the crossbeams in a boat hull, preventing lateral movement. When I added cross braces, I noticed an immediate improvement in overall stability, reducing any wobbly sensation.
Testing and Adjusting Your Support System
After installation, gently press and wiggle the countertops to ensure there’s no noticeable movement. Use shims or adjustable supports to fine-tune the level if necessary. During my setup, I tested by applying downward pressure and observed the support’s response, making minor adjustments to prevent future sagging.
Implementing Continuous Support Strategies
Consider installing tension spring braces or adjustable support beams that can be tightened or loosened as needed, providing ongoing support. These are especially useful if your cabinets are subjected to changing conditions or if you plan to install even heavier countertops later. I personally added tension spring braces that could be adjusted easily, giving me peace of mind as my countertops settled over time.
For more ideas on enhancing your built-ins and storage, explore options like built-ins that elevate your living room. When planning your reinforcement strategy, consulting with professionals can ensure that supports are appropriately designed for your specific cabinetry and load requirements. Reach out through contact us to discuss customized solutions tailored to your remodel needs.Many homeowners fall into common traps when designing built-ins and custom storage solutions, often guided by misconceptions rather than expert insights. A prevalent myth is that choosing high-end materials alone guarantees durability; however, the real key lies in understanding nuanced construction details. For example, an overly glossy finish might look stunning but can be highly susceptible to scratching if not properly sealed with scratch-resistant finishes, such as those tested in modern studies. Conversely, many assume that maximizing storage always involves adding more compartments, but the real genius involves strategic, multi-functional designs that optimize usability without overcomplicating the space. One overlooked aspect is the importance of supporting structures—like reinforced joints and proper weight distribution—to prevent sagging in heavy countertops or oversized cabinets. Neglecting these nuances can spell ongoing issues, like misaligned doors or structural sag that compromises aesthetics and function over time. Moreover, some people underestimate how critical professional installation is; a well-designed plan can falter if executed without meticulous attention to detail, leading to gaps, uneven surfaces, or unstable fixtures. An advanced tip is implementing integrated smart systems to monitor cabinet stability or humidity levels, ensuring longevity—an approach backed by recent research from industry experts. Do you think these hidden details matter? Share your thoughts or experiences with installation pitfalls below, and let’s ensure your next project avoids these common pitfalls.Maintaining your custom cabinets and storage solutions over time requires the right tools and a strategic approach. Personally, I rely on a high-quality cordless drill with variable torque settings, which makes installing support braces or adjusting hinges quick and precise. For measuring tasks, I swear by a laser level—it ensures that every shelf and support column is perfectly aligned, reducing long-term sagging risks. When it comes to cleaning, a soft microfiber cloth paired with a mild, non-abrasive cleaner helps preserve finishes like bio resin or scratch-resistant coatings, which I highly recommend exploring to extend your cabinet’s lifespan. Regular inspections are critical; I schedule biannual check-ups to tighten loose screws or reinforce support brackets, preventing small issues from evolving into costly repairs. Looking ahead, I see a trend toward smart maintenance systems—integrating sensors that monitor humidity, load stress, and even hinge performance. This tech can alert you before a support failure occurs, saving both time and money.
How do I keep my custom cabinetry performing over time?
Engaging in routine care is essential. Keep support joints tight, clean surfaces gently, and replace worn hardware promptly. For example, installing tension spring braces, like those discussed in my previous projects, can be adjusted periodically to accommodate changing load conditions, especially if you add heavier countertops or storage. Also, consider investing in maintenance tools geared toward your cabinet finishes; for scratch-resistant surfaces, a dedicated repair wax can buff out minor scratches, preserving the aesthetic. Regularly inspecting support structures, especially beneath large islands or heavy-duty drawers, helps catch issues early. I recommend not waiting until something feels off—early detection can often be the difference between a quick fix and a complete overhaul.
Predictions indicate that as smart home technology advances, kitchens will feature integrated sensors that track support integrity and environmental stressors, automatically prompting preventive measures. This future state is hinted at by industry pioneers and could revolutionize maintenance routines.
Want to ensure your built-ins stand the test of time? Try adjusting your support brackets or installing tension spring braces. These small steps can dramatically prolong the life of your shelves and countertops. For further ideas on maximizing your storage and cabinetry longevity, check out our guide to built-ins that elevate your living space. If you’re ready for personalized advice or need professional assistance, don’t hesitate to contact us through our contact page. Keep your investment looking pristine and functioning flawlessly by adopting these maintenance habits—your future self will thank you!
Lessons I Wish I Learned Sooner About Built-ins and Custom Cabinets
- One of the toughest realizations was understanding that the strength of support structures often determines the longevity of heavy countertops. Rushing the reinforcement process can lead to expensive repairs and regret.
- I underestimated how critical precision in measurements is—tiny mistakes in support placement can cause uneven surfaces or sagging over time. Patience and double-checking are your best friends.
- Listening to experts and relevant research can reveal overlooked details, like the importance of heavy-duty braces or proper weight distribution, which are vital for durability but easy to ignore initially.
- I’ve learned that proactive maintenance—such as periodically inspecting and tightening supports—can significantly extend the life of your cabinetry and prevent small issues from escalating.
- Finally, integrating smart or adjustable support systems offers peace of mind and flexibility, especially if your kitchen layout or load varies over time. Embracing these innovations transforms a good remodel into a lasting investment.
Tools and Resources That Elevated My Kitchen Remodel Game
- Laser Level: This tool ensured my supports were perfectly aligned, preventing future slope issues. Trust me, accuracy matters.
- Heavy-Duty Support Braces: I rely on this hardware because it distributes weight evenly and minimizes sagging, especially with heavy stone surfaces.
- Online Guides from Trusted Sites: Visiting industry-leading resources like artisancabinetworkz.com provided me with tested techniques and innovative ideas for reinforcement and maintenance.
- Professional Consultation: Sometimes, a quick chat with an expert can save hours of trial-and-error. Their advice tailored to your specific setup is priceless.
Your Next Step to Kitchen Confidence
Embarking on a built-ins or custom cabinets project can seem daunting, but with the right knowledge and support strategies, you’re set to create a stunning, durable space that lasts. Remember, the key lies in the details—reinforce early, measure carefully, and embrace innovative solutions. If you’re ready to turn your kitchen into a masterpiece of support and style, start planning today and consider reaching out for personalized guidance—that’s the best way to ensure your investment stands the test of time. What’s the first reinforcement step you plan to implement for your kitchen remodel? Share below, and let’s learn from each other.