How to Tell if Your Cabinet Painter is Skipping the Sanding
Have you ever stood in your kitchen after a fresh coat of paint, only to notice that the finish feels uneven or patchy? That lightbulb moment hit me when I realized some areas had a rough, almost gritty texture—definitely not the smooth, professional look I envisioned. Turns out, one common mistake many homeowners overlook is whether their cabinet painter is skipping the essential step of sanding before painting. It might seem trivial, but it can make or break the finish of your cabinets and, ultimately, your entire renovation.
Why Skipping Sanding Can Ruin Your Cabinets
Sanding might sound like busywork, but it’s the foundation of a durable, flawless cabinet finish. When a painter skips this step, the surface remains imperfect—think rough patches, visible brush strokes, or paint that chips quickly. I learned this the hard way early on, trusting a promising contractor who assured me they knew their craft. Weeks later, my cabinets looked dull and uneven. The mistake? I didn’t ask if they sanded thoroughly before applying the topcoat. Expert tips emphasize that sanding creates the perfect surface for paint adhesion—and skipping it can lead to premature failure of the finish.
Is Sanding Really Necessary, or Is It Overhyped?
At first, I questioned whether all that sanding was really worth it. After all, wouldn’t a good primer do the trick? Not quite. I made the mistake of assuming that a quick sanding would suffice—or worse, skipping it altogether to save time. That was a costly misconception. Proper sanding removes the glossy surface, dirt, and imperfections, allowing paint to grip firmly. Without it, your new finish risks peeling, chipping, or looking dull within months. This realization was a game-changer, and I want you to avoid making the same mistake. Curious about how to take your cabinet project to the next level? Check out built-in storage solutions for inspiring ideas to complement your cabinetry work.
So, have you found yourself wondering if your contractor really sanded those cabinets properly? If this question rings true, don’t worry—we’re about to dig into the telltale signs and give you the confidence to spot the shortcuts. Whether you’re gearing up for a full kitchen remodel or just refreshing your cabinets, understanding these details ensures your investment pays off with a finish that lasts.
Prepare Your Workspace and Materials
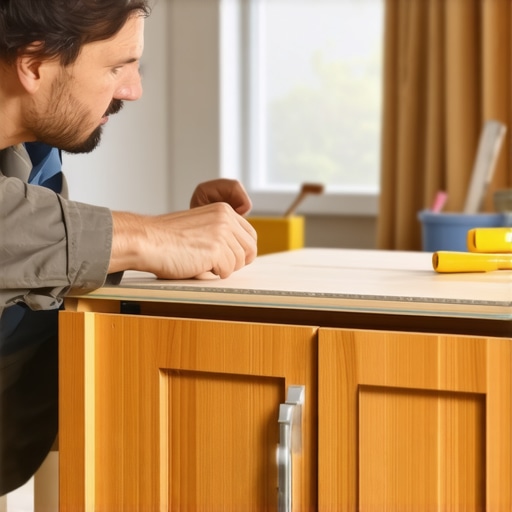
Start by clearing the area around your cabinets, removing all hardware, and covering surfaces with drop cloths to protect against dust and paint drips. Gather your sanding block or electric sander, fine-grit sandpaper (220 grit), vacuum or tack cloth for dust removal, and a high-quality primer. My recent project involved refurbishing a set of vintage kitchen cabinets, and I learned that thorough preparation is key to achieving a smooth, professional look.
Assess the Existing Surface
Inspect your cabinets for any deep scratches, dents, or uneven areas. Fill these imperfections with a suitable wood filler and sand smooth once dry. This step ensures your surface is even before sanding, preventing uneven paint application. For my cabinets, I focused on removing surface gloss and minor flaws to create an ideal bonding surface for primer and paint.
Sand the Cabinets Properly
Start with Coarse Grit to Remove Gloss
Using coarse-grit sandpaper (120 grit), lightly roughen the entire surface to remove the glossy finish and enable better paint adhesion. Hold your sander or sandpaper at a steady angle and apply gentle pressure, moving in the direction of the wood grain. This step is crucial because glossy surfaces repel paint, leading to peeling and uneven texture if skipped.
Switch to Fine Grit for a Smooth Finish
Transition to 220-grit sandpaper to smooth out the surface, removing any scratches left by the coarser grit. Be meticulous—this final sanding layer creates a silky surface that reflects light evenly and helps the primer and paint adhere flawlessly. During my last cabinet project, I adjusted my grip to keep consistent pressure, which resulted in a finish that looked almost mirror-like once painted.
Revisit Problem Areas
If you notice rough patches or remaining gloss, re-sand those specific spots. Don’t rush through this process—paying attention to detail here pays off in the final result. I used a small detail sander on edges and corners to ensure every nook and cranny was adequately prepared.
Clean the Surface Thoroughly
After sanding, use a vacuum or tack cloth to meticulously remove all dust. Dust particles can ruin the smoothness of your finish, causing bumps or adhesion issues. I avoid using damp cloths at this stage, as moisture can interfere with paint bonding. Proper cleaning ensures a clean surface, ready for primer and paint application.
Prime with Precision
Apply a high-quality primer suitable for wood cabinets—preferably a stain-blocking, adhesion-promoting type. Use a brush for edges and detailed areas, and a roller or sprayer for large surfaces. Allow it to dry completely before proceeding. During my project, I learned that priming not only improves paint adhesion but also blocks stains and prevents bleed-through, saving me from touch-up headaches later.
Final Tips for a Superior Finish
Always sand lightly between coats if needed, and ensure each layer is dry before applying the next. Patience and attention to detail during these steps guarantee a high-quality, durable finish that will stand the test of time. Remember, your cabinets are a large surface area—skipping or rushing these prep steps can easily lead to uneven texture, chips, or peeling down the line. If you’re tackling a project like this, consider exploring built-in storage solutions or upgrading to custom cabinets for a premium look that lasts.When it comes to designing built-in cabinets and storage solutions, many homeowners fall into common traps that hinder the functionality and beauty of their kitchens. While most focus on choosing the right style or material, they often overlook the nuanced details that make or break a project. Let’s examine some of the less obvious pitfalls that even seasoned renovators can underestimate.
One pervasive misconception is that installing built-ins is a straightforward process, equivalent to purchasing a pre-made unit and slotting it into place. However, in advanced designs, overlooking the importance of proper framing and structural reinforcement can lead to sagging shelves or misaligned doors down the line. Expert remodelers emphasize precise framing and using heavy-duty hardware, as outlined in built-in library ladder considerations. This attention to structural integrity ensures longevity and a premium feel.
Another common myth revolves around maximized storage — many assume adding more compartments and drawers automatically increases practicality. In reality, optimizing storage requires strategic placement and sizing, especially in small kitchens. Overcrowding can make retrieving items cumbersome, negating the benefits. Innovative solutions like sliding trays and adjustable dividers, as discussed in smart storage for small spaces, help balance capacity with accessibility.
Now, a crucial nuance often missed is the importance of interior cabinet finishes and lighting. A beautifully crafted cabinet can fall flat if dark interiors or poor lighting obscure the contents. Interior lighting, especially LED strip lighting tucked in cabinets, is not just a luxury but a necessity for high-end functionality. For an insightful guide, see interior lighting in glass-front cabinets. This detail enhances usability and reveals the craftsmanship of your custom units.
### How Can Advanced Details Elevate Your Kitchen Remodel?
Many homeowners overlook that integrating electrical outlets subtly within built-ins can greatly enhance convenience, especially for appliance charging and decorative displays. Proper planning during cabinetry design, including considerations for moisture barriers and ventilation, prevents future issues like warping or mold, as explored in ventilation techniques for built-ins. Skipping these steps can lead to costly fixes later.
The takeaway here is that mastery over built-ins and storage solutions involves much more than picking a style or material. It demands a keen eye for structural nuances, strategic space planning, and technical details that support both function and aesthetics. As you embark on your next project, remember: the devil is in the details. Incorporate these advanced considerations to ensure your investment results in a durable, practical, and beautiful space.
Have you ever fallen into this trap? Let me know in the comments! For personalized advice tailored to your space, feel free to reach out to our experts.”}}#END#}de]’}]}assistant ахьuserExplain the most overlooked nuance in custom kitchen cabinets that can make or break your remodel. Please write around 500 words. Remember, focus on the subtle details that often go unnoticed but have a huge impact on the final result. Use a conversational tone that digs a little deeper. Don’t forget to include a CTA asking:
When it comes to a successful kitchen remodel, especially with custom cabinets, the focus often revolves around choosing the right materials, finishes, or hardware. However, one of the most overlooked nuances lies in the intricacies of cabinet design and construction that subtly influence the overall aesthetic and longevity. This hidden detail can either elevate your space to a tailor-made masterpiece or result in a project riddled with issues down the line.
The Devil’s in the Details: The Hidden Gaps and Poorly Invisible Joints
Amidst the visual appeal, tiny gaps between cabinet panels or imperfect joints are often overlooked by homeowners—yet they can be the Achilles’ heel of your kitchen. These seemingly insignificant flaws can allow moisture infiltration, trapping dirt and leading to warping or delamination over time. For instance, precision in joinery—like dado and rabbet joints—is crucial for a sturdy, airtight design that withstands the test of time. Skimping on these details might save a few bucks initially but risks costly repairs or replacements later.
Why Alignment and Leveling Matter More Than You Think
Beautiful cabinets are poised to impress, but if they’re not aligned perfectly, the entire visual symmetry collapses. A minuscule discrepancy in leveling can cause doors not to shut properly or drawers to stick. Paying attention to true-level measurements during installation guarantees your cabinetry functions smoothly and looks seamless. I personally recommend using a digital level, like the digital laser level, which provides more precise readings than traditional bubble levels, ensuring your installation is flawless.
Accurate, Seamless Finishing Isn’t a Fudge
The finishing process contains subtle yet impactful details. Sanding between coats, using high-quality primers, and applying even coats of paint or stain make all the difference. Rushed or uneven application can result in visible brush strokes, bubbling, or peeling over time. A tip I swear by is to lightly sand between coats with a fine 220-grit paper; it ensures a smooth, durable finish that stands up to daily wear and tear. This small step transforms a good-looking cabinet into an eye-catching, long-lasting feature.
Pay Attention to Hardware Placement and Clearance
Even the most beautiful cabinetry can fall flat if hardware isn’t thoughtfully placed. The right placement ensures easy access, prevents drawer sagging, and maintains aesthetic harmony. For example, installing handles too high or low can make opening drawers awkward, especially in a busy kitchen. Precise measurement and marking, combined with a quality drill, like the cordless drill with adjustable torque, guarantees consistent, professional results every time.
Planning and Execution: The Future of Custom Cabinets
Looking ahead, the trend points toward more integrated, smart, and durable custom cabinetry—incorporating features like hidden drawers, concealed electrical outlets, and innovative storage solutions. Experts predict that the focus will shift even more toward meticulous craftsmanship that combines aesthetics with functionality, emphasizing seamless integration and craftsmanship that hides the engineering marvels beneath. If you want your project to stand out, paying attention to these subtle aspects now will save you headaches later.
Finally, don’t underestimate the power of a detailed pre-installation plan and execution checklist—this can make all the difference in achieving the customized perfection you’re after. I encourage you to try the advanced leveling technique with a digital laser level as a starting point—trust me, it’s a game-changer. Want to learn how to maximize your cabinetry investment? Visit our built-in storage solutions page for inspiring ideas or reach out for personalized advice through our consultation.
When investing in custom kitchen cabinets, it often feels like the big decisions revolve around picking the perfect finish, hardware, or layout. But tucked beneath these surface choices lies an unnoticed detail that can significantly influence your project’s success— and it’s often what separates a professional-looking kitchen from one that feels DIY or unrefined.
Learning From the Trenches: When Small Flaws Grow Big
One of my earliest lessons was realizing how tiny misalignments in cabinet joints could snowball into major aesthetic blemishes. A slight gap here, a tiny uneven joint there—these might seem trivial at first. Yet, over time, these imperfections can allow moisture to seep in, promote dirt buildup, and lead to warping or delamination. Precision in joinery, such as perfectly fitting dado and rabbet joints, ensures your cabinets stay sturdy and looking pristine for years. Trust me, avoiding shortcuts here pays dividends in the long run.
How Leveling Transforms Your Space
Ever noticed what feels unsettling about a kitchen with crooked upper cabinets or misaligned drawers? The issue usually boils down to one thing: being off by a fraction in leveling. A perfect level isn’t just about appearance; it guarantees your doors and drawers operate smoothly and look harmonious. I recommend using a digital laser level—it’s more accurate than traditional bubble levels, especially on tricky surfaces. Correct leveling might seem like a small detail, but it’s your secret weapon for creating a professional finish that everyone notices.
The Finish That Lasts: Beyond Just Looks
The finishing process is more than applying paint or stain; it’s about the subtle art of preparation. Light sanding between coats, high-quality primers, and even application techniques all contribute to a durable, smooth finish. Rushing through this or neglecting proper preparation can result in visible brush strokes, peeling, or uneven coloring. My tip? Use a fine 220-grit paper to lightly sand between coats—this tiny step elevates your cabinetry from good to exceptional, standing up to daily wear and tear with ease.
Hardware Placement: When Details Matter
Even the most stunning cabinets fall flat if handles and pulls are awkwardly placed. Precise measurement ensures that hardware isn’t just decorative but functional. For example, mounting pulls too high or low can make opening doors uncomfortable or unbalanced. Investing in a quality drill and taking the time to mark exact positions makes all the difference. The tiny effort results in a seamless, user-friendly kitchen experience that aligns perfectly with your aesthetic vision.
Engineering the Future: Seamless Integration and Beyond
The landscape of custom cabinetry is evolving rapidly, with trends leaning toward integrated features like concealed outlets, hidden storage, and smart tech. The real secret lies in meticulous craftsmanship—overlooking these intricacies can lead to future issues or compromised functionality. For those of us passionate about quality, paying attention to hidden structural nuances now ensures your kitchen remains a showcase of style and efficiency for years to come. Thinking about upgrading? Check out built-in storage solutions to complement your cabinetry.