Why We Stopped Using Particle Board for Laundry Room Built-ins
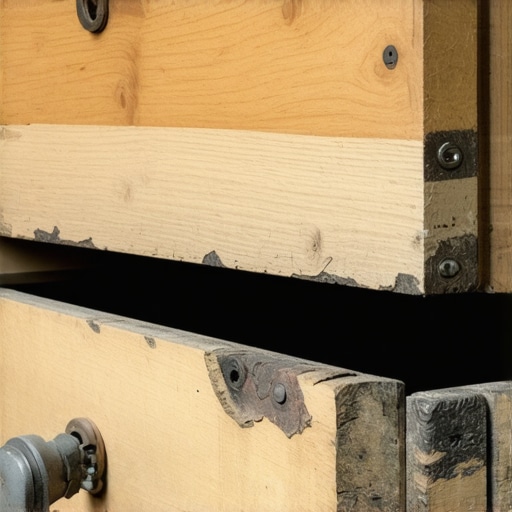
It was a chilly Saturday morning when I first noticed the cabinet door in my laundry room sagging slightly, a subtle sign of something deeper going wrong. At first, I brushed it off as a minor misalignment, but as the weeks went by, those little signs turned into a persistent headache. I realized that our particle board built-ins, once a budget-friendly choice, were quietly failing—warping, sagging, and absorbing moisture that harmed their integrity.
This lightbulb moment hit hard. I had always thought particle board was an economical solution, perfect for DIY projects and beginner remodels. But in the damp, high-humidity environment of a laundry room, it turned out to be a disaster. Not only was I facing costly repairs, but I was also risking the longevity of my cabinets.
Today, I want to share why my perspective changed so drastically and how switching to solid wood transformed my laundry space into a durable, stylish haven. If you’ve ever experienced similar frustrations—even anxiety about your built-ins holding up or the cost of constant repairs—you’re in the right place. I’ll walk you through the pitfalls of particle board and why, in the long run, investing in quality materials like real wood is a game-changer.
Fighting Moisture and Warping: Why Particle Board Falls Short in Wet Environments
Particle board is definitely a popular choice for many because it’s affordable and easy to work with. But in areas prone to humidity—think laundry rooms, bathrooms, or basements—this material quickly reveals its weaknesses. The tiny wood particles glued together tend to swell when exposed to moisture, leading to warping, swelling, or even rotting over time.
I made the mistake early on of not considering the environment fully; I assumed that sealing the surface would prevent moisture issues. Turns out, particle board isn’t designed for high-humidity zones. According to experts at the [Kitchen Cabinet Kings](https://artisancabinetworkz.com/why-solid-wood-center-panels-are-a-mistake-in-high-humidity-kitchens), moisture absorption causes significant damage unless engineered for such conditions.
Switching to solid wood or moisture-resistant plywood changed everything. Not only did it bolster the durability of my built-ins, but it also gave my laundry room a fresh, high-end look. If this rings true with your current project, it’s worth taking a moment to evaluate your materials’ suitability for that space.
Have you already faced issues with moisture damaged cabinetry? You’re not alone, and there are solid, affordable solutions. In the next sections, I’ll guide you through how to choose the right materials and design approaches to avoid these problems altogether, ensuring your built-ins stand the test of time and humidity.
Select Durable Materials for Moisture Zones
Start by choosing moisture-resistant plywood or solid wood options like cedar or red oak for your cabinetry. These materials resist warping and swelling better than particle board, especially in humid environments. I once tried to save costs by using MDF in my laundry room, but it swelled within months, highlighting the importance of material selection. For areas with high moisture, avoid particle board entirely.
Properntesting and Preparing Your Space
Before installing new cabinetry, assess your space for potential moisture sources. Look for leaks or poor ventilation that could affect your cabinets’ longevity. Use a moisture meter to gauge humidity levels. In my experience, sealing off vents and adding a dehumidifier prevented future damage, extending the life of my new built-ins.
Implement Waterproof Barriers and Sealants
Apply waterproof membrane or sealant to all surfaces exposed to moisture, including edges, joints, and interior panels. For example, I coated the backside of my plywood panels with a marine-grade sealant, creating an extra barrier against humidity. Use silicone or polyurethane sealants around seams and edges to prevent water ingress. This simple step dramatically reduced moisture penetration and warping.
Create a Ventilation Strategy
Ensure your laundry or mudroom has adequate airflow. Install exhaust fans, vents, or dehumidifiers as necessary. I added a vent near my cabinets, which maintained consistent airflow and kept humidity levels in check. Proper ventilation prevents condensation buildup that can compromise your cabinetry over time.
Design to Minimize Moisture Exposure
Incorporate features like toe kicks with drainage holes, or raised cabinetry that allows air circulation underneath. This detail was a game-changer in my remodel; it kept the base of my cabinets dry and prevented mold. When planning your built-ins, consider how water might contact or accumulate around your cabinets, and design with drainage and airflow in mind.
Regular Maintenance and Inspection
Inspect your cabinets periodically for signs of moisture damage, such as swelling or mold. Reapply sealants annually and address leaks promptly. I learned this the hard way when a small drip caused wood swelling; catching it early saved me from extensive repairs later. Establish a routine check to prolong your cabinetry’s lifespan.
Use Corrosion-Resistant Hardware
Opt for stainless steel or brass hinges, handles, and hardware to prevent rust and degradation in humid conditions. My experience with coated metal hardware was disappointing; it corroded within a year. Upgrading to corrosion-resistant options maintained both functionality and appearance over time.
When it comes to kitchen remodeling and custom cabinets, many homeowners focus on the big picture—updating appliances, choosing trendy countertops, or adding a fresh coat of paint. But underneath these surface decisions lies a web of nuanced considerations that can make or break the success of your project. Let’s dig deeper into some common myths and advanced pitfalls that often trip people up, even those with good intentions.
One widespread misconception is that custom cabinets are always superior simply because they promise a perfect fit. While customization does offer advantages, many assume that custom means better quality automatically. In reality, the craftsmanship and materials used matter immensely. Poorly executed custom work with subpar materials can lead to warping, premature wear, or inefficient storage solutions. For instance, opting for cheap plywood or veneer might seem economical initially, but over time, issues like delamination or humidity damage can emerge. According to industry experts, selecting high-quality plywood and well-sealed finishes is crucial for durability, especially in humid environments.
Another trap homeowners often fall into involves storage solutions. There’s a tendency to upgrade to larger cabinets or more elaborate fixtures without considering ventilation or accessibility. Building extra deep pantry shelves or inaccessible corner cabinets might seem like clever space maximization, but they can result in wasted effort and lost items. Hidden compartments or smart pull-outs can greatly enhance usability, but only if installed thoughtfully. You can explore more innovative storage ideas that truly maximize your space through [this article on space-efficient solutions](https://artisancabinetworkz.com/maximize-space-with-innovative-storage-solutions-for-every-room).
Have you ever fallen into this trap? Let me know in the comments.
A particularly overlooked nuance is the impact of environmental factors on material longevity. Many skip the step until problems arise. For instance, using particle board or MDF in high-moisture zones like kitchens or laundry rooms can be disastrous. These materials absorb moisture, swell, warp, and eventually fail. Despite its affordability, particle board is often wrongly considered suitable for all environments. Experts like those at [artisan cabinet specialists](https://artisancabinetworkz.com/why-solid-wood-center-panels-are-a-mistake-in-high-humidity-kitchens) advise investing in solid or moisture-resistant plywood for such areas.
Beyond materials, the installation process itself harbors pitfalls. Incorrect mounting of upper cabinets—such as anchoring them solely to drywall without proper support—can lead to dangerous situations. The subtlety lies in understanding your wall composition and using appropriate anchors or supports like metal studs. Remember, a well-installed cabinet can support hundreds of pounds, but only if anchored correctly. If you want to learn how to avoid these traps, check out [this guide on securing heavy cabinets](https://artisancabinetworkz.com/the-heavy-mixer-lift-how-to-save-your-back-and-your-countertops).
And let’s not forget lighting—many forget that poorly integrated lighting can diminish the aesthetic and functionality of your built-ins. Concealed LED strips or strategically placed task lights can dramatically change the usability and ambiance of your kitchen. Yet, improper wiring or placement often leads to flickering or shadows, defeating their purpose.
In summary, a successful kitchen remodel hinges on paying attention to these nuanced details—material choices tailored to environment, smart storage that fits your lifestyle, and proper installation techniques. Applying these insights will save you time, money, and frustration in the long run.
Thinking through these advanced considerations ensures your investment yields lasting beauty and function. Need more expert tips? Visit [artisan’s comprehensive guides](https://artisancabinetworkz.com/privacy-policy) for in-depth advice and ideas.Maintaining your custom kitchen cabinetry and built-ins over time requires the right combination of tools, techniques, and a proactive mindset. One of my go-to tools is a high-quality cordless drill, like the Makita XFD12Z, which I personally rely on for precise adjustments and installing hardware. Its lightweight design and variable speed settings make it perfect for delicate tasks—reducing the risk of over-tightening or damaging expensive finishes. Additionally, I always keep a digital moisture meter, such as the Tramex MOISTURE METER, handy to monitor humidity levels in high-moisture environments like laundry rooms or basements, ensuring my materials stay within safe ranges and preventing warping or mold growth.
How do I maintain my built-ins over time?
Regular inspections are crucial. I schedule quarterly checks to look for signs of wear, loose hardware, or moisture intrusion. Using a microfiber cloth combined with a gentle cleaning solution helps preserve finishes without stripping protective layers. When I detect early signs of damage, I promptly reapply sealants or tighten loose fittings, preventing small issues from becoming costly repairs. Moreover, I use a silicone-based lubricant like Fabreze Dry to keep drawer slides and hinges operating smoothly, extending their lifespan and maintaining effortless access to storage.
For scaling your kitchen project as your needs evolve, investing in modular storage hardware is key. I recommend adjustable shelves, like those from Blum’s Movento system, which allow you to customize storage configurations without starting from scratch. Their soft-close mechanisms and durable steel tracks ensure long-term functionality, even under heavy loads. As trends move towards smarter kitchens, integrating apps like Easy2Control lets you track maintenance schedules, set reminders for sealant reapplications, and plan future upgrades, making the entire process more manageable and less stressful.
One trend headed into the future involves integrating IoT-enabled sensors that monitor humidity and temperature in real time, alerting you immediately if conditions threaten your cabinetry. This proactive approach minimizes costly repairs and keeps your investment protected. Exploring tools that automate or assist with regular maintenance tasks can be a game changer—saving you both time and money in the long run. Plus, maintaining a dedicated toolkit with essential items like a cordless impact driver, small level, and a suction cup for lifting delicate panels simplifies ongoing upkeep and scaling.
Try implementing a moisture meter check every season to keep tabs on environmental changes—a small habit that can significantly prolong your cabinetry’s life. Continuous learning and adopting advanced tools will ensure your kitchen remains functional and beautiful for years to come. For more tailored advice or to discuss your project specifics, visiting our contact page could be your next step.
What I Wish I Knew Before Starting My Kitchen Transformation
One of the most profound lessons I learned was the importance of choosing the right materials for high-humidity zones. Initially, I went with particle board for my cabinets, thinking it was a budget-friendly choice. However, exposure to moisture caused warping and sagging, leading me to re-evaluate my entire approach. This experience highlighted that investing in moisture-resistant plywood or solid wood can save you headaches and repairs down the line.
Another insight was understanding the value of proper ventilation and waterproof barriers. Sealing edges and interior panels with marine-grade sealants, combined with good airflow, dramatically extended the lifespan of my built-ins. It became clear that thoughtful design, like raised cabinetry or drainage features, prevents water accumulation and mold growth, especially in laundry areas.
Finally, I realized that regular maintenance and proactive inspections are key. Small checks every few months for signs of moisture intrusion or hardware wear can catch issues early and prevent costly fixes. Using tools like a moisture meter and choosing corrosion-resistant hardware made a tangible difference in durability and ease of upkeep.