The Appliance Garage Rethink: Using Pocket Doors to Save Counter Space
Ever opened my kitchen cabinet to grab a spice jar, only to find my elbow banging against a wall of clutter? That frustrating moment hit me hard during a remodel, realizing how much space is wasted with traditional cabinet doors and bulky appliances. I knew there had to be a smarter way—something that could free up my counter space and give my kitchen a cleaner, more open feel.
One lightbulb moment was discovering the potential of pocket doors in the kitchen. These clever sliding doors tuck neatly into walls, disappearing when not in use and creating seamless access to hidden storage. It felt like a game-changer, promising to transform the way I organized my space.
Why Pocket Doors Are theKitchen’s Best-Kept Secret
Traditional swinging doors in kitchens often get in the way—literally. They block access, chip paint, and make tight spaces feel even more cramped. For years, I overlooked the idea of replacing these with sliding pocket doors, thinking it was only for high-end homes or renovation TV shows. But as I dug deeper, I learned that pocket doors are practical, versatile, and surprisingly easy to install with the right planning.
The beauty of pocket doors is their ability to save precious counter and floor space. When you slide them open, they tuck away flush with the wall, revealing a neat, unobstructed area perfect for appliances or additional storage. Plus, they lend a sleek, modern look that elevates your entire kitchen aesthetic.
Did you know that according to a study by the National Kitchen & Bath Association, optimizing space is one of the top priorities for homeowners during remodels? Yet, many stick to traditional cabinet doors, missing out on the benefits of more innovative solutions like pocket doors and built-ins.
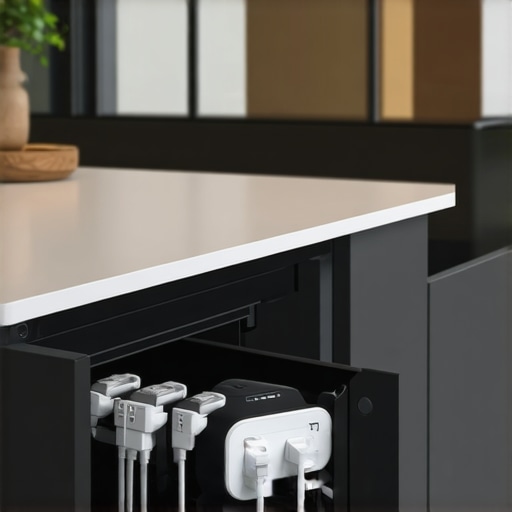
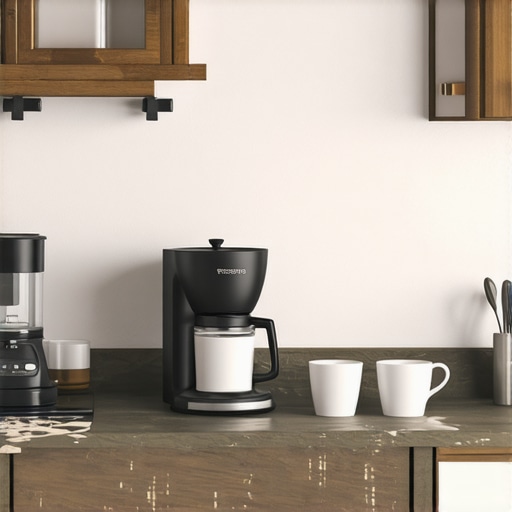
In my case, installing pocket doors to hide my coffee station and small appliances decluttered my countertops instantly. It made my workspace feel larger and more organized—both practically and visually. If you’ve been thinking about ways to maximize your kitchen’s potential, this simple upgrade might just be the secret ingredient.
But I understand skepticism. It’s natural to wonder if pocket doors are durable, if they fit your decor, or if they’re worth the investment. That’s why I’ve broken down everything I’ve learned into easy, actionable steps—so you can decide if this approach fits your remodel goals.
Choose the Right Location and Design
Start by identifying which cabinetry or wall area will benefit from a pocket door. Think of this as planning a secret passage—you’re creating an opening that slides away to reveal hidden storage. For instance, I decided to conceal my coffee station behind a pocket door, freeing up countertop space and reducing clutter. Sketch out your design, considering the dimensions and the wall cavity needed. When I measured my space, I left an extra inch on each side to accommodate the door’s track and hardware, ensuring smooth operation.
Gather Materials and Tools
Prepare everything you’ll need—pocket door kits come with most components, but you’ll also require a drill, level, tape measure, stud finder, and a jigsaw. Think of this as assembling a puzzle; every piece has its place. I found that using a quality pocket door hardware kit saved me time and frustration. Before starting, double-check that all parts are present and compatible with your door size to avoid delays.
Prepare the Wall Cavity
Remove existing drywall or paneling in the designated area. Use a stud finder to locate framing studs and mark their positions. This is crucial: anchoring the track into studs provides stability. I cut along the markings with a drywall saw, being careful not to damage electrical wiring or plumbing behind the wall. This step is like preparing a blank canvas—precision here ensures a seamless finish later.
Install the Track and Framing Components
Attach the header plate and track system according to the manufacturer’s instructions. Secure the header into the studs using heavy-duty screws. Picture this as building the rails of a sliding door railway system—precision is key for smooth operation. I used a level to ensure everything was perfectly horizontal, preventing future swinging or jamming. Remember, a crooked track can cause the door to stick or come off alignment.
Mount the Door and Hardware
Hang the door onto the rollers and slide it into the track. Adjust the rollers to ensure the door glides smoothly. Think of this as balancing a skateboard; adjustment screws fine-tune the smoothness. I tested the door several times, making small tweaks to prevent rubbing or sticking. Proper alignment here is vital: a misaligned door makes the entire system look unprofessional and can cause operational issues.
Finish with Trim and Paint
Once the door slides flawlessly, install any necessary trim pieces to conceal gaps and hardware mounts. Paint or stain your door to match the kitchen aesthetics. I used painter’s tape to protect adjacent surfaces and applied a semi-gloss paint for durability. This final step is like dressing up your hidden gem—details make all the difference.
Extra Tips for Success
During my installation, I found it helpful to watch tutorial videos and have an extra pair of hands—it’s much easier with assistance. Also, considering an anti-jump hardware feature prevents the door from derailing if pulled forcefully. If you’re hesitant, consult a professional or visit https://artisancabinetworkz.com/contact-us for expert advice.
While many assume that selecting custom cabinets or built-in storage automatically guarantees a functional kitchen, the reality is more nuanced. A common misconception is believing that bigger or more elaborate designs always serve practical needs. In fact, overfitting a space with ornate cabinetry can lead to reduced accessibility and wasted real estate, especially if the layout isn’t thoughtfully planned. For example, installing deep, full-extension drawers without considering user height or reach can make daily tasks cumbersome.
Are Built-Ins Truly Versatile or Just Style Statements?
Many homeowners think that built-ins are only for high-end designs, but in my experience, smartly integrated built-in storage can dramatically enhance a kitchen’s usability. They can be tailored to your specific habits, like custom spice pull-outs or concealed appliance garages, if you avoid the trap of cookie-cutter solutions. One pitfall is focusing solely on aesthetics, neglecting ergonomics and future needs. According to a study by the American Society of Interior Designers, bespoke solutions that address specific workflows provide better long-term satisfaction than generic mass-produced options. To truly benefit, it’s essential to marry form with function—deliberately designing built-ins that evolve with your lifestyle. For instance, I integrated vertical storage for baking sheets and narrow pull-outs for utensils, which drastically improved efficiency.
Beware the Hidden Cost of Over-customization
While custom cabinets seem like an investment that pays off, they can also carry hidden pitfalls. Overly intricate joinery or excessive cabinetry can significantly increase lead times and costs, sometimes exceeding budget expectations. Additionally, overly custom solutions may reduce flexibility if your needs change—say, you want to convert a pantry to a wine cellar later. An often-overlooked mistake is neglecting future-proofing in the design phase. To avoid this, consult with experts ([contact us](https://artisancabinetworkz.com/contact-us)) who can advise on adaptable storage solutions that grow with your habits. For example, modular storage systems can offer the flexibility you need without the hefty price tag of bespoke craftsmanship. Remember, the goal is a kitchen that enhances your daily routine without becoming a static, unchangeable space. For more ideas on a balanced approach, explore [the ultimate guide to custom cabinets](https://artisancabinetworkz.com/the-ultimate-guide-to-custom-cabinets-for-a-stylish-kitchen-overhaul). Ultimately, mastering storage involves understanding your habits, avoiding the allure of over-design, and planning for the future. Do you see yourself falling into these traps? Let me know in the comments.Maintaining your custom kitchen storage over time requires the right tools, meticulous attention, and a proactive approach. My personal favorite is a high-quality digital level, such as the Stabila 37824, which I use daily to ensure that cabinet and shelf alignments stay perfect through seasonal shifts. Precise leveling prevents doors from sticking and drawers from misaligning, keeping your storage functional year after year. Additionally, I swear by a fine-tipped obsessive-compulsive glue applicator for securing shelf supports during initial installation, ensuring longevity and stability, especially in high-use areas. For software-driven planning, I rely on 3D CAD tools like SketchUp Pro, which help me visualize storage solutions before executing them, avoiding costly mistakes and making future expansions seamless. Predicting where the trend is headed, I believe integrated smart storage—such as sensor-activated drawers or app-controlled lighting—will become standard, simplifying maintenance routines and enhancing user experience. How do I keep my built-ins working smoothly over time? Regular inspection and maintenance are crucial. I recommend checking hinges and drawer slides at least biannually. Applying a bit of WD-40 or hinge-specific lubricant keeps parts moving effortlessly and prevents squeaks or rust. When your hinges are showing signs of stiffness, replacing standard hinges with soft-close Blum options, as I detail in my tutorial, can dramatically extend the lifespan of your cabinets and improve daily use. For instance, I recently replaced my aging hinges with Blum’s latest soft-close model, significantly reducing door misalignment issues, which also preserves the cabinet’s aesthetic appeal. To further safeguard your investments, consider installing tip-in hardware on drawers for easy adjustments or replacements, found on specialized supplier sites like https://artisancabinetworkz.com/contact-us. Regular cleaning, avoiding overloading shelves, and keeping moisture levels low are simple yet effective strategies to prevent warping, cracking, or hardware corrosion. Looking ahead, I see a future where integrated maintenance reminders—alerts for hinge lubrication or hardware inspections—become standard in smart cabinetry. If you’re eager to implement these long-term solutions, start by trying the tip of lubricating your hinges with the recommended silicone spray for a smoother, quieter operation. Remember, a well-maintained storage system not only looks fantastic but also enhances your kitchen’s efficiency and lifespan.
The Hidden Pitfalls I Wish I Knew From the Start
One of the most eye-opening lessons was realizing that over-customization can lead to rigidity. I once designed a pantry with intricate pull-outs that looked fantastic—until I needed to change a shelf height years later and found the entire system was complicated to modify. Flexibility is key for long-term satisfaction.
Another revelation was that selecting high-end hardware isn’t enough; proper installation and ongoing maintenance are crucial. Even the most beautiful soft-close hinges need regular lubrication to function flawlessly over time, which many homeowners overlook.
Lastly, I learned that sometimes, simple solutions outperform complex ones. Installing a basic toe-kick drawer for flat baking sheets transformed my space more than a costly custom cabinet. It’s about clever use of every inch and prioritizing ease of access over extravagance.
Tools and Resources That Made All the Difference
My favorite go-to resource is The-ultimate-guide-to-custom-cabinets. It’s packed with practical advice on balancing aesthetics with functionality, which helped me avoid common pitfalls. For hardware, I rely on Blum’s soft-close hinges; they’re durable and proven to prolong cabinet life—highly recommended if you value reliability.
For planning, SketchUp Pro has been invaluable. It allows me to visualize storage solutions before physical work begins, saving time and reducing surprises. Finally, I trust this expert consultation service for personalized advice, especially when I face unique structural challenges in my remodels.
Your Next Step: Embrace the Creative Potential of Your Space
The future of kitchen built-ins and storage is all about smart design and thoughtful planning. Don’t be afraid to experiment with innovative ideas like hidden compartments or tailored built-in features—these little touches elevate your space while improving functionality. Remember, a successful remodel is a journey, not just a project. Dive into the process with confidence, and let your kitchen become a reflection of your best habits and style.
What clever storage hack are you most excited to try in your kitchen? Share your ideas below!
,