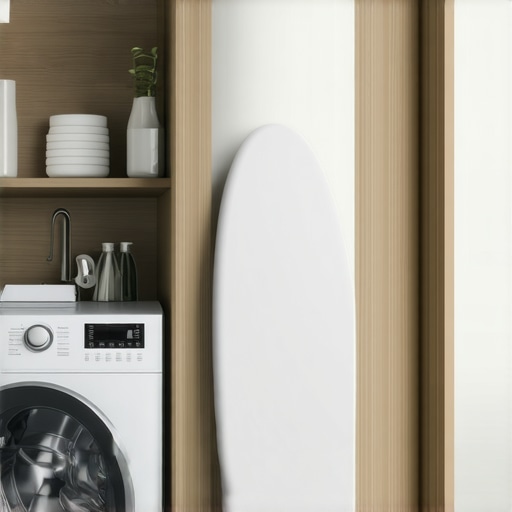
The Laundry Room Built-In That Finally Hides the Ironing Board
I remember the exact moment I realized my laundry room was no longer functional but just a cluttered eyesore. It was a busy Saturday morning, and I desperately needed to iron a batch of shirts before heading out. I opened the laundry room door, only to be greeted by a chaotic mountain of clothes, mismatched hangers, and a glaringly obvious folding station. But what caught my eye the most was the unsightly, upright ironing board leaning against the wall, taking up precious space and ruining the room’s otherwise neat appearance. That lightbulb moment made me think—why should something so essential be such an eyesore?
Why Our Laundry Spaces Desperately Need a Makeover
It’s startling how many of us accept the laundry room as a necessary evil—an awkward corner filled with tools of the trade that we hide behind closed doors. But what if I told you that you don’t have to settle for a cluttered, inefficient space? A well-designed built-in solution can seamlessly hide your ironing board, making your laundry area both stylish and highly functional. Plus, this change is more achievable than you might think. As I dove into the process, I discovered that a custom-built cabinet could be a game-changer, transforming my space from chaos to calm.
It’s worth noting that in recent studies, experts highlight how organized laundry spaces noticeably reduce stress and increase efficiency—because, let’s face it, nobody wants to start their day surrounded by mess. You can learn more about how custom cabinets revolutionize your home in this insightful article.
Is Building a Hidden Ironing Board Actually Worth the Hype?
Early on, I made a mistake many DIY enthusiasts stumble over: I underestimated the complexity of integrating a hidden ironing board into my existing cabinetry. I assumed I could just slap together a quick shelf, and it would work. Spoiler: it didn’t. That’s why I want to be upfront with you—careful planning and choosing the right materials are critical for success. Trust me, I learned this the hard way, and it cost me time and money.
If you’re tired of battling clutter every time laundry day comes around or worried about turning your laundry space into an eyesore, keep reading. I’ll guide you through the process of designing and implementing a built-in that keeps your ironing board—and your sanity—intact. And, of course, I’ll show you how to avoid the common pitfalls that might trip up a less experienced DIYer.
Plan and Measure with Precision
Start by removing your current ironing board and assessing available space. Use a tape measure to determine the width, height, and depth needed to accommodate your ironing board when stored and in use. Sketch your cabinet design, considering a fold-down or slide-out mechanism. I recall measuring multiple times to ensure the cabinet opening wouldn’t interfere with neighboring appliances, which saved me from costly errors later. Accurate measurements are crucial—a poorly fitted unit will cause frustration later.
Choose Rigid, Durable Materials
Select high-quality plywood or hardwood for the cabinet structure, ensuring it can handle frequent use and weight. Avoid particleboard, which may warp or sag over time, especially in damp laundry environments. Thinking back, I initially went for cheaper materials but had to redo parts when they warped after a few months. This step is like choosing the foundation for a house—the sturdier, the better. For inspiration, check out this article on weak materials to avoid in cabinetry.
Design the Cabinet for Hidden Storage
Create a frame that houses the ironing board, with a hinge or sliding track system. The hinge mechanism should allow the board to fold down smoothly without wobbling. During my own build, I modeled the hinge placement on a DIY video, ensuring the pivot point was optimally positioned for easy folding. Test the mechanism by manually folding and unfolding the board—this helps to identify any tight spots before installation. Think of it as a door; it needs to open and close seamlessly. For further design ideas, consider this resource on integrating built-ins into your space.
Install the Cabinet Securely
Attach the cabinet to the wall using sturdy anchors and screws, anchoring into wall studs for maximum stability. Use a level to ensure the cabinet sits perfectly horizontal, preventing misalignments that could cause binding or uneven opening. Remember, loose mounting can lead to sagging or even failure over time. I once experienced a wobbling cabinet until I resecured it correctly with proper wall anchors, which made a huge difference. Make sure to consider the weight of the built-in when selecting fasteners—overloading them can cause serious damage. For tips on proper mounting, see this post about wall cabinet installation.
Finish with a Professional Touch
Apply paint or veneer to match your laundry room decor, ensuring a seamless look. Seal the edges with a high-quality edge banding to prevent moisture infiltration. During my project, I used a semi-gloss paint for easy cleaning and durability. A professional finish not only elevates the look but also prolongs the lifespan of your built-in. Remember, proper sealing and finishing are key to resisting humidity and wear—especially important in laundry environments. For ideas on stylish cabinetry, visit custom cabinet ideas.When it comes to kitchen remodels and storage, many homeowners rely on popular advice that, in reality, can lead to pitfalls. A common misconception is that installing standard cabinets and generic storage options suffices for a functional kitchen. However, as I discovered through years of experience, *custom cabinets* and *built-ins* unlock unparalleled benefits, especially when tailored to your specific space. For example, incorporating a hidden spice rack or a vertical drawer for bakeware can revolutionize your workflow. Yet, many overlook these nuanced details, assuming one-size-fits-all solutions are adequate.
Another widespread myth suggests that cost-saving measures, such as opting for particleboard or low-grade materials, won’t impact durability. In my professional opinion, sacrificing quality here leads to frequent repairs and replacements, making it a false economy. Instead, high-quality plywood or hardwood is more reliable, especially in humid environments like kitchens. Discovering this early saved me from costly redo’s and prolonged downtime.
Why Do So Many Fall for the Same Mistake in Kitchen Storage?
It turns out, the trap isn’t just in material choice but also in execution. For instance, many people underestimate the importance of proper installation—think about wall anchors and support brackets. Improperly secured cabinets can wobble or even fall, posing safety risks. I’ve seen countless projects where homeowners skipped detailed planning, resulting in cluttered counters and inaccessible storage. To avoid this, thorough measurement and professional installation are vital. For more insights on creating efficient storage, check out this article on expert tips for selecting storage solutions.
A particularly sneaky mistake involves neglecting the importance of door and drawer hardware. Cheap handles or hinges may seem economical initially, but they wear out quickly, leading to misaligned doors and annoying squeaks. Upgrading to quality hardware ensures smooth operation and lasts for years. This small upgrade can make a significant difference in usability over time.
Have you ever fallen into this trap? Let me know in the comments.
The key to avoiding these pitfalls is recognizing that every detail, from material selection to installation, impacts your kitchen’s function and style. Remember, investing in *custom cabinets* and carefully thought-out *built-ins* pays off in longevity and usability. Curious about transforming your space? Explore how custom cabinets can revolutionize your kitchen and consider consulting professional designers who understand these nuanced details. Your ideal kitchen awaits once you go beyond the myths.When it comes to maintaining your custom kitchen cabinets and built-ins over time, having the right tools and a disciplined approach is essential. I personally swear by a combination of high-quality machinery and smart software that streamline the process and ensure durability. For instance, investing in a **decent orbital sander** with variable speed capabilities allows me to sand surfaces evenly and flawlessly, which is crucial for finishing touches that stand the test of time. Moreover, I rely on a **laser level**—not a bubble one—to achieve precise alignment of cabinets and shelves, especially when working on custom projects like those described in seamless built-in installations.
In terms of software, I utilize **Cabinet Vision** for designing intricate cabinetry layouts. This program enables me to visualize the project in 3D, catch potential mistakes early, and communicate more effectively with clients and fabricators. AutoCAD is another excellent tool I use for detailed shop drawings, especially for complex angles or unique integration points described in technical guides like those from ultimate cabinet guides.
For long-term results, regular maintenance is a must. I schedule bi-annual check-ins to tighten screws, reapply protective finishes, and replace worn hardware. For cleaning, I recommend a **microfiber cloth** combined with a gentle, pH-neutral cleaner—this preserves the finish and prevents micro-scratches, as advised by wood care experts. Keep in mind that humidity levels can impact wood longevity; using a **dehumidifier** in your kitchen can drastically minimize warping or swelling over the years. A tip often overlooked is installing **ventilation fans** or even a small **humidistat-controlled exhaust system** to regulate moisture.Looking ahead, I predict that smart maintenance solutions will become more integrated, perhaps via IoT-connected sensors that notify you of environmental shifts or hardware issues before they escalate. As the trend toward precision and durability accelerates, equipping your workshop or renovation process with advanced tools now will save you time and money in the future.**How do I maintain my custom cabinets and built-ins over time?** The key is regular inspections combined with high-quality, purpose-built tools that enable precise adjustments, such as soft-close mechanisms and moisture-resistant finishes. For example, ensuring your hinges are properly lubricated with manufacturer-recommended compounds can prevent squeaking and misalignment. I encourage you to try a **smart tool setup like a digital measuring device**—they are game-changers for accuracy and consistency. For more insights on creating long-lasting kitchen upgrades, explore how to keep your built-ins in perfect shape. Stay proactive, and your investment in custom cabinetry will reward you for decades.
Throughout my journey of redesigning my laundry room, I uncovered several unexpected lessons that reshaped my approach to home improvement. One insight that stood out was the importance of anticipating future needs during the planning phase. Initially, I focused solely on aesthetics, but as I integrated custom-built features, I realized that thoughtful foresight could save me significant time and money down the road. Another lesson was the power of patience—rushing the installation of my hidden ironing board led to misalignments that undermined its functionality. Taking the time to carefully measure and test mechanisms proved invaluable, emphasizing that meticulous attention to detail is key when working with built-ins. Lastly, I learned the hard way that using high-quality materials isn’t just about durability; it also influences the overall polished look of your finished project. Investing in sturdy plywood and premium hardware enhanced both performance and aesthetics, making my laundry room a space I actually enjoy. These lessons have deepened my appreciation for custom cabinetry and reinforced the idea that well-executed hidden storage solutions can elevate your home in ways you’ve never imagined.