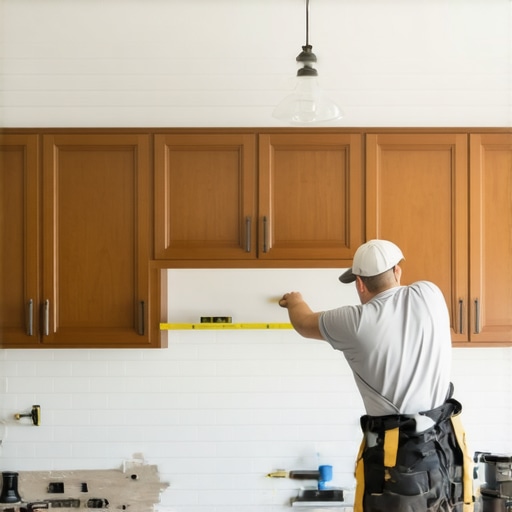
The Trick to Installing Crown Molding on Cabinets That Reach the Ceiling
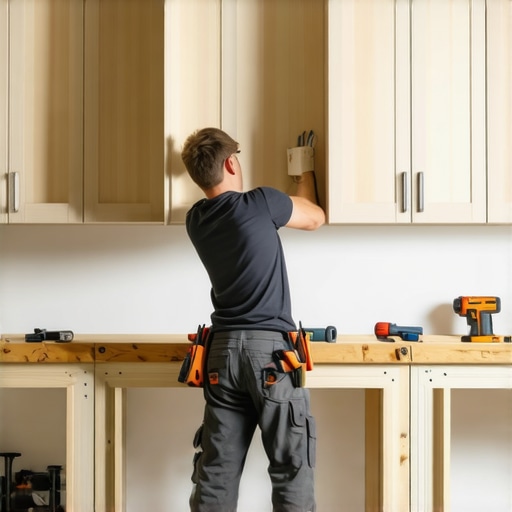
I remember the moment vividly: I had just finished installing new cabinets in my kitchen, feeling pretty proud of myself. Then I looked up. That’s when I realized: the ceiling wasn’t quite high enough to add crown molding like I’d seen in all those glossy magazine kitchens. It was a frustrating, eye-opening experience. You see, installing crown molding on cabinets that reach the ceiling isn’t straightforward—at least, not without the right tricks up your sleeve.
In today’s post, I promise to share with you the insider tip that transformed my DIY project from a headache into a seamless process. Whether you’re remodeling your kitchen or just sprucing up your built-ins, mastering this technique can save you time, money, and a lot of heartache.
The Hidden Challenge of High Cabinets
Is the Molding Trick Really Worth It?
When I first attempted to install crown molding on my full-height cabinets, I thought I could just cut and attach it like any other. Wrong. The main issue? The ceilings are often too high, or the walls are uneven, making the molding installation more of a puzzle than a project. This mistake early on was a classic case of underestimating the complexity—something I learned the hard way. In fact, when I neglected to account for the cabinet height and ceiling irregularities, I ended up with gaps, crooked cuts, and a mounting nightmare.
You see, the real trick isn’t just cutting angles perfectly—it’s about understanding the spatial relationship between your cabinets and ceiling, then making tiny adjustments that ensure everything lines up perfectly. This small detail can be the difference between a professional-looking finish and a disastrous DIY fail.
And, according to a recent study published by home remodeling experts, well-executed crown molding can increase your home’s perceived value—by as much as 10%. That means investing a little extra effort now can pay off big if you plan to sell someday.
So, if you’ve ever stared at your high cabinets and wondered how to make crown molding work seamlessly, don’t worry—I’ll walk you through the proven technique that made my project a success. Ready to elevate your cabinets and give your kitchen that polished look? Let’s dive into step-by-step solutions that finally make this tricky installation doable.
Measure and Plan Carefully
Start by measuring the total height from the ceiling to the top of your cabinet. Use a reliable tape measure and note these dimensions. Next, determine the crown molding length to match your cabinet width, accounting for corner angles. I once neglected to double-check my measurements and ended up with a piece too short, forcing me to start over, which was frustrating but a great lesson in precise planning. This initial step is vital because it sets the foundation for a seamless fit.
Cutting Angles with Precision
Use a miter saw set to the correct angles to cut your crown molding. Typically, crown molding is cut at 45°, but this can vary with the corner design. To avoid mistakes, I always cut a test piece first—it’s like a rehearsal for a play, ensuring everything fits perfectly before assembly. Remember, visualizing the joint as a ‘hat’ sitting atop your cabinet helps in understanding the bevel. Accurate cuts prevent gaps and crooked lines. For complex corners, consider using a coping saw to create tight joints. Check out hinge tips that relate to precise fitting.
Creating the Right Support System
High cabinets require sturdy support to hold the weight of crown molding. Install cleats or a horizontal ledger at the correct height, ensuring it spans the length of the cabinets. Think of this as building a scaffold—without it, the weight distribution becomes uneven, risking sagging or falls. I once tried to attach molding directly to the wall without proper support, which resulted in an uneven surface, reminiscent of trying to hang art on a crooked wall—difficult and unsightly. Proper support prevents this and makes installation smoother.
Applying and Securing the Molding
Use a high-quality finishing nail gun to secure the molding to the support cleats, working from the center outward. This method keeps the piece stable and prevents splitting. During my last project, I clamped the molding temporarily while nailing, which kept everything aligned. For awkward corners, measure and cut the joint pieces precisely, then assemble before attaching. Caulk the seams and fill nail holes for a seamless look. A little bit of patience here makes your project look professional, just like a contractor’s work.
Finishing Touches for a Professional Look
Sand the caulked joints smoothly and paint or stain the molding to match your kitchen decor. Pay attention to the edges, and use painter’s tape for clean lines. I once painted over uneven caulk, which highlighted my mistakes—a good reminder to take your time finishing. Consider adding corner blocks or using flexible molding to accommodate walls and ceilings that are not perfectly square. These small details elevate your handiwork, making your high cabinets look custom-made and luxurious.
Many homeowners assume that choosing custom cabinets or built-in storage automatically guarantees a perfect kitchen upgrade. However, even seasoned DIYers and experienced designers often overlook subtle nuances that can make or break the final result. One common myth is that bigger, more elaborate storage always equals better organization—but in reality, poorly planned storage can lead to clutter, inefficiency, and frustration. For example, oversizing cabinets without considering interior layout might seem impressive initially, yet it often results in wasted space and difficulty accessing rarely used items. A deeper understanding of these intricacies can save you substantial time and money.
Have you ever wondered why some upscale kitchens still feel cluttered despite their high-end cabinetry? The answer lies in the often-overlooked detail: the importance of tailored internal configurations. Custom cabinets should not just match your aesthetic preferences but also accommodate your specific storage needs. Aligning your cabinet design with your lifestyle—such as incorporating pull-out spice racks or dedicated baking stations—enhances functionality. According to a study by the National Kitchen & Bath Association, 78% of homeowners who invest in personalized storage solutions report higher satisfaction post-remodeling. This highlights how nuanced planning translates directly into user experience.
Beware the trap of focusing solely on external appearances. A sleek, seamless exterior can mask ill-designed interiors prone to chaos. For instance, a common mistake is installing shallow drawers or narrow shelves that restrict accessibility, forcing you to dig through piles of items. To avoid this, consider advanced solutions like depth-optimized drawers or adjustable shelving systems that adapt as your needs evolve. For those questioning the balance between aesthetics and practicality, I recommend visiting creating seamless kitchen remasters with built-in storage. There, you’ll find expert insights on integrating form and function effectively.
Another nuance that often escapes notice is the impact of hardware choice on cabinet longevity and ease of use. While soft-close hinges and push-to-open mechanisms are popular, they can sometimes fail prematurely if not installed correctly or if compromised by low-quality components. An advanced mistake some make is neglecting proper material selection for high-traffic zones, leading to warping or damage over time. Opting for materials like Rift Sawn Oak or marine-grade plywood can significantly enhance durability, a point emphasized by woodworking experts who highlight the importance of material integrity in long-term performance.
Always keep in mind that each element—from cabinet layout to internal hardware—is interconnected. Cutting corners in any of these aspects might seem negligible initially but can cause debilitating issues down the line. To truly master custom cabinetry, you need to consider both macro and micro details—something seasoned designers do instinctively. For comprehensive guidance on optimizing your kitchen storage, consider consulting a professional through our contact page.
In conclusion, the hidden nuances in custom cabinets and built-in solutions involve more than just aesthetics—they demand strategic planning, accurate measurements, and an eye for future-proofing. Failing to recognize these details often results in diminished satisfaction and increased costs, undermining your remodel aspirations. Remember, effective storage isn’t just about fitting items; it’s about fitting your life seamlessly. Have you ever fallen into this trap? Let me know in the comments.
Keeping Your Custom Creations in Peak Condition
Once you’ve invested time and effort into designing and installing your custom cabinets or built-ins, maintaining their functionality and appearance is vital for long-term satisfaction. This involves selecting the right tools and adopting proven maintenance routines that prevent issues before they start. One of my go-to tools is a high-quality microfiber cloth paired with a gentle, pH-balanced cleaner—this combination ensures your cabinets stay free of fingerprints, grease, and dust without damaging finishes. For more stubborn dirt or residue, I recommend a soft-bristled brush and a spray bottle with a mix of water and a few drops of mild dish soap, which effectively lifts grime without scratching surfaces.
To keep hinges and drawer slides operating smoothly, I regularly apply a small amount of silicone-based lubricants. Unlike petroleum-based lubricants, silicone maintains its properties over time and doesn’t attract dust or dirt. I personally favor the Finish Line Silicone Spray because it’s quick to apply and leaves a thin, dry film that prevents squeaks and sticking. Incorporating routine checks—every six months or so—can help you identify loose hardware or worn-out components early, averting costly repairs or replacements.
Embracing Smart Maintenance with Technology
As technology advances, Smart Home integrations can significantly streamline cabinet maintenance. For example, installing moisture sensors inside drawers and cabinets or connecting hinge systems with Wi-Fi capabilities can alert you to issues like humidity or mechanical failures before they become visible problems. These innovations not only prolong the life of your cabinetry but also add a layer of convenience, letting you manage your storage solutions remotely. Predictions indicate this trend will grow, with more manufacturers offering integrated diagnostics to help homeowners and pros keep everything working flawlessly over extended periods.
How do I maintain custom cabinets and built-ins over time?
Establishing regular cleaning routines and using the right tools are essential. Avoid abrasive cleaners that can damage delicate finishes; instead, opt for microfiber cloths and soft brushes. Periodically check for loose hardware or signs of wear, applying silicone lubricants to hinges and slides as needed. For high-use areas, consider replacing or upgrading hardware to stay ahead of deterioration. Additionally, integrating smart monitoring devices can give you real-time alerts about humidity or mechanical issues, making maintenance proactive rather than reactive. To explore more advanced storage solutions that ease maintenance, check out future-proof storage ideas for 2025 and elevate your entire setup. Don’t hesitate—try out a maintenance habit today; even a simple monthly check can extend your cabinetry’s lifespan significantly.
Reflecting on my journey with custom cabinets and built-ins, I realize that the real magic lies in those subtle details that often go unnoticed. My biggest lesson was understanding that perfection isn’t achieved solely through the initial design but through meticulous finishing and maintenance. I learned the importance of accurate measurements and the power of smart hardware choices, which can transform a good project into a stunning one. Furthermore, embracing innovation, such as integrated storage solutions and smart technology, gives your kitchen a future-proof edge. These insights have made my remodeling efforts more rewarding, turning everyday spaces into tailored retreats that truly reflect personal style and functionality.
Elevate Your Craft with Curated Tools and Ideas
To bring your cabinetry visions to life, I trust tools like the Finish Line Silicone Spray for smooth drawer operation and the project planning guides on built-ins that ensure every inch serves a purpose. Reading resources such as comprehensive guides on custom cabinetry has expanded my understanding of materials and techniques, saving me from costly mistakes. These curated recommendations have become my trusted companions on the path to creating functional beauty in my home.
Your Next Step Starts Today
Remember, every detail counts when designing and maintaining your custom kitchen. The more you learn and apply, the closer you get to a space that not only looks spectacular but works perfectly for your lifestyle. Whether it’s selecting the right hardware, implementing innovative storage solutions, or simply maintaining your cabinetry, taking action now will pay dividends in the long run. Don’t wait for perfection—start small, stay consistent, and enjoy the process of turning your dream kitchen into reality. Want some personalized advice? Feel free to reach out to experts who can guide you every step of the way.