Why Upper Cabinets Should Touch the Ceiling for Modern Aesthetics
Have you ever opened your kitchen cabinets only to find a frustrating gap between the top of your upper cabinets and the ceiling? That noticeable space can feel like a missed opportunity—both visually and functionally. I remember the first time I tackled my kitchen remodel, and despite choosing sleek, modern cabinets, that awkward gap remained. It was like a perpetual reminder that something was just a little off—until I discovered the game-changing idea of pushing those cabinets all the way to the ceiling.
Embracing the Impact of Touching Cabinets
When I finally decided to extend my upper cabinets to the ceiling, the transformation was immediate. Not only did my kitchen look taller and more cohesive, but I also gained extra storage space without sacrificing style. It’s astonishing how a simple design choice can elevate the room’s overall aesthetic, creating a clean, modern look that feels both luxurious and functional.
Now, I want to share with you what I’ve learned about why this small change makes such a big difference. If you’re contemplating your own kitchen upgrade, understanding the benefits of touching your cabinets to the ceiling can help you make informed decisions that last for years to come.
Question: Will Touching Cabinets Really Make That Much Difference?
Early on, I worried that extending cabinets to the ceiling might be a costly or complicated upgrade. Honestly, I made the mistake of waiting too long to consider it, and I wish I had known sooner. It’s a common misconception that such modifications are only for high-end kitchens, but in reality, they are a smart, achievable upgrade that significantly boosts a room’s visual appeal and storage capacity. According to industry experts, well-designed cabinetry can dramatically influence how spacious and modern a kitchen feels, especially when the cabinets seamlessly meet the ceiling, hiding those unsightly gaps and gaps in visual flow (learn more about custom cabinet options here).
In the sections ahead, I’ll walk you through the practical reasons and design tips for ensuring your upper cabinets reach the ceiling, helping you avoid the common pitfalls and, ultimately, create a kitchen space you’ll love.
Measure and Plan for a Perfect Fit
Begin by measuring the full height from your existing cabinets to the ceiling. Use a tape measure and level to ensure accuracy, especially in older homes where walls may be uneven. I once ignored the wall’s slant and ended up with crooked cabinets, which I rectified by shimming and re-measuring multiple times until I achieved a level line. This foundational step prevents costly mistakes later and sets the stage for a clean, professional look.
Choose the Right Cabinet Style and Materials
Select cabinets that match your current style or opt for a new design that complements your kitchen. Opt for full-overlay doors to maximize interior space and ensure a seamless appearance. When planning for cabinets that reach the ceiling, consider materials that are durable and easy to finish, such as high-quality plywood or MDF with a veneer or paint finish. For example, I used shaker-style doors with a painted finish to achieve a sleek, unified look, as suggested in the ultimate guide to custom cabinets.
Fabricate or Purchase Custom Cabinets
Decide whether to buy pre-made cabinets or custom-build them. Custom cabinets offer a perfect fit and can be tailored to your measurements, but they require precise fabrication. When I worked on my remodel, I opted for custom cabinets to ensure they fit flawlessly and aligned perfectly with the ceiling line. I coordinated with a carpenter to design and build units that matched my specifications, using detailed plans to avoid surprises. If you choose custom, consult with a professional or a quality cabinet manufacturer experienced in ceiling-high installations.
Prepare the Wall and Installments
Prepare your wall by removing existing upper cabinets and patching any holes. Use shims and a level to mark the exact height for your new cabinets. During installation, anchor the cabinets securely to wall studs using heavy-duty screws. I learned this the hard way when a loosely attached cabinet wobbled during a test open, risking damage; ensuring proper anchoring proved essential. Consider using drywall anchors rated for your wall type and verify stud placement with a stud finder.
Attach Cabinets and Fine-Tune Alignment
Hang the cabinets one at a time, verifying level and plumb as you go. Use clamps to hold sections temporarily and adjust with shims for a perfect fit. My first attempt was messy—cabinets not aligned—requiring me to unscrew and reposition several times before getting it right. The key is patience and small adjustments, working from one end to the other. Once aligned, secure all cabinets tightly, ensuring they rest firmly against the ceiling for a seamless appearance.
Finish Edges and Conceal Gaps
Finish the gap between the cabinets and ceiling with crown molding or custom trim to create a finished look. I installed crown molding with a slight overhang, which hid any minor discrepancies and added elegance. If gaps are uneven, use caulk to fill small spaces and touch up with matching paint. This step elevates the visual flow and makes the extension appear intentional rather than an afterthought.
Optimize Storage with Innovative Additions
Leverage the extra height by installing shelves, pull-outs, or vertical dividers inside the cabinets. This not only maximizes storage but also makes access easier. For example, I added spice racks and tray dividers inside my new cabinets, transforming them into highly functional storage solutions. You can explore built-in storage hacks to further enhance your space.
Consider Aesthetic and Functional Details
Ensure the cabinet doors and hardware align with your overall kitchen design. Opt for soft-close hinges to prevent slamming and account for wall switches or outlets that might need repositioning or extension. I installed magnetic catches on the doors for a quieter, more refined closure. These details make your ceiling-high cabinets both beautiful and practical, integrating seamlessly into your kitchen’s workflow.
By following these concrete steps, you convert a tricky, gap-filled space into a stunning, functional feature that elevates your entire kitchen. The investment in planning, proper fabrication, and execution pays off with a sleek look and added storage capacity that lasts for years.
Many homeowners assume that installing custom cabinets or built-ins is a straightforward path to maximizing space and elevating kitchen design. However, in my extensive experience working on bespoke projects, I’ve found that there’s a hidden nuance most overlook: the belief that one-size-fits-all solutions work equally well for every space and need.
Why do most people believe that standard storage options suffice for custom needs, and is that truly effective?
The truth is, relying solely on pre-made, stock cabinets can backfire, leading to wasted space, functional bottlenecks, or a disconnect between the cabinetry and your unique lifestyle. For example, a common myth is that custom means automatically expensive and time-consuming. While true in some cases, savvy designers know that well-planned custom solutions can be surprisingly efficient and cost-effective, especially if you leverage innovative design techniques like hidden compartments or modular components, as detailed in built-in storage hacks.
Beware of the trap: forget to account for future needs or lifestyle changes
One of the biggest mistakes I see is overlooking how your storage needs might evolve. A family’s storage demands for pots, pans, and tech gadgets will shift over time. Failing to plan for these changes results in cabinets that either become cluttered or need costly reconfigurations later on. Additionally, many underestimate the importance of precise measurements and tailor-made solutions for corner spaces or awkward alcoves, which can turn even small nooks into highly functional storage—details you’ll find covered thoroughly in expert guides like seamless built-in storage options. For those pushing the boundaries of existing layouts, consider integrating innovative storage like hidden drawers in toe kicks or vertical dividers that maximize every inch. A common pitfall is installing generic solutions without considering the unique architecture of your space, leading to gaps or unusable areas. As a seasoned professional pointed out, customizing not only enhances functionality but also preserves the aesthetic integrity of your design, which can be achieved efficiently with strategic planning (see modern remodel ideas). Have you ever fallen into this trap? Let me know in the comments. The key takeaway? Prioritize a nuanced approach—consider not just immediate needs but also future growth and your home’s architecture—when opting for storage solutions or custom cabinetry. It’s these details that turn good design into truly smart, long-lasting investments.
Invest in Quality Tools for Long-Term Success
Choosing the right equipment is crucial for maintaining your custom cabinets and built-ins over time. I highly recommend investing in a high-quality cordless drill with adjustable torque settings. This tool allows for precise and gentle tightening of hardware, preventing wood damage and ensuring long-lasting fixtures. Additionally, a cordless sander with variable speed control helps keep your cabinetry surfaces smooth and free of scratches during routine touch-ups or repairs.
Don’t overlook the importance of a good level — a laser level can significantly speed up installation accuracy and help maintain perfect alignment as your cabinets settle over years. When it comes to storage solutions, investing in labeled, stackable plastic bins or adjustable shelving brackets makes organizing and accessing items much more manageable, saving you time and frustration down the line.
Software That Keeps Your Projects Organized
Using project management apps like Trello or Asana enables you to track maintenance schedules, note repairs, and plan future upgrades. I personally utilize cloud-based CAD software such as SketchUp to visualize modifications, which proves invaluable when adjusting cabinet layouts or planning for additional built-in storage features. These tools help maintain a clear overview and prevent costly mistakes—especially vital when scaling or remodeling further.
Routine Maintenance Protects Your Investment
Regularly inspecting hinges, drawer slides, and finishing surfaces prevents small issues from escalating. I suggest setting reminders every six months to check for loose hardware and clean cabinet surfaces with a gentle, non-abrasive cleaner. Applying a protective wax or furniture oil annually can preserve the finish and extend the lifespan of wood veneers or painted surfaces. For areas exposed to moisture, such as under-sink cabinets, sealing seams and checking for leaks is essential to prevent rot and mold.
Where Will Your Next Upgrade Take You?
As technology advances, so do maintenance tools—and I predict we’ll see smart sensors integrated into cabinetry that can alert you to conditions like humidity levels or mechanical issues in real-time. Stay ahead by exploring innovative hardware options and maintenance techniques that embrace this future.
How do I keep my custom cabinets in top shape over time?
The key lies in routine inspections, timely repairs, and leveraging the right equipment. Remember, a well-maintained kitchen not only preserves your investment but also keeps your space beautiful and functional for years to come. To get started, try installing a high-quality drill and leveling system; they make all the difference in ensuring lasting accuracy and structural integrity. For more detailed insights into maintenance techniques, check out this comprehensive guide.
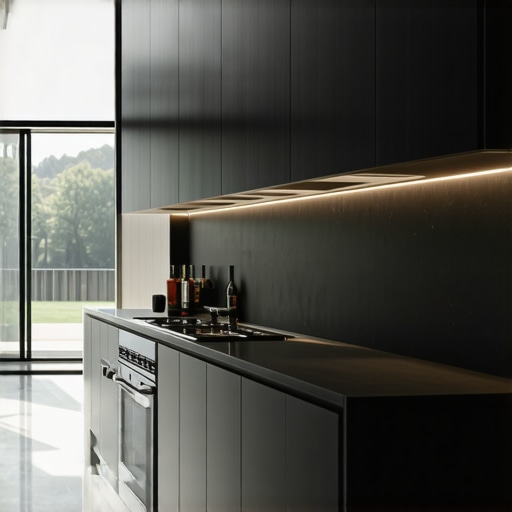
During my remodeling journey, I discovered that pushing upper cabinets all the way to the ceiling was a game changer. It transformed the entire space, making it look taller, more cohesive, and surprisingly, increasing my storage options. This small change turned a cluttered, gap-filled area into a sleek focal point that enhanced both functionality and aesthetics.
The Surprising Power of Going Just a Bit Higher
Initially, I hesitated because I thought the cost and effort might outweigh the benefits. But the truth is, extending cabinets to the ceiling is an accessible upgrade that can suit various budgets, especially with careful planning. It eliminates visual clutter and creates a unified look that elevates your kitchen’s overall style, as discussed in this detailed guide.
Designing for Perfect Fit and Beauty
One lightbulb moment was realizing the importance of precise measurements—using a level and measuring twice is essential. I also found that choosing materials like painted MDF or high-quality plywood ensures durability. Finishing touches like crown molding not only hide small gaps but add an elegant finishing touch, contributing to a seamless appearance that feels custom-made, as illustrated in this comprehensive resource.
Personal Reflections and Lessons Learned
- Measure Your Space Carefully: Don’t rush this step—small errors can cascade into bigger issues during installation.
- Invest in Good Tools: A solid cordless drill and a laser level made my project smoother and more accurate.
- Plan for Future Needs: Think about how your storage requirements might change over time, and design with flexibility in mind.
- Finish with Intention: Adding crown molding or custom trims makes a significant difference, transforming an ordinary extension into a polished feature.
Embrace the Custom and Creative Side
Beyond the technicalities, this project reminded me that embracing custom solutions—be it with built-ins or tailored cabinet heights—can inject personality and long-term value into your home. Exploring storage hacks and innovative designs inspired me to think beyond conventional layouts, making my kitchen uniquely mine.
Let Your Kitchen Reflect Who You Are
Upgrading to ceiling-height cabinets is more than just a visual improvement—it’s an affirmation that your space can grow and adapt alongside your life. With proper planning and attention to detail, you can create a kitchen that’s not only beautiful but also seriously functional for years to come. Remember, every detail from materials to hardware choices adds up to a space that truly works for you.
Your Next Big Step Is Within Reach
Thinking about extending your cabinets or customizing your storage? Take the leap—start with precise measurements and explore the possibilities of tailored cabinetry. Trust me, the satisfaction you’ll feel when your kitchen looks seamless and organized is worth the effort. If you’re curious about further ideas, I recommend checking this guide to built-in storage innovations.
What has been your biggest challenge in kitchen upgrades?
Share your experience below—whether it’s measuring tricky corners or choosing materials. I’d love to hear how you’re transforming your space!