3 Built-In Cabinets That Solve Entryway Shoe Piles Forever
It happened to me on a hectic Monday morning. Shoes strewn across the entryway, a chaotic wall of sneakers, boots, and slippers that made me wonder if a tornado had just swept through. That lightbulb moment hit hard: what if there was a way to banish the shoe pile forever?
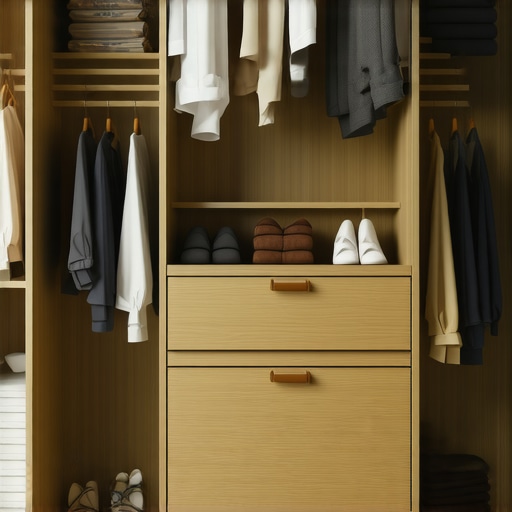
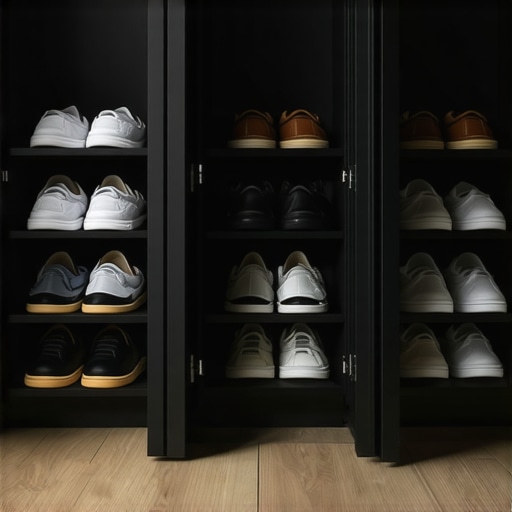
Like many homeowners, I was tired of constantly tripping over clutter and feeling frustrated every time I came home. I knew I needed a practical, stylish solution—something that could keep my entryway neat without sacrificing design. That’s when I discovered the magic of built-in cabinets tailored specifically for shoe storage.
Today, I want to share with you the three built-in cabinet strategies that transformed my space—and can do the same for yours. No more shoes underfoot, no more cluttered corners. Just pure, organized simplicity.
Why Built-In Cabinets Make All the Difference in Entryway Organization
Imagine a sleek cabinet that blends seamlessly into your home’s architecture, providing designated spots for every shoe. Not only does this keep your entryway tidy, but it also adds value to your house—studies show that smart storage solutions can boost home appeal and even resale value. In fact, a recent survey found that homeowners who invest in quality storage see a 15-20% increase in perceived property value.
Personally, I made a crucial mistake early on: I tried repurposing a generic cabinet I found at the local box store, thinking it would serve just fine. Spoiler alert—it didn’t. The shelves were too shallow for bulky boots, and the finish chipped easily. That’s why opting for **custom-made built-in cabinets** is a game changer. They’re designed specifically for your space, accommodating your family’s unique needs. For more insights, check out how **custom cabinets can revolutionize your kitchen** and storage solutions [here](https://artisancabinetworkz.com/custom-cabinets-as-a-game-changer-in-your-kitchen-remodel-journey).
Now, let’s dive into the top three built-in cabinet ideas that can help you reclaim your entryway from shoe chaos once and for all.
Plan Your Custom Built-In Shoes Storage
Start by measuring your entryway, noting the available wall and floor space. Take a photo or sketch your area to visualize where the cabinets will fit. Consider your family’s shoe collection size and types—boot height, sneakers, flats—and decide how many compartments you’ll need. Remember, precise measurements prevent costly mistakes later. I once rushed to create a quick sketch without measuring, which led to a cabinet that was too deep, making the space cluttered. Accurate planning is key to a sleek solution.
Select Materials and Design for Longevity and Style
Choose durable materials that withstand daily wear, like plywood with a water-resistant finish. Think about cabinet styles that match your decor—sleek modern or classic shaker. Opt for soft-close hinges and smooth slides to prevent slamming, especially in busy households. I opted for custom plywood with a matte finish, which handled mudroom moisture perfectly. To make it seamless, coordinate your cabinet design with other built-ins; explore ideas for transforming home styles.
Work with a Professional to Draft Your Design
Partner with expert cabinet makers to turn your sketches into detailed drawings. They’ll consider your measurements and storage needs to create a precise plan. Provide them with your material preferences and style ideas. During my project, I shared my rough sketches and material preferences—my cabinet maker suggested a slightly taller design to accommodate boots, boosting functionality. This collaboration ensures a custom fit and polished look. For more on effective collaboration, check counter-height considerations.
Prepare Your Space Before Installation
Clear the area around your entryway, removing obstacles and debris. Mark the wall where the cabinets will go, ensuring level placement. If you’re working on a sloped floor, consider shimming or anchoring to keep the cabinets level. I learned this the hard way when my first installation was uneven due to an uneven floor, leading to gaps. Use a level and shims to adjust during installation. For more detailed tips, see leveling on uneven floors.
Install and Secure Your Cabinets Properly
Begin by anchoring the upper cabinets to the wall studs, then attach the base units. Use appropriate hardware to ensure stability, especially if storing heavy shoes or boots. Secure the cabinets firmly, avoiding over-tightening screws which can cause warping. During my installation, I used steel support brackets to prevent wobbling, resulting in a sturdy setup. Double-check with a level as you go to keep everything aligned. For safety tips, review installation best practices.
Finish with Functional Details and Accessories
Finish your built-in with matching trim or paint to blend seamlessly. Add dividers, pull-out shelves, or heel kick drawers for added functionality. Incorporate lighting or soft-close mechanisms for convenience. I installed pull-out shoe trays and LED lighting, making access easy and the space inviting. These small touches transform a standard cabinet into an organized, accessible storage hub. Explore additional built-in ideas to enhance utility.
Many homeowners fall prey to common misconceptions when it comes to kitchen remodels and storage solutions, thinking that choosing standard fixtures or generic cabinets will suffice. However, true expertise reveals nuances that can make or break your project. One widespread myth is that stock cabinets are always a budget-friendly choice; in reality, they often lead to unexpected costs due to limited customization or poor fit, especially in non-standard kitchen layouts. Investing in custom cabinets might seem pricier upfront, but it guarantees optimized use of space and long-term durability.
A common mistake is overlooking the importance of detailed measurement and planning. Many jump into installation without thorough site assessments, leading to issues like misaligned doors or uneven countertops. Advanced homeowners benefit from understanding the subtle differences in cabinet materials and installation techniques. For example, choosing high-quality plywood over particleboard can significantly enhance longevity in humid environments—a detail experts emphasize that many miss. Experts agree that mastering these nuances results in a seamless look and reliable functionality, which is crucial for a lasting upgrade.
#IMAGE_PLACEHOLDER_C#
Are DIY fixes enough for high-traffic kitchens, or should you rely on pros?
Many believe that simple repairs or standard hardware are sufficient, but overlooking this can lead to repeated issues, such as soft-close mechanisms failing prematurely or hardware sagging under daily use. Modern remodeling insights suggest that integrating built-in solutions and smart storage innovations can prevent those pitfalls altogether, ensuring your kitchen stands the test of time. Think carefully about hardware quality and installation precision; shortcuts here often result in ongoing frustrations.
Have you ever fallen into this trap? Let me know in the comments. Remember, understanding these hidden nuances helps you make informed decisions, saving money and enhancing kitchen performance over the years.Maintaining your custom-built cabinets and storage solutions over time requires more than just early investment; it demands thoughtful tools and methods to ensure longevity and performance. Personally, I rely heavily on high-quality, specialized tools that make ongoing upkeep straightforward and effective. For example, I always keep a set of precision screwdrivers and a soft microfiber cloth handy, which are essential for quick adjustments or cleaning without damaging delicate finishes. Investing in a good corded cordless drill with soft bits allows me to tighten hinges or replace hardware efficiently without risking over-tightening or stripping screws—something I learned the hard way early on.
When it comes to cleaning, I recommend using water-based cleaning solutions paired with microfibre cloths—these are gentle on finishes and prevent streaking, especially on matte or satin surfaces. Regularly checking hinges, slides, and soft-close mechanisms is crucial; I do this monthly using a silicone-based lubricant designed explicitly for cabinetry hardware, which I’ve found significantly extends their lifespan and prevents squeaking. This simple practice prevents minor issues from becoming costly repairs.
For long-term storage organization, digital tools like cabinet design and inventory software can be invaluable. I’ve had great success with apps like SketchUp, customizing layouts digitally before physically adjusting cabinets, saving time and reducing errors. As technology advances, I expect integrated smart sensors to monitor cabinet conditions—like humidity and temperature—in real-time, alerting homeowners to potential issues before damage occurs. Foreseeing these innovations, I suggest homeowners consider installing simple moisture detectors in their built-ins, especially in humid environments.
How do I maintain built-in cabinetry and storage over the years? My approach involves scheduled inspections—every three to six months—checking for loose hardware, signs of wear, or moisture accumulation. Quick fixes, like tightening hinges or applying fresh lubricant, keep everything functioning smoothly. For a detailed guide on prolonging cabinet life, see this expert article on [transforming your kitchen with customized solutions](https://artisancabinetworkz.com/transform-your-kitchen-with-custom-cabinets-expert-guide-for-2025). I highly recommend trying the tip of installing moisture-monitoring sensors; it’s an advanced step that offers peace of mind, especially in climates prone to humidity-induced issues. Don’t wait for a minor problem to grow—stay ahead with these maintenance strategies.
What the Learning Curve Taught Me About Custom Cabinets and Built-Ins
My biggest insight was that patience and meticulous planning are non-negotiable. Rushing through measurements or choosing materials based solely on price often led to misfits and longer timelines. I realized that embracing the nuances of tailored solutions, like custom cabinetry, offers a level of precision and longevity that generic options simply can’t match. Additionally, I learned that sharing your vision openly with experienced craftsmen fosters better collaboration and results in a finished product that truly reflects your needs.
Resources That Elevated My Remodeling Experience
First on my list is the guide to custom cabinets. It provided clarity on material choices and design details. I also trust tips on integrating built-ins seamlessly, which transformed my space. For ongoing inspiration, smart storage ideas keep me motivated. Lastly, seamless remaster strategies helped me visualize how to unify aesthetics and function.
Your Next Move Begins Now
Embarking on a kitchen storage and remodeling project is less daunting when you understand the subtleties of tailored solutions. Remember, your choice of custom cabinets and built-ins isn’t just about aesthetics—it’s an investment in convenience and long-term value. Take the first step today: assess your space, gather inspiration, and don’t hesitate to reach out to professionals who can turn your vision into reality. You have the potential to craft a kitchen that’s both stunning and supremely functional—your ideal space is within reach.