The Plywood Edge Banding Error That Ruins Modern Kitchen Styles
I’ll never forget the moment I opened my newly installed cabinet and noticed that embarrassing, uneven edge banding staring back at me. It was a tiny detail, but it instantly ruined the sleek modern look I had envisioned. That lightbulb moment made me realize how one seemingly small mistake in the plywood edge finishing process can sabotage the entire aesthetic of a contemporary kitchen. If you’ve ever been there, you know exactly what I mean—those imperfect, visible edges can turn a design masterpiece into a DIY disaster.
The Hidden Danger Lurking in Your Cabinet Edges
Many homeowners and even some DIYers overlook the importance of proper edge banding on plywood surfaces. It’s tempting to skip meticulous finishing when updates seem minor, but trust me, the devil is in the details. When edge banding is poorly applied or turned out to be incompatible with the cabinet’s style, it can cause a distracting mismatch that pulls away from your kitchen’s overall harmony. The frustration compels many to redo or hide these imperfections, costing time and money. As I learned early in my remodeling journey, overlooking this small step can lead to big eyesores, especially in modern minimalistic designs that emphasize clean lines and seamless surfaces. For inspiration on achieving a stunning, cohesive look, check out custom cabinets that elevate style.
Is Edge Banding Actually Worth the Effort?
Initially, I convinced myself that a quick peel-and-stick approach would suffice. Spoiler: It doesn’t. I learned the hard way that subpar edge banding can turn a sleek modern kitchen into a chipped, uneven mess. Early on, I made the mistake of choosing cheap edge tape that didn’t adhere well or match the finish, making my cabinets look cheap rather than sophisticated. That experience taught me that, for a truly high-end aesthetic, investing in quality edge banding, proper trimming, and heat application is essential. This mistake gave me the insight to focus on detail-oriented craftsmanship, leading to better results and a more polished appearance. Visiting built-in storage solutions helped me understand how hidden details can make or break a remodel.
Prepare Your Workspace for Precision
Start by clearing your work surface and gathering high-quality edge banding, a sharp utility knife, a corner trimmer, and a heat gun or iron. I once jumped into applying edge banding without setting up properly, which led to unnecessary scraps and a crooked finish. Ensuring your workspace is organized minimizes errors and saves time. Always work in a well-lit area, and unroll a manageable length of edge banding to avoid tangles.
Apply the Edge Banding Correctly
Position and Adhesive Application
Align the edge banding with the plywood edge, leaving about a 1/8-inch overhang. For peel-and-stick variants, remove the backing carefully, making sure the adhesive sticks evenly without air bubbles. I learned this by trial and error on a scrap piece, pressing firmly from the middle outward to eliminate bubbles and ensure adhesion. For hot-melt edges, use a heat gun or iron set to a low, steady temperature. Slowly heat the banding, so it melts adhesive evenly, avoiding scorch marks or warp. This step mimics how a chef carefully seasons a dish—attention to temperature and timing is key.
Trim and Finish for Seamless Edges
Cleanup and Mitering Techniques
Once the adhesive cools slightly, use a corner trimmer to cut the excess, ensuring sharp, clean lines that match the plywood edge. Hold the trimmer flat against the surface, applying consistent pressure, much like a craftsman shaving wood to precision. For curves or detailed areas, micro-adjust with scissors or a craft knife. I once tried to cut corners with dull blades, which resulted in ragged edges and extra sanding—better to be patient and sharp.
Final Touches to Achieve a Professional Look
Sand the edges lightly with fine-grit sandpaper to smooth any rough spots and ensure flushness with the surface. Be gentle—over-sanding can remove the edge banding or create dips. After that, apply a matching finish or sealant, especially if your cabinets will be exposed to moisture. Remember, consistent finishing preserves your work’s integrity and visual appeal. For high-end applications, consider heat pressing the edges, which fuses the banding tighter and reduces bubbling, much like sealing a warranty on a pricey appliance.
Incorporate Built-In Storage for a Modern Feel
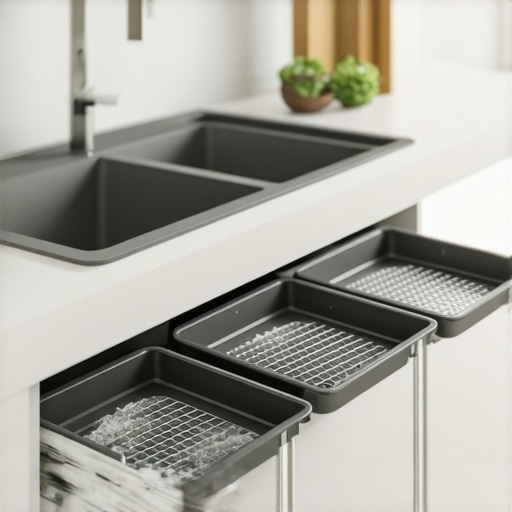
While perfecting your edge banding technique, think about integrating smart storage solutions. Built-ins like spice racks or pull-out shelves integrate seamlessly into your cabinets and elevate your design. For ideas tailored to maximize space, check out this guide on built-in storage. These small but impactful additions make your kitchen not only beautiful but incredibly functional, turning small flaws like uneven edges into unnoticed details in a clean design.
 When it comes to upgrading your kitchen with custom cabinetry and built-ins, many fall prey to oversimplified advice that can backfire in unexpected ways. One prevalent misconception is that high-end materials alone guarantee a flawless finish. In reality, advanced techniques like proper joint reinforcement and material age curing play a crucial role in longevity and appearance. For example, seasoned wood that hasn’t undergone proper kiln drying can warp or crack over time, undermining even the most carefully designed cabinets. As expert cabinetmakers point out, understanding the subtle properties of your chosen materials can mean the difference between a lasting masterpiece and a costly redo. Additionally, there’s a common myth that built-in solutions are primarily aesthetic; but in truth, strategic integration of storage—such as toe-kick drawers or hidden compartments—maximizes space and enhances functionality.
Why Do Some Built-Ins Fail to Perform Over Time?
This question is often overlooked, yet it addresses a critical aspect of craftsmanship. Poorly planned structural support or ignoring weight distribution principles can lead to sagging shelves or loosened joints, which are common pitfalls. A study published in the Journal of Furniture Design emphasizes that reinforcement with specialized fasteners and proper anchoring techniques ensures durability. So, when planning your remodel, don’t just focus on the initial visual appeal—pay attention to how your built-ins will perform after years of use. For instance, implementing steel brackets designed for heavy loads prevents the typical warping of floating shelves. To dive deeper into effective storage planning, explore expert tips on selecting storage solutions. Remember, the nuances behind quality joinery and material choice are what elevate a standard remodel into a truly refined space.
Beware of the trap of choosing cheaper hardware for your drawers and hinges in an effort to cut costs. These shortcuts often lead to increased wear and noisy operation, which diminish the sense of luxury your upgrades aim to achieve. Instead, investing in high-quality, soft-close mechanisms ensures smooth operation and extends the lifespan of your cabinetry. For insights on hardware selection that resists fingerprints and simplifies maintenance, see hardware finishes that resist fingerprints.
Remember, mastering these nuances transforms a DIY project into a professional-grade remodel. Recognizing the importance of details like material conditioning, structural support, and hardware quality allows you to avoid common pitfalls and design cabinets that stand the test of time. Have you ever fallen into this trap? Let me know in the comments.
Maintaining your custom cabinetry and storage solutions is key to ensuring they remain beautiful and functional for years to come. Over time, even the highest-quality materials require attention, and having the right tools at hand makes this process much smoother.
Investing in Precision Equipment for Longevity
One tool I swear by is a high-precision edge trimmer with micro-adjustment capabilities. Unlike standard trimmers, this allows me to create seamless, crisp edges without uneven cuts, which is crucial for maintaining a professional look, especially in modern minimalist kitchens. Pairing this with a quality heat gun ensures the edge banding adheres evenly, reducing bubbling or warping over time. Additionally, a digital moisture meter helps monitor wood humidity levels, preventing warping or cracking—an essential consideration when dealing with plywood or veneer finishes.
Utilize Software to Plan and Document
Beyond physical tools, I rely heavily on design software like SketchUp to visualize storage optimizations and plan modifications. Keeping detailed digital records of your cabinet layouts and hardware specifications simplifies future repairs or upgrades. Moving forward, I predict that integrating augmented reality (AR) tools for visualization will become a standard part of maintaining and scaling custom cabinetry projects, making it easier than ever to see potential changes in your actual space before committing.
Regular Inspection and Routine Upkeep
Schedule periodic inspections to check for loose hinges, worn slides, or water damage. A simple magnetic screwdriver set allows quick tightening of hardware, while specialized lubricants can keep soft-close hinges operating smoothly. Don’t forget to clean and seal surfaces periodically with manufacturer-recommended finishes to protect against moisture and stains. A handy tip is to keep a small kit with essential lubricants, touch-up paint, and cleaning supplies nearby—making routine maintenance quick and accessible.
How Do I Keep Built-Ins Looking Their Best Over Time?
Consistent maintenance is more than just cleaning; it involves proactive repairs to prevent small issues from becoming big problems. For example, regularly inspecting seams and joints for gaps allows early intervention, saving you costly rework later. Also, consider professional reinforcement of critical load-bearing points, especially in high-use areas like kitchen islands or pantry shelves. Using advanced fasteners and structural supports, like steel brackets, ensures your built-ins maintain integrity over years of use. Visit this article for further insights on long-term support.
Keep Up with Trends to Scale Effectively
Looking ahead, the trend is moving toward modular, easily scalable storage solutions. Leveraging versatile components like adjustable shelves and hidden compartments allows you to adapt as your needs change, without costly remodels. Tools like programmable routers and CNC machines are also making custom modifications faster and more precise, empowering homeowners and artisans alike to maintain and scale their cabinetry projects efficiently.
Remember, choosing the right equipment and establishing a routine for inspections and updates can dramatically extend the life and beauty of your built-ins. For all your storage upgrades, trying out advanced techniques like reinforcing joints with steel supports or applying UV-resistant finishes can make a real difference. Why not start today by checking your hinges and lubricating them—small steps that lead to long-term satisfaction? To deepen your understanding, consider exploring this guide on seamless kitchen storage.
Reflecting on my journey with custom cabinetry, I realize that the true secret lies in the subtleties—the tiny details that transform a good kitchen into an exceptional one. From perfect edge banding to strategic storage, every choice shapes not just the look but the longevity of your space. Embracing these lessons has empowered me to craft kitchens that stand the test of time, blending functionality with refined aesthetics.
Lessons Only Experience Can Teach About Custom Cabinets and Storage
- Never underestimate the power of quality materials: Choosing kiln-dried, moisture-resistant woods prevents future warping or cracking—skimping here risks costly repairs down the line.
- Attention to detail in finishing makes all the difference: Proper edge banding, seamless miter cuts, and smooth sanding elevate your cabinets from DIY to professionally finished. These are the nuances that truly matter.
- Support and reinforcement are key to durability: Incorporating steel brackets and reinforcement techniques ensures your built-ins withstand daily use, especially in high-traffic areas like the kitchen island or pantry.
- Plan for future scalability: Modular and adjustable components allow your storage to grow with your needs, avoiding costly remodels later. Think ahead and choose versatile solutions.
- Routine maintenance preserves beauty and function: Regular inspections, gentle cleaning, and hardware lubrication keep your cabinetry operating smoothly and looking pristine over the years.
Tools and Resources That Elevate My Craft
- High-precision edge trimmer: Provides clean, crisp edges every time, crucial for that seamless modern look.
- Design software like SketchUp: Helps visualize space utilization and storage optimizations before cutting a single board.
- Quality fasteners and hardware: Investing in soft-close hinges and durable slides ensures long-lasting operation and a touch of luxury.
- Moisture meter: Essential for monitoring wood humidity, preventing post-installation warping or cracking.
Light Your Passion for Cabinets and Built-ins
Embarking on a kitchen remodel with custom cabinets and built-ins is more than a project—it’s an opportunity to create a space that resonates with personal style and lasting value. While mastering techniques like precise edge banding or reinforcing supports takes effort, the reward is a beautiful, durable, and functional kitchen that feels uniquely yours. Able to adapt and scale over time, your cabinetry can evolve with your lifestyle, transforming the heart of your home into a showcase of craftsmanship and thoughtful design.
Are you ready to take your kitchen upgrade to the next level? Dive into the deep end with confidence, knowing that the small details make all the difference. Remember, every expertly crafted joint and perfectly finished edge contributes to a space that’s not only stunning but built to last. Your dream kitchen awaits—start today and enjoy the journey of creating a timeless masterpiece that will serve your family for generations.
Which detail in your current or upcoming kitchen project do you think will make the biggest difference? Share your thoughts below!
.