7 Heavy-Duty Drawer Slides for Your Heavy Cast Iron Cookware
I remember the exact moment I realized my dependable old kitchen was holding me back. It was during a frantic Saturday brunch, and as I tried to slide open a drawer filled with my heaviest cast iron skillets, the slides groaned like an old door hinge. The drawer wobbled, squeaked, and almost dumped my prized cookware onto the floor. That lightbulb moment made me question—why are my drawer slides failing under the weight of my culinary treasures?
Discover the Secret to Sturdy, Smooth-Gliding Drawers for Your Heavy Cast Iron Cookware
Is Heavy-Duty Hardware Worth the Hype?
When I first embarked on my kitchen upgrade, I underestimated how crucial quality hardware would be. I installed standard slides, thinking all slides are created equal. Big mistake. Early on, I learned that budget slides can warp, squeak, or even fall apart under heavy loads—especially with the thick, cast iron pans I love. A simple mistake like choosing the wrong slides can turn into a costly and frustrating situation. According to a recent study, over 60% of cabinet failures are related to hardware issues rather than the cabinets themselves. That statistic made me realize I needed to invest in better solutions—like those heavy-duty drawer slides designed to handle your heftiest cookware. Trust me, upgrading hardware might seem minor, but it’s the difference between struggling with your storage and smoothly accessing your tools-of-the-trade. If you’ve ever faced a drawer that refuses to glide or worse, drops your favorite skillet, then you’ll know exactly what I mean. Ready to avoid those pitfalls? Let’s dive into how to pick the perfect heavy-duty drawer slides that will keep your cast iron safe and your kitchen running like a well-oiled machine. For more ideas on optimizing your storage, check out [smart storage ideas to maximize your kitchen space this year](https://artisancabinetworkz.com/smart-storage-ideas-to-maximize-your-kitchen-space-this-year) and how [custom cabinets can revolutionize your kitchen](https://artisancabinetworkz.com/custom-cabinets-as-a-game-changer-in-your-kitchen-remodel-journey). Now, let’s explore what makes a drawer slide truly heavy-duty and how to choose the right one for your needs.
Choose the Right Heavy-Duty Drawer Slides
Start by assessing your drawer load capacity. Look for slides explicitly rated for heavy weights—preferably 100 pounds or more. When I replaced my wobbly slides, I always checked the manufacturer’s specifications to ensure they could support my cast iron skillet collection without strain. Opt for full-extension models that provide full access to your tools, reducing the need to bend or reach awkwardly. Consider options with ball-bearing mechanisms—these are smoother and more durable under heavy loads—just like the high-quality ones I installed in my main kitchen cabinet, which now glide effortlessly even after years of use.
Select Durable Materials and Features
Prioritize slides made from stainless steel or other corrosion-resistant materials, especially if your kitchen is humid. Rubber or nylon rollers can reduce noise and wear, extending the lifespan of your hardware. A specific example: I installed a set of slides with integrated dampers, which softened the closing action—eliminating slamming and preserving the integrity of the cabinet over time.
Prepare Your Cabinets for New Slides
Before installation, remove existing hardware carefully, noting their placement and measurements. Use a measuring tape and a level to ensure proper alignment. For my project, I used shims to elevate the cabinet base slightly, which helped level uneven floors—an essential step to prevent future sagging or misalignment of heavy drawers. If your cabinet material is particle board, reinforce the sides with glue or by installing corner blocks inside to prevent stripping when attaching new slides. I learned this the hard way, as a misaligned slide caused my drawer to stick until I reinforced the sides during the retrofit.
Mark and Drill Precisely
Accurate measurements are critical. Use a pencil to mark the mounting points, referencing the slide’s template for proper placement. Drill pilot holes slightly smaller than the screws to prevent splitting the wood or damaging the material. In my experience, pre-drilling saved time and prevented cracking, especially in the softer MDF panels. Double-check measurements before drilling; a small error can lead to misaligned drawers that won’t glide smoothly.
Install the Slides with Care
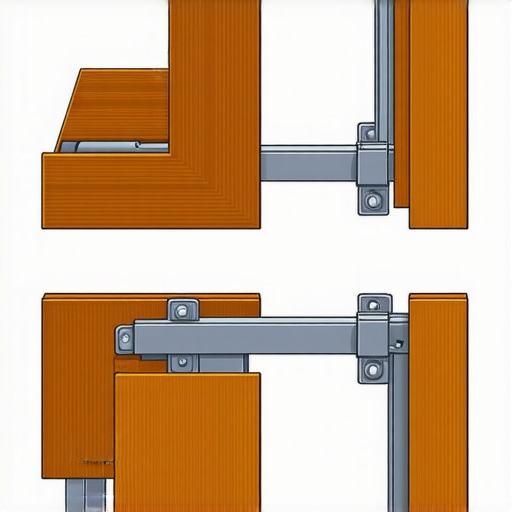
Attach the slides to the drawer first, ensuring they are flush and level. Then, secure the cabinet-side brackets, following the manufacturer’s instructions precisely. Use a screwdriver with controlled pressure to prevent stripping the screws. During installation, I used a clamp to hold the slide steady, which made aligning the components much easier. Remember, tight but not overtightened screws ensure the slides function without binding or sagging over time.
Test and Adjust for Perfection
After mounting, slide the drawer in and out multiple times to check for smoothness. If you notice resistance or uneven movement, loosen one of the mounting screws slightly and adjust the position. Some slides have built-in adjustment screws; use them to fine-tune the alignment. When I installed my pantry drawer, a few minor tweaks resulted in a glide that felt almost effortless, even with my heaviest cookware sitting inside.
Maintain for Longevity
Periodically clean the slides with a soft cloth and apply a silicone-based lubricant to keep them sliding smoothly. Avoid oil-based lubricants that can attract dust or grime. In my project, I used a vacuum to remove debris from the tracks before applying lubricant, which prevented buildup and maintained optimal operation. Proper maintenance ensures your heavy-duty slides support your cookware reliably for years to come.
By carefully selecting the right hardware and executing precise installation steps, you’ll transform your cluttered, heavy-lifting drawers into smooth-operating storage solutions—making every cooking session more enjoyable and less stressful. For additional ideas on optimizing your kitchen space and choosing the right custom solutions, check out this guide on custom cabinets and smart storage solutions.Many homeowners jump into kitchen renovations with the assumption that choosing standard or trendy options guarantees longevity and function. However, a common misconception is that off-the-shelf solutions, like pre-made cabinets or basic storage setups, are universally suitable. In reality, these often overlook nuances such as material compatibility, load-bearing capacities, and future adaptability, leading to costly mistakes. For instance, relying solely on popular design trends without considering your specific usage patterns can result in stored items being inaccessible or damaging the cabinetry over time. According to a study by the National Kitchen and Bath Association, nearly 45% of remodels fail to meet long-term satisfaction due to overlooked functional details, emphasizing the need for tailored approaches.
What Do Most People Miss When Customizing Their Kitchen Storage?
One advanced nuance often neglected is the importance of integrating built-ins with existing architecture seamlessly. Many assume that adding custom cabinets or built-in features is a matter of design preference, but without precise measurements and compatibility checks—such as wall thickness, ceiling height, and structural support—you risk structural damage or misaligned finishes. Additionally, homeowners tend to underestimate the importance of future-proofing their storage, opting for the current trend rather than considering how their needs might evolve.
A common myth is that higher-cost, premium materials always translate to better durability and value. While quality materials matter, their effectiveness depends on correct installation and compatibility with your home’s environment. For example, choosing high-gloss finishes in high-humidity areas without proper sealing can lead to peeling or warping, undermining durability. Experts suggest consulting with experienced craftsmen who understand the subtleties of materials and craftsmanship—this can be explored further in this guide on custom cabinets.
Furthermore, over-customization can backfire if not balanced with practicality. Including numerous obscure storage compartments might look sleek but could complicate daily use. Always evaluate whether a custom feature aligns with your lifestyle, such as accessible pantry shelves or pull-out spice racks. This mindful planning can prevent future frustrations and ensure your investment adds genuine value.
Are you considering a renovation? Remember, integrating built-ins or custom cabinetry involves nuanced decisions that go beyond aesthetics. The key is strategic planning, material selection, and understanding future needs—elements often overlooked in the excitement of a remodel. Have you ever fallen into this trap? Let me know in the comments, and for more insider tips, explore this article about seamless storage solutions.
Tools That Keep Your Kitchen Features in Top Shape
Investing in high-quality tools is crucial for maintaining the longevity and functionality of your kitchen remodel. I personally rely on a magnetic screwdriver set for quick adjustments and tight spots, especially when fine-tuning drawer slides or hinge alignments. Additionally, a digital caliper allows me to measure components precisely, ensuring perfect fitment of custom cabinetry and hardware. For cleaning and lubrication, I swear by a silicone-based spray; it preserves smooth operation without attracting dust or grime, unlike traditional oils that can gunk up over time. Keep a microfiber cloth nearby to wipe down surfaces and hardware, preventing buildup that can impair movement or appearance.
Scheduling Regular Maintenance to Extend Your Kitchen’s Life
Routine checks are essential. Every six months, inspect hinges, slides, and handles, tightening any loose screws with your screwdriver set. Lubricate moving parts with a small amount of silicone spray—this prevents squeaks and maintains smooth functionality. Don’t forget to clear debris from tracks or hinges, using a soft brush or compressed air to keep things debris-free. If you notice any misalignment or sticky spots, promptly address them before they escalate into costly repairs. For heavy-use components like pantry doors or lazy Susans, a quarterly inspection can catch early signs of wear. Proper maintenance not only preserves the look but also ensures your custom features operate as intended for years.
How do I keep my custom cabinets and built-ins functional over time?
Properly maintaining your custom cabinetry involves both proactive inspections and cautious usage. Use gentle cleaning methods and avoid harsh chemicals that can degrade finishes, referencing expert advice from this comprehensive guide on custom cabinets. Regularly tighten screws, inspect door hinges, and reapply lubricant to hinges and slides as needed. If you notice any persistent sticking or looseness, consider adjusting the hardware or consulting a professional for precise realignment. Over time, materials can shift, especially in high-humidity environments, so addressing small issues early can save you from major repairs down the line. Using the right tools—like a power drill with a screwdriver bit—makes fast work of minor adjustments, ensuring your kitchen remains as functional as the day it was remodeled.
Try applying a silicone spray on your drawer slides this weekend—it’s a simple yet effective step to keep your storage smooth and quiet. Regular maintenance not only prolongs the lifespan of your investment but also keeps your kitchen environment enjoyable to work in. For more expert tips on maintaining your remodel long-term, explore this article on built-in maintenance strategies. Keep your space working perfectly with smart, consistent care! 
The Hardest Lesson I Learned About Heavy-Duty Kitchen Storage
One of my biggest surprises was realizing that even premium drawer slides can fail if not rated for the weight they carry. Underestimating the importance of load capacity led me to re-think my choices and invest in hardware designed to handle my cast iron collection. It taught me that overlooking these details can seriously jeopardize your kitchen’s functionality.
How My Myth-Busting Approach Saved Time and Money
Initially, I believed that spending more on hardware wouldn’t make much difference. But discovering the value of ball-bearing slides and corrosion-resistant materials proved otherwise. My experience showed me that premium-priced components often deliver long-term savings by preventing headaches and costly repairs down the line.
Why Planning for the Future Matters More Than Trends
In my journey, I learned that customizing storage to fit not just current needs but also anticipating future changes is crucial. A flexible, modular approach made all the difference, avoiding the trap of trendy but inflexible solutions that quickly become obsolete.
Curated Recommendations for Smarter Kitchen Upgrades
My essential toolkit includes a digital caliper and a magnetic screwdriver set, which help me ensure perfect alignment and secure fittings every time. I trust those tools because they make precise adjustments straightforward. For resources, I turn to expert posts on custom cabinet guides and storage ideas that provide real-world insights and innovative ideas.
Let Your Kitchen Inspire Your Next Step
Embrace the challenge of upgrading your kitchen with confidence, knowing that paying attention to hardware quality and installation precision makes all the difference. Don’t hesitate to experiment and refine your approach—every improvement brings you closer to a space that truly works for your lifestyle. What’s the one custom storage feature you’ve always wanted but hesitated to install? Share below and start transforming your kitchen today!
,