Why Your Lazy Susan Keeps Jamming and the Pull-out Alternative
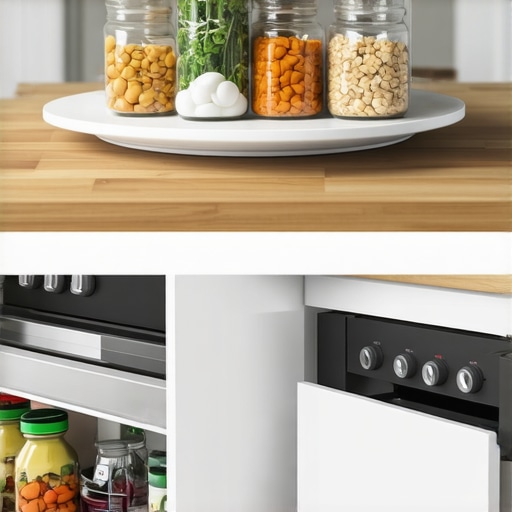
I remember the exact moment I realized my Lazy Susan was more of a frustration than a solution. I was mid-recipe, trying to reach for that elusive spice jar, only to have the entire turntable grind to a halt. Frustration bubbled up—I had meticulously chosen that cabinet for its convenience, but it was now a jammed, unused obstacle. It hit me: if I didn’t get to the bottom of this, my beautiful kitchen remodel would be pointless, and my daily routines would suffer.
Why a Jamming Lazy Susan Is More Than Just Annoying
Lazy Susans are supposed to make our lives easier, right? But many of us experience stubborn jams that turn these handy organizers into sticky, unusable messes. The real issue often isn’t a simple lack of lubrication—it’s misalignment, overloading, or poor design choices. Early on, I made the mistake of packing mine to the brim without considering weight limits or how things spin. That oversight quickly led to jamming, and I wasted hours trying to fix it with sprays and DIY tricks that only provided temporary relief. It wasn’t until I learned about proper maintenance and design considerations that my lazy Susan finally ran smoothly—and stayed that way.
Is a Pull-Out Really Better Than a Lazy Susan, or Just a Trend?
Admittedly, I was skeptical when I first heard about pull-out shelves replacing lazy Susans. They seemed more complicated to install. But after experiencing repeated jams and frustration with my lazy Susan, I wanted a better solution. Today, I’ll share from my own journey—how switching to pull-outs transformed my kitchen efficiency. And yes, I’ll explain why, in certain situations, pull-outs actually outshine lazy Susans in both reliability and ease of use. Early on, I overlooked the importance of proper installation—you can read more about common cabinet mistakes that cripple storage functionality at this link. Trust me, avoiding these mistakes is key to making your storage smarter and more durable.
Now, are you tired of fighting with your lazy Susan? Or are you considering upgrading your kitchen storage but unsure which method suits you best? Stick around—I’ll guide you through the best practices, the pitfalls to avoid, and how to choose a solution that keeps your kitchen humming without constant jamming or frustration.
Disassemble and Inspect the Turntable
Start by carefully removing the Lazy Susan from your cabinet. Use a screwdriver to unscrew any mounting plates or hardware. Once detached, place the turntable on a clean workspace and examine for debris, damage, or misaligned parts. During my last fix, I found a piece of broken plastic lodged between the turns, which caused the jam. Clear out the debris and check for cracks or warping in the plastic components.
Clean and Lubricate the Components
Thorough cleaning is essential. Use a damp cloth to wipe down all moving parts, removing dust, grease, and grime. Let everything dry completely. Next, apply a high-quality lubricant suitable for plastic and metal joints—like silicone spray or white lithium grease. During my repair, I used silicone spray on the axle and bearings, which smoothed out the rotation significantly. Be cautious to avoid over-lubricating, as excess can attract dirt.
Check for Proper Alignment and Load Balance
Misalignment often causes jamming. Place the turntable back onto the base and ensure it spins freely without wobbling. Test with light weight first, then gradually load it with your spices or jars. If it stalls under minimal weight, re-examine the alignment. I once overloaded my Lazy Susan beyond its capacity, which led to permanent warping. Consider redistributing heavy items or replacing with stronger hardware if needed.
Reinstall with Correct Hardware and Adjustments
Align the mounting brackets carefully before tightening. Use a level to ensure the turntable is perfectly horizontal—an uneven surface encourages jamming. If your model has adjustable stops or screws, tweak them to allow smoother rotation. During my last fix, a minor screw adjustment made a noticeable difference in spin quality.
Upgrade for Better Performance
If persistent issues remain despite maintenance, consider upgrading to a heavy-duty model or a newer design featuring sealed bearings or ball bearings for smoother motion. While investing in quality hardware might seem costly initially, it pays off by reducing frustrations and the need for frequent repairs. When I upgraded to a ball-bearing Lazy Susan, I immediately noticed a quieter, easier spin, even under heavier loads.
Thinking about more space optimization and storage solutions? Explore innovative built-ins and custom cabinets that integrate smart organization features—like corner pull-outs or vertical dividers—making your kitchen more functional. For inspiration and expert craftsmanship, visit Modern Kitchen Remodels. Need personalized guidance? Contact us at Contact Us.
When it comes to transforming a kitchen, many homeowners focus on aesthetics and layout, but there’s a common misconception that can trip up even the most seasoned DIY enthusiasts: believing that more customization immediately equates to better functionality. In reality, the devil is in the details. For instance, opting for overly elaborate built-ins without considering the nuances—like door clearance or hardware placement—can lead to frustration and underused space. Advanced designers understand that customizing alone isn’t enough; understanding the interplay between hardware, materials, and workflow is crucial to achieving a truly efficient kitchen.
One prevalent myth is that high-end materials guarantee durability. While quality materials play a vital role, neglecting proper installation and understanding material limitations can cause problems down the line. For example, choosing a beautiful particle-board cabinet for a high-traffic area might seem aesthetically pleasing, but without proper reinforcement and sealing, it risks sagging or damage—especially in humid environments. Experts recommend selecting materials like HMR-grade plywood for heavy-use zones, which resist warping and sagging over time, as highlighted in these insights.
Many assume that bigger is better when it comes to storage solutions, but stuffing a cabinet with as many shelves and drawers as possible often hampers accessibility and productivity. The goal should always be to maximize usability—an approach well articulated in innovative storage strategies. Overloading a corner cabinet without considering hardware like blind corner pull-outs or lazy Susans can turn a promising space into a dead zone, trapping items and frustrating users.
What advanced tactics can elevate your cabinet design beyond the basics?
One sophisticated tactic involves integrating smart storage solutions tailored to your specific needs, such as automatic drawers for frequently used items or tailored dividers that prevent clutter. These require careful planning and understanding of the cabinet’s mechanical systems to prevent common issues like misalignment or jamming. For example, installing heavy-duty slides compatible with your cabinet’s weight load ensures longevity and smooth operation, as detailed in this article. Moreover, considering accessibility for all users—including those with mobility challenges—can mean the difference between a functional kitchen and one that excludes family members or guests. This often overlooked aspect underscores the importance of thoughtful design and user-centered customization.
Another pitfall is neglecting future-proofing during your remodel. Materials and hardware should be selected with an eye toward longevity and adaptability. For example, opting for hardware finishes that resist fingerprints and corrosion can save time and money long-term, a consideration discussed extensively in this guide. Similarly, strategic placement of outlets within cabinets for powering appliances without cluttering countertops is often overlooked but can enhance both safety and convenience.
In essence, the journey to a perfect kitchen is about more than aesthetics; it’s about understanding and managing the complex interactions between materials, hardware, workflow, and long-term usability. Embracing these nuanced considerations elevates your project from merely good to truly exceptional. Want personalized advice tailored to your unique space? Reach out through this contact page and let’s make your dream kitchen a reality.
Have you ever fallen into this trap of oversimplification or overlooked these critical details? Let me know in the comments!
Keep Your Cabinets in Prime Condition
Regular maintenance is essential to ensure our custom cabinets and storage solutions perform optimally over the years. I personally recommend investing in a quality microfiber cloth and gentle cleaning agents like a diluted mild soap solution to remove dust and grime without damaging delicate finishes. Avoid harsh abrasives or ammonia-based cleaners, which can strip or dull surfaces. Periodic inspections for loose hardware or hinges help prevent minor issues from becoming major repairs down the line. For example, tightening screws and lubricating hinges with a silicone-based spray keeps doors swinging smoothly and extends their lifespan. Remember, consistent small interventions significantly reduce the long-term costs of repairs and replacements.
Tools I Favor for Effective Maintenance
In my toolkit, a high-quality cordless drill with precision screwdriver bits simplifies the process of tightening hardware, especially in hard-to-reach corners of built-ins. A soft-bristled brush aids in cleaning out detailed moldings and intricate hardware, preserving the aesthetic appeal. I also rely on a digital level and a small laser measure to verify cabinet alignment after adjustments, ensuring everything stays perfectly plumb and level. For lubricating moving parts, I prefer silicone sprays over grease, as they resist dust accumulation and don’t attract dirt. I’ve found that investing in specialized tools like a cabinet hinge cleaner or a microfiber polishing cloth pays off in maintaining a showroom-quality finish in my kitchen.
The Promise of Smart Storage and Automated Adjustments
Looking ahead, the integration of smart technology offers exciting prospects for cabinet maintenance and functionality. Automated hinge adjusters and sensor-driven drawer systems promise to catch alignment issues before they become noticeable, saving time and preserving cabinet integrity. As home automation continues to evolve, expect features like remote diagnostics and self-lubricating hardware to become more standard, reducing manual upkeep. For example, in the near future, we may see cabinet hardware that adjusts itself based on usage patterns, optimizing longevity and performance. Embracing these innovations now can set your kitchen up for effortless long-term operation, allowing you to enjoy your space without constant worry over wear and tear.
How do I stay on top of cabinet maintenance over time?
One effective strategy is adopting a routine schedule—monthly checks for loose hardware, quarterly cleaning with gentle products, and annual inspections of hinges and slides. Incorporating proactive measures, such as adding protective coats of finish in high-traffic areas, can further extend the life of your cabinets. Listening to your cabinets’ signals—like squeaking doors or uneven drawers—helps catch issues early. For more tips tailored to your specific setup, reaching out to professionals experienced in custom cabinetry can be invaluable. Visit this contact page for personalized guidance. As expert cabinet maker and author Mike Licher advises, “Regular maintenance and early detection are the best defenses against costly repairs.” So, make it a habit to dedicate time to your cabinetry—it’s an investment in both beauty and value.
Lessons That Changed My Approach to Custom Cabinets and Storage Solutions
- One of the toughest lessons I learned was the importance of precise hardware alignment. Small miscalculations can lead to persistent jams, and only after investing in better tools and taking my time did I see a real difference.
- I’ve realized that no matter how beautiful your cabinets are, neglecting proper material selection—like choosing moisture-resistant plywood in humid kitchens—can cause long-term issues I wish I had known earlier.
- The myth that bigger storage always equals better was a trap I fell into. Thoughtful organization and specialized hardware like pull-out shelves made far more impact than just adding more space.
- Upgrading to high-quality, sealed bearings was a game-changer. Smooth operation and reduced maintenance reminded me that investing in the right hardware saves headaches down the line.
- Paying attention to workflow and accessibility over aesthetics alone has transformed my kitchen into a functional space I actually enjoy working in every day.
Tools and Insights That Elevate Kitchen Remodels
My essential toolkit includes a precision screwdriver set, a digital level, and silicone-based lubricants—trustworthy staples that keep everything functioning smoothly. For inspiration and proven practices, I often turn to resources like this article on drawer improvements. Additionally, books like Kitchen Courage by Sarah Burchfield opened my eyes to innovative design concepts that marry form and function perfectly. For ongoing education, reputable sources like this guide have been invaluable. Finally, consulting with seasoned craftsmen through personalized advisories has helped me refine my approach to custom cabinetry and storage solutions.