The Simple Reason Your Lazy Susan Jams and the Corner Pull-Outs That Fix It
Ever been in the middle of preparing a family feast, reaching for that elusive spice jar, only to have your Lazy Susan stubbornly refuse to turn? I’ve been there, frustrated watching my once-smooth-spinning corner cabinet turn into a stubborn game of patience. That lightbulb moment hit me hard—there’s a simple reason behind those frustrating jams, and fix it, we can. It’s not about buying more storage or remodeling the entire kitchen; it’s about understanding what makes these systems fail and how to fix them once and for all.
The Real Reason Your Lazy Susan Gets Stuck
Initially, I thought my Lazy Susan jammed because it was old or poorly made. Turns out, the cause is usually much simpler—misaligned hardware, insufficient lubricating, or worn-out parts. It’s a classic mistake I made early on: overlooking the importance of regular maintenance and the quality of the hardware. I assumed that if it was new, it shouldn’t jam. But I learned the hard way that even the best systems need occasional TLC to keep spinning flawlessy. Maintaining your corner pull-outs isn’t just a minor maintenance task; it’s a key to prolonging their lifespan and keeping your kitchen running smoothly.
Is It Worth Fixing or Should I Replace?
Many folks jump straight to replacing their corner pull-outs at the first sign of trouble. But here’s a fact—proper adjustments, lubricating moving parts, or upgrading to heavy-duty slides can extend their life significantly. And investing a little time now can save hundreds later. Want ideas on how to select durable options? Check out artisan cabinets ideas that can truly transform your space. Trust me, take care of your hardware, and it will serve you well for years.
If you’re tired of battling stubborn corners, stay tuned. I’ll guide you through straightforward fixes that bring your storage back to life, boosting both convenience and your kitchen’s aesthetics. Ready to restore your corner cabinets’ glide and regain your peaceful prep space? Let’s dive into the practical steps that make this a weekend project rather than a costly remodel.
Assess and Prepare Your Hardware
Begin by removing the Lazy Susan from its mount. Inspect all parts, focusing on the turntable, hardware screws, and slides. I once tackled a jam that was caused by loose screws; tightening them alone restored smooth rotation. Use a screwdriver to ensure all screws are snug but not over-tightened to avoid stress on the hardware.
Clean and Lubricate Moving Parts
Next, disassemble the turntable and clean all components with a soft cloth and mild soap. Remove dust, grease, and debris accumulated over time. Apply a silicone-based lubricant to the slides and rotating mechanisms—this prevents sticking and reduces wear. I remember a messy project where a generous application of lubricant turned a stubborn jam into effortless spinning within minutes.
Use the Right Lubricant for Durability
Avoid WD-40 or petroleum-based lubricants, as they attract dust and can degrade plastic parts. Instead, opt for a dedicated silicone spray or white lithium grease. For instance, I replaced an old spray with silicone lube on my cabinet’s corner pull-outs, which dramatically improved their function and longevity.
Adjust and Realign Components
If the turntable still doesn’t spin freely, check for misalignment. Loosen the mounting screws slightly, shift the turntable until it rotates smoothly, then tighten again. It’s like tuning a guitar—small adjustments make a big difference. I once had to realign a misfit turntable, and the improved rotation saved me from buying replacements.
Upgrade for Heavy Use
If your Lazy Susan gets constant use or is holding heavy items, consider upgrading to professional-grade slides or larger diameter turntables. Heavy-duty slides have ball bearings that glide effortlessly even under load. I upgraded mine with reinforced slides from the local hardware store, and now it handles my largest spice jars without a hitch. For inspiration on integrating durable, sleek storage, check out custom cabinets ideas.
Seal and Finish
Once everything operates smoothly, wipe down all surfaces and add seals if necessary to prevent dust ingress. Applying a protective finish can also reduce future wear and tear. I’ve found that sealing with a light coat of furniture wax prolongs the rider’s performance, keeping it spinning like new. For ideas on optimizing your cabinetry layout, explore built-ins that elevate your living rooms.
Many homeowners operate under common misconceptions when it comes to selecting and implementing storage solutions, built-ins, or custom cabinets in their kitchen remodels. While the surface appears straightforward—maximize space, enhance aesthetics—the nuanced realities often trip up even seasoned renovators. Contrary to popular belief, the biggest pitfalls are not always about choosing the most expensive materials or trendy designs.
One prevalent myth is that opting for high-gloss, sleek finishings automatically ensures durability. However, without understanding the underlying construction techniques—like proper plywood grading or veneer quality—you risk wear and warping over time. Expert tip: always inquire about core materials; thick-core plywood often outperforms standard MDF in humid environments, preventing costly repairs down the line. You can learn more about cabinet materials here.
Another overlooked nuance involves the installation process itself. Many believe that professional-grade hardware and the best design are enough—but neglecting proper anchoring and leveling can lead to sagging doors or jammed drawers. For instance, floor-to-ceiling built-ins require precise anchoring techniques, which when neglected, may cause structural issues as the house settles. Check out our guide on secure anchoring to understand this further.
What makes a solution truly smart and future-proof for your kitchen?
Advanced homeowners often ask about integrating technology seamlessly without sacrificing aesthetic harmony. The tricky part isn’t just installing smart hinges or motorized lifts; it’s ensuring these innovations are compatible with the overall design and long-term usability. For instance, forget the misconception that only large kitchens can benefit from smart storage; with innovative solutions for small spaces, even compact kitchens can enjoy the convenience of automate-access systems. Studies show that homes that thoughtfully incorporate future-proof features tend to maintain higher value and user satisfaction.
Most importantly, many overlook the importance of considering the internal organization—like hidden compartments or optimized access points—that can prevent clutter buildup and save time during daily routines. As you plan your next project, remember that true mastery lies in attention to these nuanced details, transforming a standard kitchen into a personalized haven. Have you ever fallen into this trap? Let me know in the comments.
If you want your kitchen storage systems to perform flawlessly year after year, investing in the right tools and establishing a solid maintenance routine is key. One of my go-to essentials is a high-quality cordless electric screwdriver. It speeds up disassembly and reassembly during maintenance or upgrades, reducing frustration and saving time. I prefer models with adjustable torque settings to prevent stripping screws—trust me, a stripped screw can turn minor tweaks into major headaches. Another indispensable item is a soft cloth combined with a mild cleaning solution; regular cleaning prevents dust and grime buildup that can cause mechanisms to jam or wear prematurely.
Lubrication cannot be overstated. I recommend carrying a silicone-based spray lubricant, such as WD-40 Silicone, for sliding parts and hinges. Unlike petroleum-based lubricants, silicone doesn’t attract dust or dirt, which maintains smooth operation over time. I personally apply this every six months to my built-in cabinets and custom drawers, especially those with moving components exposed to humidity or frequent use, like corner pull-outs. For more detailed maintenance techniques, check out this guide on heavy-duty slides.
How do I maintain my built-ins to stay looking and functioning like new?
Beyond tools, establishing a routine inspection schedule helps catch issues early. Every few months, examine hardware tightness, ensuring screws haven’t loosened over time—loose screws are a leading cause of misalignment or jamming. Wipe down surfaces with a microfiber cloth to remove dust that can impair sliding mechanisms. For high-traffic areas, consider installing soft-close hinges and slides, which reduce wear and noise. Upgrading hardware like heavy-duty ball-bearing slides offers enhanced durability, especially for larger or heavily loaded cabinets. Keep an eye on manufacturer recommendations, and consult detailed product specifications to ensure compatibility, such as using the right weight capacity for your pantry drawers. Regular maintenance prolongs the life of your cabinet investments and keeps your kitchen running smoothly, even after years of use.
Looking ahead, these practices are set to evolve with smarter tools. The integration of IoT-enabled hinges that monitor their own wear and notify you via smartphone is on the rise. Already, some hardware manufacturers are embedding sensors that track usage frequency and lubrication needs, making preventative maintenance more accessible. As this technology matures, you’ll be able to proactively address issues before they become disruptive, saving time and cost over the long term. For now, I encourage you to try the simple yet effective tip of applying silicone lubricant every six months—it’s a quick step that pays off immensely in the longevity of your cabinetry systems.
In the realm of kitchen remodels, choosing the right tools and committing to consistent maintenance is the secret to enduring beauty and functionality. Whether you’re upgrading existing cabinets or designing new ones, consider automation and smart hardware solutions to future-proof your space. And remember, small, regular interventions can prevent major repairs down the line—think of it as giving your kitchen a vitality check every year or so. If you’re interested in elevating your storage systems with durable, efficient components, explore custom cabinet ideas that incorporate high-quality materials and innovative hardware. Your cabinets will thank you for it!
The Hardest Lesson I Learned About Kitchen Storage Mastery
One of the biggest revelations in my journey was realizing that initial investment in quality hardware pays dividends over cheap, quick fixes. I once replaced a jammed cabinet with a cheaper slide, only to face repeated issues. Now, I swear by selecting durable, heavy-duty components from trusted brands, understanding that a well-built system is the backbone of a smooth kitchen. This lesson transformed my approach from reactive repairs to proactive maintenance, saving time and money in the long run.
Essential Tools That Keep My Cabinets in Top Shape
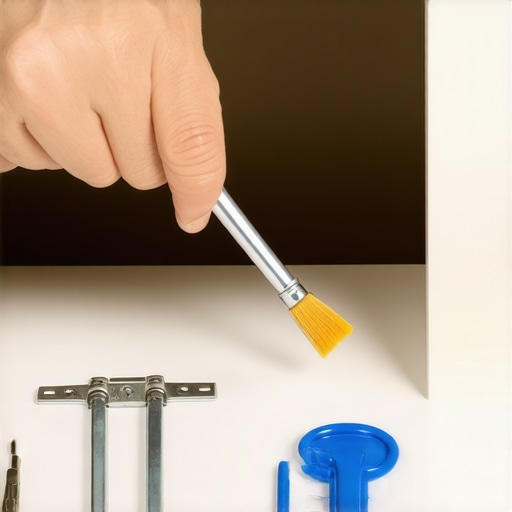
Over the years, I’ve curated a toolkit that simplifies maintenance and upgrades—think a cordless electric screwdriver for quick disassembly, a high-quality silicone lubricant for smooth slides, and microfiber cloths for daily cleaning. These tools have become my secret weapons against wear and tear, allowing me to address issues swiftly before they escalate. Trust me, having the right toolkit turns what seems like a complex fix into a straightforward weekend project, keeping your custom cabinets looking and functioning like new.
When Small Upgrades Lead to Big Wins in Kitchen Organization
Sometimes, a simple upgrade can dramatically enhance your kitchen’s efficiency. Installing soft-close hinges prevents noisy slamming, preserving cabinet longevity. Adding vertical dividers for deep drawers stops clutter and makes retrieving items effortless. I found that these minor tweaks—done periodically—make my kitchen more inviting and functional, encouraging regular upkeep and preventing costly overhauls. Remember, the secret is in regular attention to detail, turning mundane maintenance into an opportunity for optimization.
What I Wish I Knew When Starting My Kitchen Remodel
One crucial insight was understanding that a well-planned layout and high-quality materials work together to create a truly enduring space. I once prioritized aesthetics over durability, leading to frequent repairs. Now, I focus on core materials like thick-core plywood and moisture-resistant finishes, which stand the test of time—even in humid environments. Exploring custom cabinet ideas that emphasize durability has been a game-changer. Don’t underestimate the power of quality fundamentals—they’re the foundation of success in your kitchen upgrade.
Stay Ahead with Smart Storage and Maintenance Practices
Integrating technology, such as smart hinges with usage sensors, is on the rise—giving you proactive alerts before problems occur. Meanwhile, establishing a routine inspection schedule—tightening screws, cleaning slides, lubricating—prevents small issues from snowballing into major repairs. I encourage you to adopt these habits early; they are simple, cost-effective ways to ensure longevity of your cabinetry investment. When combined with thoughtful design and high-quality hardware, your kitchen will remain a harmonious hub of function and style for years to come.