How to Scribe a Cabinet to an Uneven Wall for a Gap-Free Finish
Ever spent hours installing beautiful cabinets only to realize there’s a pesky gap between the unit and the wall? I remember my first DIY kitchen project—excited to finally see my dream cabinets, only to be met with uneven gaps and awkward spaces that threw off the entire look. That lightbulb moment made me realize: walls aren’t always straight, and standard assembly methods just won’t cut it. If you’ve ever faced the frustration of trying to fit cabinets flush against wall imperfections, you’re not alone—I’ve been there too.
Why Scribing Cabinets to an Uneven Wall Matters
When you’re remodeling or installing new cabinetry, achieving that perfect, gap-free finish isn’t just about aesthetics; it’s about craftsmanship. Uneven walls are a common challenge, especially in older homes where walls might have shifted over time. Without proper scribing, cabinets can appear misaligned, draw attention to imperfections, or worse, develop structural issues down the line. A well-scribed cabinet not only looks professional but also prolongs the lifespan of your installation.
But here’s the thing—many DIYers give up or settle for less because they think scribing is too complicated or time-consuming. In reality, with a bit of guidance and patience, it’s a skill that anyone can learn. Plus, in the context of a **modern kitchen remodel**, finishing details like these can significantly elevate the overall look and feel of your space. For inspiration, check out the latest designs in modern kitchens with custom cabinets.
Have you struggled with uneven gaps before? If so, you’re in the right place. Today, I’ll guide you through the essential steps and tips to master scribing cabinets perfectly to any wall for that smooth, professional, gapless finish you’re after.
Is Scribing Truly Worth the Extra Effort?
At first glance, scribing might seem like just another step in your project, but skipping it can lead to noticeable flaws. I made this mistake early on—thinking I’d save time—and ended up with uneven cabinets that annoyed me every time I looked at them. Trust me, taking the time to learn proper scribing pays off big time.
If you’re skeptical, consider this: professional contractors know the value of meticulous finishing touches. Their secret? Skills like precise scribing that make all the difference. And if you want to see how this small technique transforms your cabinetry, there are detailed guides out there—like those at Artisan Cabinetry—that can help boost your DIY confidence.
So, are you ready to turn uneven walls into a backdrop for flawless cabinetry? Let’s get into the practical steps to scribe like a pro and finally achieve that beautiful, gap-free finish you’ve been dreaming of.
Mark Your Cutting Line Precisely
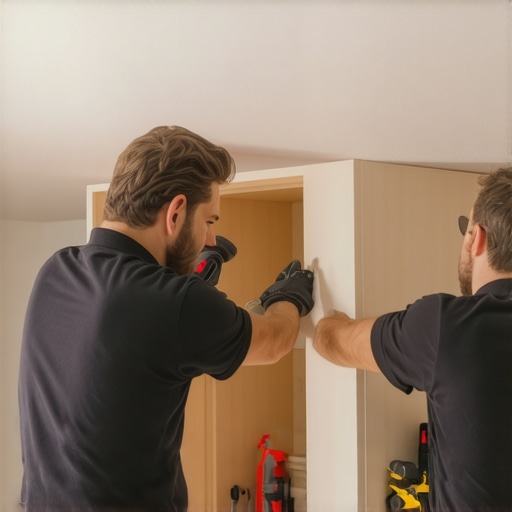
Start by positioning the cabinet against the wall, ensuring it’s level and plumb. Use a pencil to trace a line along the wall where the cabinet will sit. To account for irregularities, place shims under the cabinet temporarily to get it close to level before marking. For example, I once faced a wall with a noticeable bow; I shimmed and marked at the highest point to ensure the bottom of the cabinet would be flush after scribing.
Use Cardboard or Backer Material as a Template
Cut a piece of cardboard or thin plywood to fit along the wall, pressing it firmly against the irregular surface. Mark the high and low points along the template, then transfer that curve onto the cabinet side panel. This step creates a custom guide that matches exactly to your wall’s contour, making the scribing more accurate. I once used an old cereal box to make a quick template, which saved me hours of guesswork later.
Secure the Template and Prepare Your Saw
Clamp the cardboard template securely to the cabinet edge. Ensure it’s tight and won’t shift during cutting. Decide whether you’ll use a jigsaw or circular saw with a fine blade; jigsaws offer more control for intricate curves. Set your saw to the appropriate depth, slightly deeper than the cabinet material. I prefer a jigsaw for tight curves, as it lets me follow the template precisely without overcutting.
Perform the Cut Carefully Along the Marked Line
Cut along the line, maintaining a steady pace and following the template edge closely. Small, shallow passes prevent splintering and give you maximum control. For example, I once made a mistake by rushing and chipping the veneer on a cabinet face, so now I always cut slowly to ensure a clean edge. Remember, it’s easier to remove a little more material than to fix an overcut.
Test Fit and Fine-Tune for Perfection
Place the cabinet against the wall again and check the fit. It should sit flush along the wall’s uneven surface. If gaps remain, use a sanding block or rasp to gently refine the scribed edge until it matches perfectly. I found that subtle adjustments with a rasp can turn a good fit into a seamless one. This step is crucial for achieving that professional, gapless finish and enhancing the overall look of your cabinetry.
Handle Special Wall Contours with Ease
For irregular or deeply bowed walls, consider making multiple templates or segments. Connecting these pieces with flexible sanding blocks can help smooth out complex surfaces. Remember, patience and incremental adjustments are your allies. The effort invested in precise scribing results in cabinets that look custom-built and elevate your overall remodel. For more tips on customizing cabinetry and achieving stunning results, explore ideas at this collection of custom cabinet ideas.
Many homeowners assume that selecting the most popular storage options or trendy built-ins guarantees the best results, but in my experience, there are subtle pitfalls that can undermine even the most well-planned remodels. A common misconception is that bigger or more elaborate storage always equals better organization, yet overcomplicating your system can lead to frustration and inefficiency. For example, installing deep drawers without considering their load-bearing capacity can cause sagging and misalignment over time, a mistake that experts like those at Artisan Cabinetry strongly advise against. However, many get lulled into thinking that depth and quantity alone define good storage, overlooking the importance of proper hardware and structural support.Maintaining your kitchen’s custom cabinets and built-ins requires more than just occasional cleaning; it involves proactive care and the right tools to ensure longevity and peak functionality. Personally, I swear by a few specialized tools that have made my maintenance routines significantly easier and more effective. For example, I always keep a set of magnetic screwdrivers handy—these are invaluable when tightening hardware quickly without the risk of losing tiny screws, especially in tight spots.
Avoid Cheap Hardware and Embrace Quality
Investing in high-quality hinges like the heavy-duty options discussed at this article ensures your doors stay aligned and function smoothly over years, reducing the need for frequent adjustments. For securing large, heavy built-ins or overhanging countertops, I recommend steel support brackets—these are a game-changer for long-term stability and are discussed extensively in the supporting heavy overhangs guide. Regularly inspecting sealants and finishes is pivotal; I use a lint-free microfiber cloth combined with a gentle solvent to keep surfaces looking pristine without scratching. Predicting future trends, automation and smart maintenance sensors are on the horizon, allowing homeowners to receive alerts about cabinetry wear or hardware issues proactively.
How do I maintain my cabinetry hardware and finishes over time?
Start with gentle, non-abrasive cleaners suited for your cabinet material—avoid harsh chemicals that can degrade finishes. Keep hardware tight, and periodically treat wooden surfaces with appropriate oils or polishes. For painted surfaces, gentle buffing with a microfiber cloth can revive their appearance and prevent the buildup of dust or fingerprints. As I look ahead, integrating smart sensors that monitor humidity, temperature, and even hardware wear could revolutionize household maintenance, making it effortless to extend the life of your investment. I highly recommend trying out a microfiber cloth combined with a quality wood polish for your next maintenance session—it’s simple but effective in preserving that high-end look of your custom cabinetry. Regularly scheduling these upkeep routines ensures your stylish built-ins remain functional and beautiful for years to come.
The Lightbulb Moment: Embracing Wall Imperfections
My journey into custom cabinetry taught me that walls rarely cooperate perfectly. That revelation transformed my approach, turning frustration into an opportunity for craftsmanship. Recognizing that walls’ irregularities could be an asset, not an obstacle, was the key to achieving seamless results.
How Prioritizing Precision Elevates Your Remodel
Real talk: investing time in precise scribing and custom fitting can dramatically increase your project’s professional look. It’s a skill worth cultivating—gluing, sanding, fine-tuning—and the payoff is a stunning, gapless finish that rivals high-end contractors. This approach guarantees your built-ins stand out in both aesthetics and durability.
From Trial to Triumph: A Personal Reflection
Early in my DIY endeavors, I underestimated the power of accurate templates and careful measuring. Once I adopted these techniques—making custom templates from cardboard or plywood—the process became more predictable and satisfying. Now, every project feels like I’m crafting a piece of art instead of just assembling furniture.
Empowering Tips for the Aspiring Cabinetmaker
Start with a flexible mindset: don’t fear imperfections, see them as design challenges. Use high-quality tools like fine-tooth blades and reliable clamps. And always test fit before making the final cut—this small step saves hours of rework and boosts confidence. For more ideas on personalizing your kitchen, browse through custom cabinet inspiration.
Transform Your Space Without Fear
Remember, every smooth, professional-looking cabinet begins with a willingness to learn and adapt. Scribing to uneven walls might seem daunting, but with patience, practice, and the right techniques, you can create a stunning, bespoke fit that elevates your entire home. Don’t let wall imperfections hold you back—embrace the challenge and let your craftsmanship shine.