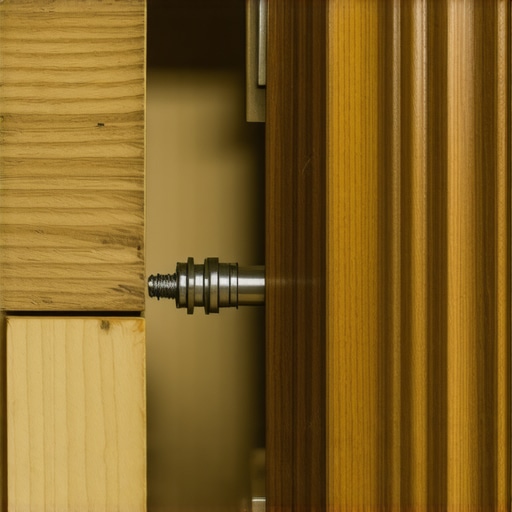
Stop the Slam: The Best Retrofit Soft-Close Dampers for Old Drawers
I remember the exact moment I realized my old kitchen drawers were secretly sabotaging my mornings. I was rushing to grab a spatula, and suddenly, with a loud slam, the drawer shut too aggressively. It was startling, noisy, and honestly a little embarrassing when guests were around. I felt like my kitchen was stuck in the 90s, loud and clunky. That lightbulb moment pushed me to dig into solutions that could make my drawers close softly, smoothly, and quietly.
Transform Your Kitchen by Stopping the Slam
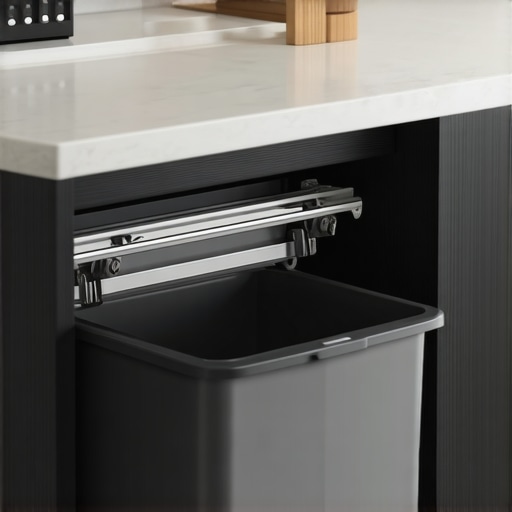
After a bit of research and a few trial-and-error installations, I discovered retrofit soft-close dampers—those clever little devices that breathe new life into your old cabinetry. Today, I want to share how these dampers became a game-changer in my kitchen, reducing noise and frustration while elevating the overall vibe of my space. If you’re tired of the loud, abrupt slamming of your drawers, stay tuned because I promise, your annoyance will be a thing of the past.
Is the Hype About Retrofit Damper Kits Overblown?
Early on, I made a classic mistake: I believed all soft-close solutions were created equal. I spent more than I want to admit on fancy hardware that didn’t quite fit or work as promised. It turns out that not all dampers are suitable for every cabinet, and some are just a gimmick. According to a recent study by cabinet hardware experts, poor installation or incompatible dampers can even cause damage to your drawers or failed mechanisms over time (source). So, understanding what works, and what doesn’t, is crucial.
Have you ever installed a home upgrade only to find it didn’t quite perform as promised? Trust me, I’ve been there. That experience taught me the importance of choosing the right retrofit dampers designed specifically for older drawers, and that’s exactly what I want to help you with. From the initial decision to install to the step-by-step process, I’ll walk you through everything you need to know to make your drawers close softly and silently, transforming your kitchen in ways you didn’t think possible.
Now, enough about my mishaps—let’s dive into the practical side of upgrading your drawers and making everyday use a delight. Ready to banish those noisy slams for good? Let’s get started!
,
Preparing for the Installation
Before diving into the hardware, clear out your drawers and measure their dimensions carefully. I once started cutting dampers without double-checking, only to realize they didn’t fit. Measure width, height, and depth precisely—this prevents mishaps that turn into a frustrating redo. Next, gather your tools: a drill, screwdriver, measuring tape, and a level. Having everything at hand makes the process smoother and reduces disruptions.
Removing Old Hardware
Carefully detach the existing drawer slides or hinges. For my first attempt, I neglected this step and ended up with misaligned dampers. Use a screwdriver to unscrew old slides, keeping screws organized—better to have extras. Inspect the drawer runners; sometimes, debris or damage affects how new dampers will perform. Cleaning and minor repairs here set a strong foundation for the new hardware.
Installing New Dampers
Align the damper with the existing mounting holes—most kits come with templates or instructions. I taped the damper in place first, then drilled pilot holes. Be cautious: installing too tightly can hinder the dampers’ effectiveness. Attach the damper using screws, ensuring it’s straight with a level. For example, I once skewed a damper slightly, causing it to malfunction; checking alignment crosswise makes a difference.
Adjusting for Soft Closure
Once mounted, test the drawer: open fully, then gently close to feel the soft-close action. Many dampers have adjustable tension knobs; turning these clockwise increases resistance, while counterclockwise eases it. My initial setup was too stiff, causing sluggish closure, so I dialed it down. Small adjustments yield significant improvements, so proceed incrementally—test frequently. This fine-tuning guarantees your drawers close softly without slamming or lingering.
Final Checks and Fine-Tuning
Reinstall any hardware or drawer fronts, then perform multiple opening and closing cycles. Watch for uneven movement or misalignment. If drawers feel unbalanced, check screw tightness and damper positioning. In my case, a minor screw loosening was causing wobbly closure; tightening fixed it instantly. Consider installing bumpers or stops if needed, to prevent over-compression and prolong damper life.
Integrating Storage Ideas
This upgrade complements smart storage solutions—like those discussed in maximizing space with innovative storage. Think about organizing your drawer contents to reduce clutter, making soft-close effectiveness even more noticeable. For further customization, explore options for built-in features that elevate your kitchen’s functionality, such as accessible spice racks or hidden trays, which subtly work with your soft-close upgrades.
With careful measurements, precise installation, and thoughtful adjustments, your drawers will glide quietly and effortlessly. This process transforms not just the hardware but the entire user experience, making daily tasks calmer and more efficient—an upgrade worth every minute of effort.
When planning a kitchen remodel, many homeowners fall prey to a common misconception: they believe that simply choosing high-end custom cabinets guarantees an instantly elevated space. However, as an experienced designer and renovator, I can tell you that the nuances of cabinet design and installation are where the real magic—and potential mistakes—happen. One often-overlooked detail is how the dimensions and internal layout of custom cabinets can inadvertently hinder functionality if not executed with precision. For example, a beautiful built-in might look perfect but could be awkward to access if the interior compartments aren’t thoughtfully planned, leading to frustration and underutilized spaces. Moreover, many assume that all storage solutions are universally adaptable, but they often overlook how different items require specific configurations—like deep drawers for pots or pull-out shelves for spices—which significantly impacts usability. A common myth is that more storage automatically equates to better organization; in reality, smarter planning that considers item frequency and ergonomics yields far superior results. Additionally, neglecting the materials and hardware compatibility during a renovation can cause long-term issues, such as warping or difficulty opening doors, especially in humid environments. For instance, choosing MDF for kitchen cabinets without understanding its moisture limitations might lead to sagging over time, undermining the investment. For those seeking a more refined look, installing built-ins that seamlessly integrate with existing architectural elements requires exact measurements and a keen eye for detail. This is where many make the critical mistake of rushing measurements or ignoring crown molding compatibility, which can cause gaps or misalignment that detract from the overall aesthetic. Did you know that even a small oversight, like misaligned hinges or improper scribe work, can compromise both the appearance and functionality of your cabinets? It’s worth noting a study from the National Kitchen and Bath Association that highlights the importance of meticulous planning and quality materials in achieving durable, beautiful results. To avoid these pitfalls, prioritize local, experienced craftsmanship and detailed planning, especially when customizing solutions for unique spaces. Exploring themes like maximizing space with innovative storage solutions can further enhance your remodel—check out this guide on intelligent [storage ideas for every room](https://artisancabinetworkz.com/maximize-space-with-innovative-storage-solutions-for-every-room). Remember, a successful kitchen isn’t just about beautiful cabinets; it’s about the harmony of form, function, and durability. Have you ever fallen into this trap? Let me know in the comments.
Ensuring your custom cabinets and storage solutions stay in top shape over the years requires the right tools and consistent maintenance. From precision measurement devices to specialized lubricants, having a well-stocked toolkit helps you troubleshoot issues early and extend the lifespan of your investments. In my experience, high-quality, durable tools make a significant difference—cheap alternatives often lead to uneven surfaces or damaged finishes, which compromise both aesthetics and functionality.
How do I maintain my cabinetry and built-ins over time?
One of my go-to practices is scheduling regular inspections, at least twice a year, to catch minor issues before they become major repairs. For example, checking door hinges for loosening screws or misalignments can prevent sagging or sticking doors. A great tip is to keep a set of 
adjustment tools, like a fine Phillips screwdriver and a hinge alignment toolkit, on hand. These allow quick fixes without needing to call in professionals for minor adjustments, saving time and money.
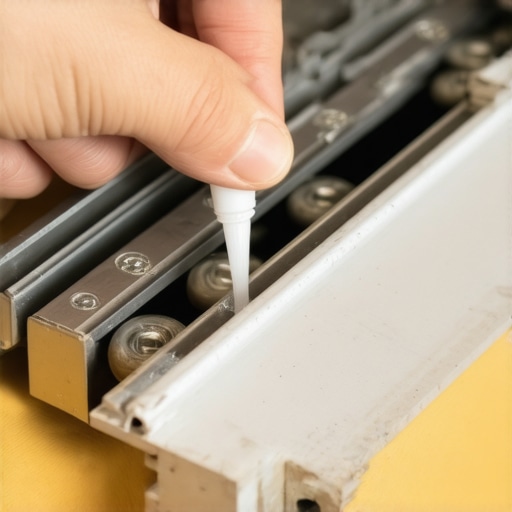
For lubricating hinges and slides, I prefer using silicone spray lubricants that won’t attract dust or dirt. Avoid oil-based lubricants, which can gunk up mechanical parts and diminish performance over time. For stubborn squeaks or resistance, an application of a dry ceramic lubricant can work wonders, especially on soft-close mechanisms.
When it comes to long-term results, investing in premium hardware—such as those heavy-duty slides and soft-close hinges from trusted brands—ensures smooth operation for years. These heavy-duty hinges are designed to withstand frequent use, making them ideal for busy households. Additionally, regular cleaning of tracks and hinges with a soft brush or compressed air can prevent dust buildup that impairs operation.
Looking ahead, I believe smart maintenance solutions will become more prevalent. IoT-enabled hardware that alerts you when components need servicing will simplify upkeep even further, turning maintenance from a chore into a set-and-forget process.
Tools I recommend for DIY cabinet care
- Digital torque wrench: Ensures screws are tightened to manufacturer specifications, preventing over- or under-tightening that can warp delicate frames.
- Hinges alignment jig: Simplifies perfect hinge placement and adjustment, especially in hard-to-reach areas.
- Microfiber cloths and gentle cleaning solutions: Keep finishes pristine without scratching or damaging surfaces.
- Vacuum with brush attachment: For removing dust from tracks and crevices.
Regular maintenance with these tools keeps your cabinetry operating smoothly and looking freshly installed. Remember, the key is consistency—set reminders for inspections and cleaning, just like you would for car maintenance. By doing so, you’ll preserve the beauty and functionality of your custom solutions for decades.
If you’re interested in exploring more advanced tips for extending your cabinetry’s life, consider trying out a hinge alignment jig during your next upgrade. It makes precise adjustments effortless, ensuring perfect door alignment every time. Need advice on choosing the right tool? Reach out through our contact page, and I’ll guide you through the best options tailored to your project.
The Hidden Truths Behind Building Perfect Cabinets
One of the most valuable lessons I learned was that meticulous planning upfront saves countless headaches later. Rushing measurements or ignoring space constraints can turn a sleek design into a frustrating mismatch. Trust me, a small miscalculation can lead to uneven gaps or doors that won’t close properly, undermining both aesthetics and function. That realization pushed me to embrace detailed measurements and double-check everything, which transformed my entire renovation experience.
Tools That Elevated My Remodeling Game
Over time, I discovered that the right tools make all the difference. From precision measuring tapes to hinge alignment jigs, these essentials ensured every cut was exact and every door hung perfectly. Investing in quality hardware, like heavy-duty slides and soft-close hinges, paid off by providing durability and a smooth user experience. Building a reliable toolkit not only saved me money but also boosted my confidence in tackling future upgrades.
Creating a Kitchen That Inspires
Ultimately, the goal was more than just beautiful cabinets; it was about crafting a space that inspires daily joy. Integrating smart storage ideas, such as pull-out trays and hidden compartments, helped me maximize every inch without clutter. This experience taught me that thoughtful design—focused on both beauty and practicality—elevates a kitchen from ordinary to extraordinary. If you’re considering a remodel, focus on how each element can improve your everyday life rather than just appearance.
Insider Wisdom for Lasting Satisfaction
- Intention over imitation: Don’t just copy trends; tailor solutions to your needs. My mistake was following generic advice without considering my unique space, which led to less than ideal results.
- Patience is key: Rushing through measurements or installation often increases errors. Taking my time with each step prevented costly redo’s and frustration.
- Think long-term: Investing in quality materials and hardware may cost more upfront but pays off over years of reliable use. I realized that choosing affordable options often resulted in quick wear and tear, nullifying initial savings.
- Seek expert guidance: Sometimes, consulting specialists or experienced DIYers saves time and ensures quality. I wish I had reached out earlier to professionals for tricky cuts or hardware choices—it’s a game changer.
My Toolkit for Cabinets and Storage Innovation
For anyone serious about elevating their cabinetry, I recommend a few game-changing resources. The comprehensive guide on custom cabinet ideas inspired me to think beyond standard designs and explore truly personalized solutions. Additionally, tools like a heavy-duty hinge set and a hinge alignment jig made adjustments straightforward and reliable. For space-conscious storage, exploring smart storage solutions transformed cluttered drawers into organized marvels, proving that thoughtful design truly makes a difference.
Choose Your Next Step with Confidence
Remember, every renovation journey is unique. Embrace the learning process, invest in quality, and never underestimate the power of precise planning. Your dream space is within reach, and with patience and the right resources, you’ll create something that truly elevates your home. Thinking about your next project? Dive into detailed planning, and don’t hesitate to reach out via our contact page for expert advice or personalized recommendations. Your perfect kitchen or storage solution is closer than you think!