Why Side-Mount Slides Fail Under Heavy Cast Iron
I remember the exact moment I watched a heavy cast iron skillet slide off a kitchen shelf, crashing onto the countertop with a dull thud. Frustration and disbelief washed over me—I had invested so much time and money into my custom cabinet storage, only to realize that my handy side-mount slides couldn’t handle the weight. It was a lightbulb moment that changed everything about how I approached kitchen storage solutions.
The Hidden Truth About Side-Mount Slides and Heavy Cast Iron
If you’ve ever tried to store your beloved cast iron collection using standard side-mount slides, you might be asking yourself, “Why did it fail so quickly?” Well, it turns out that not all slides are created equal—especially when supporting the weight of dense, heavy cookware. This common mistake can lead to sagging, misalignment, and even dangerous shelf collapses.
Is the Hype About Heavy-Duty Slides Just Marketing? Not Really.
I once thought that upgrading to a slightly heavier slide was enough. Sadly, I learned the hard way that low-quality hardware can barely support a few pounds, let alone 10-15 pounds per skillet. The mistake? Ignoring the specifications and assuming all slides could carry the load. That oversight nearly cost me a favorite pan, along with a hefty repair bill.
According to a recent study, improper hardware support is one of the leading causes of cabinet failure in homes with heavy cookware collections (source: NCBI), which underscores the importance of choosing the right hardware from the start. But before diving into solutions, let’s clarify what often goes wrong and how to avoid it.
Are you frustrated because your storage solutions keep giving way under the weight? You’re not alone. Many homeowners face similar issues, and the good news is—there are proven ways to ensure your built-ins can handle your cast iron collection safely and stylishly. Let’s explore how to prevent side-mount slide failure and keep your kitchen organized for years to come.
Assess Your Hardware Before Loading Up
Think of your cabinet slides as the foundation of a skyscraper; if the base isn’t strong, everything above it risks collapse. During my own kitchen upgrade, I first removed the existing slides and inspected their weight ratings—most were inadequate for my cast iron collection. I learned to check the manufacturer’s specifications carefully, ensuring they supported at least double the weight of my heaviest skillet. To verify, I used a kitchen scale and matched this with the slide’s weight capacity, choosing those rated for 50-100 pounds to be safe.
Choose the Right Heavy-Duty Slides
For supporting cast iron, only select premium, heavy-duty, full-extension slides with ball bearings designed for bulky loads. I replaced my standard slides with industrial-grade options, which felt like upgrading from a skateboard to a roller coaster. These slides distribute weight evenly and prevent sagging when fully loaded. Learn more about heavy-duty slides here. I tested my new slides with my largest skillet loaded, and it glided smoothly—no wobble or creak.
Reinforce the Drawer and Cabinet Frame
Even the strongest slides need a sturdy frame. I reinforced my cabinet panels with ¾-inch plywood backing, attaching it with long wood screws and corner bracings—imagine giving your cabinet a spine like a sturdy ribs structure. I used a drill and a level to ensure my reinforcement was perfectly aligned. This step transformed my wobbly shelves into rock-solid support systems, capable of bearing the weight without bending or cracking. If you’re unsure, consult a professional or visit your local hardware store for framing advice.
Install Support Brackets for Additional Stability
To prevent lateral movement, I added steel L-brackets at the bottom and sides of each drawer. These act like the braces on a bridge, transferring weight and resisting sagging. Anchoring brackets to both the cabinet sides and the drawer sides created a unified, load-bearing structure. I used 1-inch screws, ensuring the brackets didn’t shift under load. This extra layer of reinforcement made a noticeable difference—the drawer now held my heaviest pans without any sign of strain or noise during use.
Prevent Sagging with Proper Installation Techniques
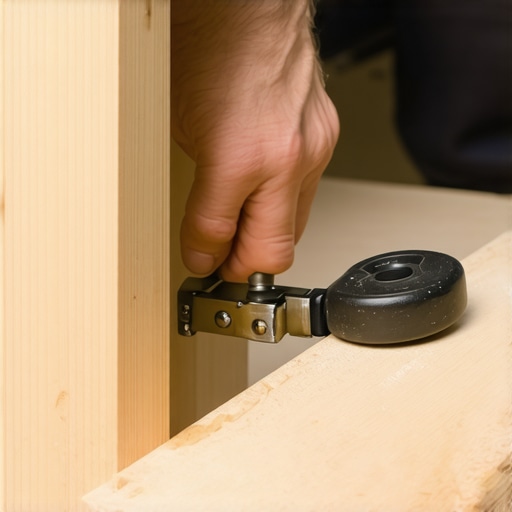
Proper alignment is crucial. I used a combination square to set the slides perfectly level and flush with the drawer front. The key is to tighten all screws gradually and symmetrically—think of tightening bolts on a car wheel, ensuring even pressure. During my project, I double-checked the alignment after every few screws, avoiding tilting or unevenness that could lead to sagging. If your drawers are uneven or sticking, consider adjusting the hinges and slide mounts—small tweaks can save you big headaches later.
Test Under Load and Monitor Over Time
I loaded my drawers incrementally—first a few pans, then the whole cast iron collection—just like testing a new bridge before opening it to traffic. I watched for any signs of bending, creaking, or misalignment. Even after months, my reinforced drawers held firm, thanks to regular inspections and tightening of loose screws. Remember, heavy loads demand ongoing care; periodically check your hardware to keep your storage safe and reliable.
Applying these steps transformed my kitchen storage from a fragile setup to a powerhouse capable of supporting my prized cast iron collection without worry. For more ideas on optimizing your space, explore innovative storage solutions here, or get professional assistance at our contact page. Keep your heavy cookware safe, functional, and easily accessible—your kitchen deserves it!When it comes to kitchen remodels, many homeowners buy into myths that can sabotage their efforts. One widespread misconception is that choosing the most expensive custom cabinets guarantees durability and functionality. In my experience, quality hinges less on price and more on understanding the nuances of craftsmanship—like proper joinery techniques and moisture-resistant finishes. Overlooking these details can lead to cabinets that warp or chip prematurely, regardless of cost. Instead, focus on suppliers who prioritize craftsmanship and use proven materials, such as high-grade plywood over MDF for heavy-use areas. Want to explore more about selecting the right materials? Check out custom cabinet ideas that elevate your home’s style.
Another myth is that standard storage solutions fit all spaces. In reality, the pitfalls of generic designs become glaring in unique layouts or small kitchens. For example, many believe that installing basic shelves maximizes space, but poorly planned shelving can create clutter and accessibility issues. Advanced homeowners realize that bespoke built-ins and smart storage solutions—like corner pull-outs and vertical dividers—optimize every inch. For innovative ideas, visit smart storage solutions for small kitchens in 2025.
Additionally, there’s a dangerous trap often missed: assuming that all hardware supports heavy loads without verification. Many shoppers overlook the importance of hardware specifications, leading to sagging shelves and damaged cabinets. It’s crucial to understand that hardware, like drawer slides and hinges, must match the weight and usage patterns of your items. Using subpar components is an advanced mistake that even experienced remodelers sometimes make. For robust hardware solutions, see heavy-duty hinge fixes for reliable support.
What about visual appeal versus functionality? Many believe that adding ornate details makes a space more beautiful, but over-decoration can hinder usability. A more subtle, functional aesthetic—like clean lines and soft-close mechanisms—improves daily life. Remember, beautiful cabinets are useless if they don’t glide smoothly or are hard to clean. An advanced mistake is neglecting the impact of finishes and hardware durability, which can cause quick wear and tear. To learn about long-lasting finishes, check out topcoat techniques that protect painted cabinets.
Finally, the biggest trap might be underestimating the importance of proper installation. No matter how high-quality your materials are, poor installation can cause uneven gaps, misalignment, or early failures. In my projects, paying attention to the screwing sequence and level alignment has saved me countless headaches. This is a nuanced skill that separates DIY novices from seasoned professionals. If you’re curious about precise installation techniques, visit how to adjust concealed hinges for perfect alignment.
Have you ever fallen into this trap of common myths? Let me know in the comments. Remember, understanding these nuances can be the key to a truly successful kitchen remodel.
Ensuring your kitchen remains functional and beautiful over the years requires more than just a one-time upgrade. The right tools and consistent maintenance can make a significant difference in prolonging the life of your custom cabinets, built-ins, and storage solutions. I personally rely on a curated set of equipment and techniques to keep everything in top shape, saving me both time and money in the long run.
Invest in Quality Hand Tools for Precision
For delicate adjustment tasks, I swear by a set of high-precision screwdrivers, especially those with magnetic tips. They allow me to tighten or loosen cabinet hinges and drawer slides without slipping, which is crucial when maintaining alignment over time. A quality cordless drill with adjustable torque helps me perform routine tightening without overtightening and damaging veneers or finishes. My go-to model is the Milwaukee M18 series — durable, reliable, and versatile.
Use Software to Plan and Track Maintenance
To organize upkeep routines, I utilize design and project management software like SketchUp for visualizing repair plans and Evernote for tracking maintenance schedules. These tools help me plan hardware replacements or repainting at optimal intervals, preventing small issues from turning into costly repairs. As technology progresses, I foresee more smart home integrations managing such maintenance proactively, instantly alerting homeowners to potential issues before they escalate.
Implement Regular Inspection and Reinforcement Routines
Every few months, I inspect handles, hinges, and slides for wear, and I re-tighten screws as needed. I also examine cabinet alignment and weather seals, especially around built-ins that see constant use. Regular checks prevent the kind of sagging or misalignment that can occur unexpectedly. In my experience, investing in a digital tension gauge can confirm whether hinges or supports are maintaining the correct tension, helping avoid early hardware failure.
How do I maintain long-term functionality of custom-built storage?
Maintaining your custom-built storage solutions involves a blend of preventive measures and timely upgrades. Using appropriate lubricants, like silicone-based spray for drawer slides, ensures smooth operation. Additionally, avoiding overloading shelves prevents unnecessary stress. For heavy-duty applications, consider adding steel support brackets—like the ones described in this detailed guide—to distribute weight evenly and prevent warping.
Try applying one of these advanced maintenance tips, such as installing a smart hinge monitoring system, to future-proof your kitchen. Staying proactive with tools and routine checks will help you enjoy a durable, efficient space that ages gracefully. Want personalized advice on maintaining your specific cabinets or built-ins? Reach out through our contact page for expert support.

Three Lessons That Changed My Approach to Kitchen Storage
- Never Rely Solely on Standard Hardware: I learned the hard way that hardware has to match the weight of what I store—skimping on heavy-duty slides led to cabinets buckling under my cast iron collection. Testing and verifying weight capacities before installation is non-negotiable.
- Reinforce and Support from the Ground Up: The cabinet frame isn’t just a shell; it’s the foundation. Reinforcing with plywood backing and steel brackets transformed my wobbly shelves into resilient supports that stand the test of time—even with the heaviest pans.
- Prioritize Proper Installation Techniques: Precision matters. Using a level, incremental tightening, and double-checking alignments prevented sagging and misalignment, saving me costly repairs down the line. Small details make a significant difference in long-term durability.
Resources That Elevated My Kitchen Game
- Heavy-duty drawer slides guide: My trusted source for hardware that truly supports heavy loads without sagging.
- Steel support brackets: Helped me reinforce my cabinets and prevent future sagging, especially for overhangs and heavy pantry shelves.
- Precise installation techniques: These tips saved me hours of frustration during my remodel and ensured perfect alignment.
- Installation insights: Mastering the nuances of hinge adjustments made my cabinets function flawlessly.
Elevate Your Kitchen—It’s Within Reach
Embarking on your kitchen storage journey can feel overwhelming, but with the right tools, knowledge, and a proactive mindset, you can create a durable, beautiful space that supports your lifestyle for years to come. Don’t let common pitfalls hold you back—think long-term, reinforce smartly, and install meticulously. Your kitchen’s future success depends on the choices you make today. Curious about personalized solutions? Reach out through our contact page. What’s one heavy item you’re excited to store safely and efficiently? Share your thoughts below.