Why We Use Water-Based Lacquers for Nursery Built-Ins
I remember the day I decided to renovate my child’s nursery—bright, cheerful, but cluttered with mismatched furniture and peeling paint. As I peeled away old layers of varnish, a lightbulb went off. The finish we choose for nursery built-ins isn’t just about looks; it’s about safety, durability, and peace of mind. That realization led me down a rabbit hole of research—one thing became crystal clear: water-based lacquers are a compelling choice, but not everyone knows why.
The Real Reason I Switched to Water-Based Lacquers for Nursery Built-Ins
Using water-based lacquers transformed my approach to finishing nursery furniture. Unlike traditional solvent-based products, these lacquers are low in volatile organic compounds (VOCs), making them safer for little ones and the environment. But what truly convinced me was the durability—they resist scratches and prevent the chipping that can happen with age. Plus, they dry quickly, which means my project moved along faster without sacrificing quality.
In fact, studies show that VOCs from older finishes can contribute to respiratory problems, especially in tiny lungs still developing [source: EPA]. Switching to water-based finishes not only enhanced the aesthetic of my son’s room but also shielded his health.
If you’ve ever painted a nursery or been worried about harmful fumes affecting your baby, you’ll appreciate how water-based lacquers offer a win-win: safer for health, tougher against everyday wear, and quick to dry. But how do you make sure you choose the right product? Let’s explore some common concerns and how to address them.
Is water-based lacquer really worth the hype?
Early on, I made the mistake of assuming all finishes are pretty much the same, only to find out that cheaper, lower-quality options can peel or show scratches more easily. The key is to select a high-quality water-based lacquer designed for wood furniture. When I switched brands, the difference was night and day. For more expert tips on choosing top-quality finishes, check out this insightful guide on [how to select the best finishes for your built-ins](https://artisancabinetworkz.com/expert-tips-on-selecting-storage-solutions-for-a-perfect-kitchen-upgrade).
Now that I’ve shared my experience and the benefits I’ve personally seen, I want to help you decide if water-based lacquers fit your project. Are you tired of peeling paint, strong chemical smells, or worry about the health of your little one? If so, then you’re in the right place. Next, let’s look at some practical steps to incorporate these finishes into your nursery or home renovation.
Ready to get started? Dive into the detailed process of selecting, applying, and maintaining water-based lacquers for your built-ins. You’ll be amazed at how much difference this simple switch can make. Let’s go!
Prepare Your Workspace for a Flawless Finish
Before applying water-based lacquer, clear the area and cover nearby surfaces with painter’s tape and drop cloths. Remove all furniture and fixtures that could be affected by drips or fumes. I once overlooked this step in a rush, leading to a weekend of cleaning sticky residue off my floors—lesson learned: preparation saves time and headache.
Sand the Surface for Better Adhesion
Start by sanding the built-in surfaces with fine-grit sandpaper (220 grit). This smooths out imperfections and creates a key for the lacquer to bond. Using a tack cloth, remove all dust afterward. During my first attempt, skipping this caused the finish to peel within months, highlighting the importance of proper surface prep.
Choose the Right Application Tools
Select a high-quality synthetic brush or a foam roller designed for water-based paints. For larger, flat surfaces, a spray gun can provide an even coat and save time. I experimented with both brushes and sprayers and found that spray application, while messier initially, gave me a professional-looking, streak-free finish.
Apply Thin, Even Coats
Dip your brush or roller into the lacquer, then wipe off excess to avoid drips. Use smooth, light strokes to apply the finish, working in the direction of the grain. Allow each coat to dry completely (usually 1-2 hours). In my early projects, thick coats caused runs and extended dry times—thin coats are the secret to a sleek finish.
Sand Between Coats for a Smooth Surface
Once a coat has dried, lightly sand with 320 grit sandpaper to smooth out any irregularities. Remove dust with a tack cloth before the next layer. I learned this the hard way when a thick, uneven coat resulted in a bumpy final surface—sanding between coats ensures a silky-smooth result. For more tips on applying durable finishes, see this comprehensive guide on selecting the best finishes for your built-ins.
Final Coat and Curing
For the last coat, apply a slightly thicker layer for added protection, then allow the piece to cure for at least 24 hours before use. Avoid heavy handling or cleaning during this time. My patience paid off: the cured lacquer provided a resilient, glossy finish that withstands everyday wear without the strong fumes of solvent-based varnishes.
Maintain Your Finish Properly
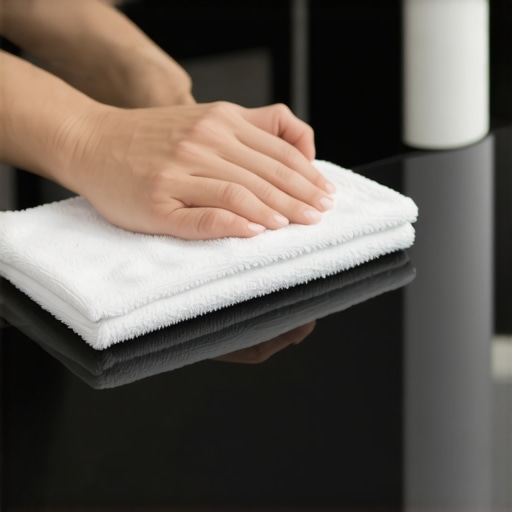
Clean the surface with a damp cloth and avoid harsh chemicals to preserve the lacquer’s durability. Regular maintenance checks help catch any damage early, extending the lifespan of your nursery built-ins. Keep in mind, the better you care for your finish, the longer it will look new—small efforts go a long way. If you’re integrating these steps into a broader kitchen or storage update, explore how custom cabinets and built-in storage can elevate your entire space.When it comes to *storage solutions*, many homeowners fall victim to common misconceptions that can turn a functional space into a cluttered nightmare. For instance, the idea that adding more shelves automatically means better organization is a myth. In my experience, thoughtfully designed built-ins or **custom cabinets** can enhance both aesthetics and efficiency, but only if they’re tailored to your specific needs and space. Relying solely on off-the-shelf solutions often leads to wasted space or awkward gaps, which is why investing in **custom cabinetry** can be a game changer—see our guide on ideas that transform your home’s style. Many assume that a kitchen remodel is just about updating appliances or choosing trendy colors, but this overlooks how integrated storage impacts everyday workflow. Without smart solutions like deep drawers or vertical dividers, even the most beautiful kitchen can feel congested. I’ve seen many fall into the trap of prioritizing looks over function, leading to frustration and wasted effort. Additionally, a common mistake is ignoring the *hidden nuances*, like the importance of proper clearance or the right hardware finish, which can significantly influence usability and durability. A recent study suggests that well-planned storage not only boosts efficiency but also increases home value—a compelling reason to get these details right.
### Are You Missing the Mark in Your Kitchen Design?
Many enthusiasts focus on aesthetics but overlook how **hidden features** such as toe-kick drawers or optimized corner solutions can make everyday use a breeze. For example, incorporating a built-in storage hack can recover wasted space and streamline your workflow while keeping clutter out of sight. Be cautious of the trap of over-customization, which can turn into costly mistakes if not carefully planned—consider consulting with experts or doing thorough research first. Remember, the goal isn’t just a stylish kitchen; it’s a space that works with your lifestyle.
So, have you ever fallen into this trap of neglecting the *nuances* that make a storage solution truly effective? Let me know in the comments. For more insights on avoiding common pitfalls, check out our comprehensive space-maximizing solutions that can elevate your entire home.Maintaining your storage investments and built-ins is crucial to ensure longevity, functionality, and appearances over time. One of the most reliable tools I use is a high-quality digital moisture meter, like the Protimeter Surveymaster, which helps me monitor humidity levels inside cabinets and drawers, especially in basements or high-humidity areas. Regularly checking moisture can prevent warping or mold growth, protecting custom cabinetry and built-in storage. Additionally, I swear by a soft brush attachment on my cordless vacuum to gently remove dust from crevices and hardware, preventing buildup that can impede drawer slides or hinges. For cleaning and fine-tuning hardware, I prefer a microfiber cloth and a mild, VOC-free cleaner, which preserves delicate finishes like matte black hardware—more resistant to fingerprints but still vulnerable to grime buildup. As materials and finishes evolve, so do maintenance techniques; for example, advanced polymer-based coatings are now offering increased resistance against scratches and chemicals, extending the lifespan of your project. Looking ahead, I predict an increase in smart sensors integrated into cabinets to alert homeowners about humidity spikes or door misalignments, pushing maintenance into the digital realm. To keep your storage solutions working optimally, schedule a biannual inspection focused on hardware function, finish integrity, and moisture levels. How do I maintain built-ins over time? Regularly clean with non-abrasive products, inspect hardware for looseness, and monitor environmental factors—these small steps prevent costly repairs and keep your space looking sharp. For a comprehensive set of smart ideas, check out our latest tips on innovative home storage. Want to level up your maintenance game? Try using a moisture meter to detect early signs of humidity-related issues—it’s a game changer for protecting your investment.Over the years, I’ve realized that the key to a functional and beautiful kitchen isn’t just about trendy cabinets or sparkling countertops—it’s about smart storage solutions and understanding the nuances that make them work. From my initial missteps to expert insights, I’ve learned that investing in customized built-ins and carefully chosen finishes redefines how I use my space every day.
Lessons That Didn’t Make the Cut When I Thought I Knew It All
- Don’t underestimate the power of tailored storage—generic solutions often fall short of your unique needs. I once bought off-the-shelf cabinets, only to realize later they wasted valuable space and lacked accessibility. Closely assessing your lifestyle and measuring precisely creates a foundation for success.
- Don’t ignore the importance of surface prep—skipping proper sanding or not cleaning dust between coats leads to uneven finishes and premature wear. Every project taught me that patience with prep work equals perfection in the end.
- Biggest revelation: quality finishes matter more than color choices. Selecting water-based lacquers over solvent-based products made a tangible difference in durability, VOC safety, and ease of clean-up. This switch transformed my approach to finishing, ensuring my custom cabinets last longer and stay healthier for my family.
- Never cut corners on hardware—smooth-operating hinges and sturdy drawer slides prevent frustration. Simple upgrades here can turn a good renovation into a great one, reducing maintenance headaches long-term.
- Pay attention to hidden details like cabinet toe-kicks or vertical dividers. These small features maximize function without clutter, and their thoughtful implementation was a game changer in my kitchen redesign.
Tools and Ideas That Have Become My Trusted Playbook
- Functionally, I rely on expert guides like the one on selecting the best finishes for built-ins. It helped me distinguish quality lacquers and hardware that stand the test of time.
- My go-to hardware resource is the detailed articles on storage hacks for a sleek kitchen. They provided creative ideas for maximizing space, especially in tight corners or high-ceiling areas.
- For maintenance, I recommend tools like moisture meters from smart storage tips to prevent warping or mold—keeping your investment pristine.
- Lastly, I turn to comprehensive guides on creating seamless kitchen upgrades. They remind me that planning for workflow efficiency is just as important as aesthetic choices.
Your Next Step into a Smarter, More Beautiful Kitchen
Embracing tailored storage solutions and paying attention to the little details—like finishes and hardware—are what elevate a kitchen remodel from good to extraordinary. Every project I’ve completed has reinforced that the journey is ongoing, and there’s always more to learn and improve. You have everything you need to start transforming your space today. Remember, the right built-ins and finishes not only make life easier but also add value that endures.
What’s your biggest challenge when it comes to storage or custom cabinetry? Share your thoughts below. Curious to see how others are elevating their kitchens? Check out our resources and start your transformation today!https://artisancabinetworkz.com/maximize-space-with-innovative-storage-solutions-for-every-room.