The Mudroom Bench Height Secret for Comfortable Shoe Changes
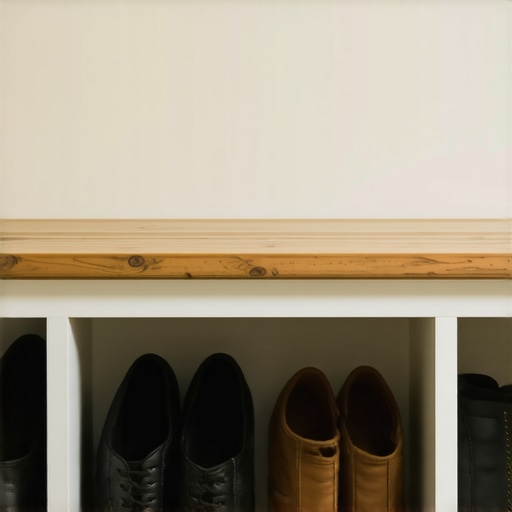
One morning, I found myself huddled painfully in my mudroom, trying to slip on my boots after a long day. The bench was too low, forcing me into awkward squats, or worse, making me balance dangerously as I struggled to get my shoes on. Moments like these made me realize something that I had overlooked for years—the perfect bench height can transform a simple daily ritual into a quick, pain-free routine.
Why the Right Mudroom Bench Height Matters
When designing or renovating a mudroom, most of us focus on storage and aesthetics. But comfort in everyday tasks gets overlooked—until it becomes a pain point. Having a mudroom bench that’s too tall or too low can turn an otherwise pleasant space into a source of frustration. The secret, I’ve learned through personal trial and error, is finding that sweet spot in bench height that makes shoe changing effortless and painless.
This isn’t just about comfort; it’s about preventing strain, especially if you or family members have knee or back issues. A properly proportioned bench enhances functionality and keeps your mudroom inviting rather than a dreaded obstacle course every morning.
Interestingly, ergonomic studies suggest that the ideal seating height for tasks like shoe changing is approximately 17 to 19 inches high. This range accommodates most adults comfortably, making the process quick and strain-free. If you’ve ever struggled with back pain after bending over a too-high or too-low surface, you’ll understand what I mean.
Are You Wasting Space With a Poorly Chosen Bench Height?
Early in my renovation, I made the mistake of installing a standard 18-inch-high bench without considering my family’s specific needs. It seemed normal, but everyone quickly complained about discomfort and awkwardness. That mistake cost me extra time and money when I had to retrofit a better solution later. To avoid similar pitfalls, it’s worth doing a little homework before choosing the size of such a vital piece of furniture. If you’re curious about innovative storage options that work seamlessly with custom-built mudrooms, check out this guide.
In the next section, I’ll share practical steps to determine your ideal mudroom bench height and how to incorporate it into your overall design. Trust me, this small adjustment can make a huge difference in your daily routine and overall comfort.
Determine Your Ideal Bench Height Efficiently
Start by measuring the height of the shoe you wear most frequently—this gives a baseline for comfort. For example, I pulled out my favorite pair of sneakers and used a tape measure to note that my midsole height was 3 inches. Add about 14 to 16 inches to this measurement to account for sitting height and ease of shoe removal, aiming for a total bench height of approximately 17-19 inches. This approach eliminates guesswork and creates a tailored solution.
Use Templates to Visualize the Space
Create a paper or cardboard template matching your chosen height and place it in the mudroom area. Test it by sitting or simulating shoe-changing motions—notice any discomfort or awkward angles. I did this by cutting a 17-inch strip of cardboard and placing it on my existing countertop; it quickly revealed that 17 inches felt perfect for my needs, preventing back strain and awkward bending.
Leverage Classic Cabinet-Making Techniques for Storage
When integrating storage, think of your mudroom like a well-organized kitchen cabinet. Use vertical dividers, adjustable shelves, and dedicated cubbies for shoes, backpacks, and jackets. I installed vertical dividers using concealed fasteners, inspired by this method, ensuring stability for heavy boots and seasonal gear. This makes it easier to keep the space tidy and accessible.
Incorporate Built-ins for Seamless Storage
Built-in benches with integrated storage maximize space and give a custom look. I framed my bench to match existing wall cabinetry, creating a cohesive appearance. Use high-quality plywood with sufficient thickness—typically ¾ inch—for durability, as recommended in this guide. This choice prevents sagging and ensures longevity, even with heavy footwear.
Plan for Power and Charging Needs
If you need to charge devices or keep essentials accessible, embed power strips within the storage units. I routed a power outlet into a drawer using the techniques from this article, hiding cords neatly and preventing clutter. Such integrations require precise measurements before construction to ensure clean lines and functionality.
Balance Aesthetics and Functionality
Choose finishes and hardware that match your home’s style—brass pulls for a vintage look or matte black for a modern feel. When installing, pay close attention to door alignment using shims and levelers, much like the detailed process described in this resource. Proper alignment prevents sticking and uneven gaps, maintaining a seamless appearance.
Test and Adjust Post-Installation
Once installed, sit on the bench to confirm comfort and make minor adjustments. I found that adding a thin cushion improved comfort without sacrificing style. Adjust hinges and hardware as needed, referencing detailed guides like this article. This iterative process ensures your mudroom is both functional and inviting, tailored precisely to your daily routines.
Many homeowners assume that custom cabinets and built-ins automatically solve storage woes and elevate their home’s style. However, a closer look reveals several nuanced pitfalls experts have learned to avoid over years of craftsmanship. One widespread misconception is that opting for full-custom designs guarantees better functionality; in reality, improperly conceived custom solutions can complicate maintenance and accessibility. For example, custom corner cabinets are often lauded for maximizing space, but without precise measurements and user-centric design, they frequently turn into inaccessible black holes—undermining their intended purpose.
Why Do So Many Upgrades Miss the Mark When They’re Supposed to Enhance Space?
The secret lies in understanding user behavior and workflow. Many designers focus on aesthetics and overlook how residents actually move through their spaces. This oversight leads to storage that looks good but frustrates daily use. For instance, some homeowners invest in elaborate built-in wine racks or spice drawers that end up rarely being used because they don’t align with the actual routines. Incorporating ergonomic principles and custom solutions tailored to your habits make your investment worth every penny. Studies from industry experts highlight that integrated storage solutions can boost both efficiency and satisfaction if designed thoughtfully (see techniques for selecting storage solutions here). A common trap is installing high-end cabinetry with lavish finishes but neglecting accessibility considerations—like soft-close hinges that aren’t suited for heavy, frequently used doors. Over time, this mismatch can cause hardware failure or user frustration. To prevent this, asking detailed questions about daily use and maintenance needs is vital. A particularly sneaky mistake happens when homeowners choose standard spacing between shelves—failing to anticipate the size of bulkier items. Instead, customized shelf heights and adjustable components provide flexibility, ensuring your storage truly adapts to your lifestyle. Remember, the goal isn’t just aesthetic perfection but functional harmony. Want to learn more about how to create storage solutions that truly work? Explore our guide on unique storage hacks for a sleek, clutter-free kitchen.
For the advanced designer, consider how to seamlessly incorporate technology and smart features into cabinets and built-ins. Integrating hidden power outlets, charging stations, and automation can elevate your space from beautiful to highly functional. But beware of the myth that all tech additions are simple or inexpensive—these require precise planning, especially re-routing wiring or ensuring moisture resistance in humid areas. Ensuring these complex elements are thoughtfully engineered can prevent costly renovations later. For example, embedding power strips within cabinetry is much more than drilling a hole; it involves meticulous planning to hide cords and ensure safety. Check out our detailed article on hiding a cluttered coffee station without bulky appliances to see smart integration in action. Have you ever fallen into this trap of overestimating your DIY abilities or underestimating the complexity of custom solutions? Let me know in the comments.
Maintaining your custom cabinetry and storage systems is crucial to ensuring their longevity and continued functionality. The right tools and methods can make all the difference, saving you time and preventing costly repairs down the line.
Invest in Quality Tools for Preventative Maintenance
Personally, I rely on a high-quality cordless drill with a variable speed control, like the Dewalt DCD791D2, for all adjustment and tightening tasks. Its precision helps prevent over-tightening, which can damage delicate cabinet hinges or hardware. Additionally, a set of fine-nosed pliers and a soft-bristled brush are indispensable for cleaning and routine touch-ups.
For wood surfaces, I use mineral spirits with microfiber cloths to remove grease and grime, ensuring my built-ins look pristine. These simple tools facilitate regular upkeep and address issues before they escalate, preserving the aesthetic and structural integrity of your installations.
How do I maintain cabinetry and built-ins over time?
Developing a scheduled maintenance routine is essential. I recommend inspecting hinges, drawer slides, and hardware every six months. Lubricating moving parts with a silicone spray such as the WD-40 Smart Straw helps maintain smooth operation without attracting dirt. Also, check for signs of moisture or pest damage—addressing these promptly prevents larger problems.
Software and Planning for Long-Term Results
Utilizing 3D design software like SketchUp or Fusion 360 allows you to visualize modifications and plan for future expansions or modifications. This foresight ensures your storage solutions adapt gracefully over time. I’ve found that regularly updating my digital plans based on evolving needs keeps my spaces functional and stylish, which is especially important as family dynamics change.
Looking ahead, the trend in custom cabinetry is moving toward smart integration, with features like built-in charging stations and motorized drawers becoming standard. Designing for these innovations now can save significant remodeling costs down the line.
Is there a way to keep my storage systems scalable and adaptable?
Absolutely. Modular components and adjustable shelving, like those found in modern storage solutions, enable you to reconfigure your space as your needs change. The secret is to select hardware and systems that prioritize flexibility, so you can add or remove elements with minimal effort.
Scaling and Future-Proofing Your Storage
As your collection of tools, devices, and household items grows, so should your storage capacity. I recommend installing vertical dividers and modular drawers that can be reconfigured quickly. For example, adjustable vertical dividers (see these solutions) allow for quick adaptation, preventing clutter accumulation and ensuring everything has its place.
By using high-quality, durable hardware and regular upkeep, your cabinetry can withstand the test of time. Remember, consistent maintenance extends beyond just cleaning—it’s about proactively addressing potential issues before they become serious.
Maximize Longevity with Expert Techniques
For advanced durability, I recommend applying a UV-resistant sealant to natural wood finishes, especially in kitchens or sunlit areas. This added layer protects against fading and warping. Referencing industry standards from cabinet finishing guides, applying such protective coats can significantly extend your cabinets’ lifespan.
Try implementing a quarterly check of all hardware fittings and reapplying lubricants or sealants as needed. This proactive approach ensures your investment stays beautiful and functional longer.
Remember, taking the time to maintain your custom solutions with precision tools and strategic planning will pay dividends over the years. Incorporate these expert tips, and watch your storage systems continue to serve efficiently and beautifully for decades to come.
Three Lessons That Changed How I Approach Custom Cabinets and Storage
- Never assume standard measurements will fit your unique space. Early on, I believed sticking to common dimensions would work universally. But personal experience showed me that tailoring measurements to your habits and space prevents headaches during installation and use.
- Prioritize accessibility over aesthetics in high-use areas. I once focused solely on beautiful finishes without considering ease of reach. Now I incorporate ergonomic principles to ensure that every drawer and shelf is effortlessly reachable, making daily routines smoother.
- Invest in quality hardware, not just attractive fronts. Beautiful cabinets are wasted if hinges and slides fail prematurely. Upgrading to durable, precision hardware avoids frustration and keeps your storage functioning flawlessly for years.
- Embrace the iterative process—test, adjust, and refine. My best spaces came after multiple small tweaks based on real-life use. Don’t settle for perfection on paper—experience it in your daily routine.
Tools and Guides That Elevate My Craft
- Expert tips on selecting storage solutions: This resource sharpened my understanding of combining function with style, ensuring my designs remain practical yet attractive.
- Modern kitchen remodels with built-ins: Learning from recent projects helped me stay current on innovative features and materials that stand the test of time.
- Innovative storage solutions: This guide inspired creative ideas for maximizing small spaces without sacrificing style or convenience.
- Maximize space with innovative solutions: It’s a game-changer for making every inch count, especially in tight or challenging layouts.
Your Next Move Starts Now—Create with Confidence
Designing and installing custom cabinets and storage solutions is a rewarding journey, full of personal growth and skill refinement. Remember, every project is a chance to learn something new—trust your instincts, use quality tools, and don’t shy away from experimenting until you get it just right. Your space will thank you for the care and thought you put into it. Have you ever faced an unexpected challenge during a cabinetry or storage upgrade? Share your story below—I’d love to hear how you turned it into a success.