The Heavy Mixer Lift: Why This Hardware is a Must for Serious Bakers
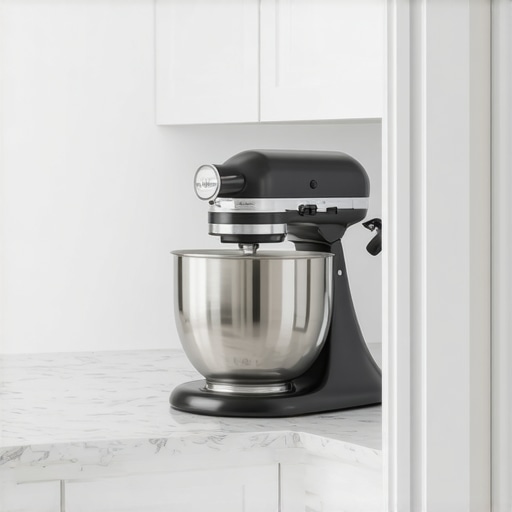
I remember the first time I tried to lift my heavy stand mixer onto a high shelf, only to nearly drop it on my foot. My back strained, and I felt that twinge of frustration—why does something so essential have to be so awkward to handle? That lightbulb moment made me realize: if I want a truly functional kitchen, I need smarter solutions for heavy appliances. Today, we’re diving into one of those game-changing accessories—The Heavy Mixer Lift—and why it’s become a must-have for serious bakers looking to streamline their workflow.
Transforming Chaos into Confidence in the Kitchen
For avid bakers, a stand mixer isn’t just a tool; it’s a partner in the art of baking. But let’s be honest—most of us wrestle with storing it. It’s bulky, heavy, and awkward to lift, especially when you’re in the thick of prepping your favorite recipes. I’ve made the mistake early on of cramming mine into a crowded cabinet, only to struggle every time I needed it. That inconvenience became a daily nuisance and a safety concern. It made me realize that my kitchen setup was working against me, not for me. A better approach was urgently needed—one that combined safety, efficiency, and ease.
What We’ll Solve Today
In this post, I promise to introduce you to the Heavy Mixer Lift, a hardware solution that transforms the way you interact with your appliances. By the end, you’ll understand why this lift isn’t just a luxury but a necessary upgrade for the home baker who takes their craft seriously. Plus, I’ll share key tips on choosing the right lift and simple installation tricks, so you can get back to baking without unnecessary hurdles.
Will the Heavy Mixer Lift Live Up to Its Hype? An Honest Look
I’ll admit, I was skeptical at first—another gadget promising convenience. Early on, I made the mistake of investing in cheap, quick-fix solutions that quickly failed or caused more clutter. These missteps taught me an important lesson: quality hardware matters just as much as your recipes. When selecting a mixer lift, look for sturdy materials and reliable mechanisms that can handle the weight and frequent use. Trust me, a well-designed mixer lift is worth every penny and then some in saved time and added safety. Curious if it’s the right fit for your kitchen? Let’s explore the ins and outs where practicality meets expert advice.
Secure a Stable Mount Point for Your Lift
First, identify a sturdy wall or cabinet side to attach the lift. Use a stud finder to locate framing or solid mounting points. On my first attempt, I installed the hinge bracket on drywall, which led to wobbling; switching to a stud-made all the difference, ensuring safety and durability.
Choose the Right Hardware and Tools
Select screws and anchors rated for the weight of your mixer. A heavy-duty toggle bolt or lag screws work well for drywall or wood. Gather a drill, level, measuring tape, and a pencil. I wasted time improvising with incompatible fasteners—firmly securing the lift requires proper hardware from the start.
Attach the Mounting Bracket
Position the bracket at the desired height, considering countertop clearance. Use a level to ensure perfect horizontal alignment. Mark the holes with a pencil. When I marked mine, I double-checked with a level to prevent tilting, which could cause instability during operation.
Connect the Lift Platform to Your Mixer
Follow the manufacturer’s instructions to attach the lift arm to your mixer. Use the included hardware, and tighten all fasteners securely. I found that applying some lubrication to the moving parts helped the lift operate smoothly, preventing jamming during use.
Test the Installation with the Mixer
Carefully lift and lower the mixer a few times to verify stability and smoothness. Ensure nothing is loose. I did a trial run with flour dust in the air—any wobble was immediately noticeable, prompting me to reinforce the bracket or adjust positioning.
Incorporate Storage for Accessories
Maximize the value by adding hooks or shelves nearby for attachments and cords. This keeps everything organized and ready to use. I installed a small magnetic strip to hold whisks and beaters—saving drawer space and reducing clutter.
Maintain and Adjust Over Time
Periodically check fasteners and moving parts for wear or looseness. Lubricate joints as needed. After several months, I noticed some squeaking—applying a bit of silicone spray restored silent operation, extending the lift’s lifespan.
While many believe that selecting the perfect built-in or custom cabinet is just about aesthetics and immediate utility, there’s a lot more beneath the surface that separates a good design from a truly exceptional one. A common myth is that larger storage spaces automatically translate into a better kitchen. In reality, thoughtful organization and understanding the nuanced needs of your space can make smaller, well-designed solutions outperform bulky, generic options. For example, incorporating vertical dividers or specialized inserts can dramatically increase efficiency, a technique detailed in our article on [smart storage ideas](https://artisancabinetworkz.com/smart-storage-ideas-to-maximize-your-kitchen-space-this-year).
Maintaining your carefully crafted custom cabinets and built-ins is essential to preserving their beauty and functionality over the years. One of the most effective ways to ensure long-term performance is investing in high-quality tools and establishing a routine maintenance schedule. I personally rely on a few specific gadgets that have transformed my maintenance approach, saving me time and preventing costly repairs.
My Go-To Maintenance Arsenal
First, I swear by a digital moisture meter—like the Extech M590. This little device helps me monitor moisture levels in my cabinetry and surrounding drywall, catching early signs of potential water damage before it escalates. This proactive approach is crucial in kitchens where humidity and spills are inevitable. Second, I use a high-quality silicone-based lubricant—such as Lubriplate—to keep sliding hardware like soft-close drawer slides and hinges operating smoothly. Regular lubrication prevents squeaks and reduces wear, extending the lifespan of your built-ins.
For cleaning, I opt for pH-neutral, gentle cleansers like those recommended by Wood Magazine. This ensures the finish of my cabinets remains pristine without the risk of stripping or dulling. Additionally, I keep a set of microfiber cloths—these are perfect for delicate surfaces and prevent scratching during routine wipe-downs. Incorporating these tools into a scheduled maintenance routine—say, quarterly checks—has drastically minimized issues and kept my kitchen’s aesthetic intact.
Joining the Trend: Smart Maintenance for Modern Kitchens
Looking ahead, the evolution of smart home technology suggests a future where sensors and automation will further simplify maintenance. Imagine smart moisture sensors that alert you directly to your phone or automated lubricating systems that activate on a schedule. As these innovations become more affordable, maintaining your kitchen’s custom elements will become even more effortless, allowing you to focus on what matters—enjoying your beautiful space.
How do I keep my built-ins functioning flawlessly over time?
Regular inspections and the right maintenance tools are your best allies. Check hinges and slides for looseness, lubricate moving parts periodically, and monitor moisture levels around cabinetry to prevent warping or rot. For detailed advice tailored to your specific project, don’t hesitate to reach out. Now, I challenge you to try incorporating a moisture meter into your routine—early detection could save you from costly repairs and preserve your kitchen’s charm for years to come.
Lessons from the Front Lines of Kitchen Customization
One of the most surprising lessons I’ve learned is that perfecting storage solutions isn’t about the biggest or most expensive options. It’s about thoughtful placement and quality hardware, which can make even modest spaces feel spacious and organized. I once tried to save a few dollars by skipping hardware upgrades, only to find that squeaky hinges and sticky drawers quickly undermined my efforts. Investing in durable materials and learning the quirks of each component turned my kitchen into a true sanctuary for culinary creativity.
Another insight was realizing that routine maintenance isn’t just a chore; it’s a safeguard for long-term beauty and functionality. Regularly checking moisture levels with tools like the Extech moisture meter prevented costly warping and mold issues. These small, consistent steps protect your investment and keep your custom cabinets looking brand new, even after years of daily use.
Lastly, understanding that design is an ongoing journey has transformed my approach. No matter how well-planned, tweaks are inevitable, and embracing these improvements with patience yields the best results. Whether it’s adjusting a shelf or upgrading a hinge, each small change adds up to a beautiful, functional kitchen for years to come.
My Toolbox for Kitchen Success
Building a professional-grade kitchen is about more than just choosing the right style; it’s about selecting tools and resources that support longevity and efficiency. I rely heavily on websites like this guide on smart storage ideas to stay inspired and informed. For hardware and finishing touches, I trust brands like Lubriplate for lubricants, ensuring my hardware stays smooth and silent. Lastly, I always examine high-quality finish options through trusted publications to keep my cabinetry looking impeccable.
Embrace Your Kitchen Makeover Journey
The process of transforming your kitchen into a functional masterpiece begins with small, intentional steps. Each upgrade, from a sturdy trash pull-out to a reliable custom cabinet upgrade, contributes to a space that truly works for you. Remember, the best kitchens aren’t built overnight—they evolve through consistent effort and a willingness to learn. So, get started, keep refining, and enjoy the journey to a kitchen that’s as beautiful as it is practical.