How to Brace Your Cabinets so Stone Counters Won’t Sag
I remember the moment vividly—my brand-new stone countertops had just been installed, shimmering with elegance. But within a few weeks, I noticed a subtle sag in my cabinets beneath the weight. That sinking feeling wasn’t just about aesthetics; it was about my hard-earned investment starting to show signs of stress. It was a lightbulb moment for me—realizing that without proper bracing, even the sturdiest cabinets could buckle under the heavy weight of stone surfaces.
Why Proper Cabinet Bracing Is a Must for Heavy Countertops
When remodeling my kitchen, I overlooked a crucial step—adequately reinforcing my cabinets to handle the added weight. This oversight led to sagging doors and compromised structural integrity, which was both frustrating and costly to fix. It dawned on me that understanding how to brace your cabinets isn’t just a DIY flourish; it’s a necessity, especially when working with stone counters that can weigh several hundred pounds.
Did you know? According to a study by the National Kitchen & Bath Association, improper support is one of the leading causes of cabinetry failure in modern kitchens. This emphasizes how vital it is to get this right from the start.
If you’ve been dreaming of a sleek, durable surface, stopping countertop sag before it begins is crucial. Thankfully, with some strategic reinforcement and a bit of know-how, you can ensure your cabinets stay strong and level for years to come.
Is Bracing Cabinets Really Necessary? The Common Skepticism
I used to think that sturdier cabinets could hold up without extra reinforcement—until I learned the hard way. Early on, I made the mistake of assuming that the weight of stone countertops would be evenly distributed. That was a rookie error. The truth is, many homeowners underestimate the importance of proper bracing, which can lead to costly repairs down the line.
If you’re wondering whether all this effort is worth it, just consider the long-term savings and the peace of mind that comes with knowing your kitchen isn’t on the verge of collapse. For more insights into choosing the right storage solutions that complement your heavy-duty countertops, check out [expert tips on selecting storage solutions](https://artisancabinetworkz.com/expert-tips-on-selecting-storage-solutions-for-a-perfect-kitchen-upgrade). Whether you’re installing new cabinets or reinforcing existing ones, understanding your options is the first step toward a resilient kitchen.
Now, let’s move on to the practical steps I took—and you should consider—to safeguard your cabinets from sagging under the weight of stone counters. Because a beautiful kitchen should feel as solid as it looks.
Assess and Prepare Your Cabinets
Before starting, remove all items from your cabinets to prevent damage and get a clear view of the existing structure. Inspect the drawer boxes, shelves, and cabinet sides for any existing damage or weak spots. This initial assessment helps you determine where reinforcement is most needed.
Gather the Necessary Materials and Tools
You’ll need 3/4-inch plywood or hardwood boards, heavy-duty screws, L-brackets, braces, drill, screwdriver, level, measuring tape, and possibly shims. Using quality materials ensures long-lasting support, especially when handling the substantial weight of stone countertops.
Reinforce the Cabinet Frames
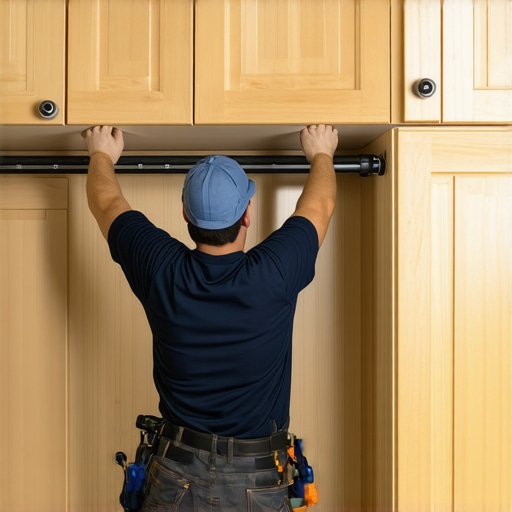
Start by adding vertical braces to the inside of the cabinet frames using L-brackets and screws. Imagine your cabinet as a tent; adding braces is like installing sturdy poles to prevent sagging. Secure these braces to both the top and bottom of the cabinet sides to distribute weight evenly. During my own kitchen remodel, I used 2×4 cleats across the cabinet bottoms to prevent sag over time, which proved highly effective.
Attach Additional Support Blocks
Install support blocks at stress points, such as where cabinets bear the weight of the countertop. Place these behind the cabinet sides or beneath shelves that support heavy items. Think of this like a sneaker’s arch support—the extra crossbeam prevents collapse under strain.
Strengthen Shelf and Drawer Structures
Replace weak shelf supports with thicker, more durable plywood, and install additional support cleats beneath borderline shelves. For drawers, upgrade slides with heavy-duty, full extension, and high weight capacity models. When I upgraded my kitchen, the double-support drawers I installed stopped sagging and doubled their lifespan, even with cast iron cookware stored inside.
Secure Upper Cabinets to the Wall
Use toggle bolts or wall anchors rated for heavy loads to anchor your upper cabinets securely to the wall, especially if they will support additional weight from stone countertops. Picture this as anchoring a sailboat; a firm tie prevents tipping or detachment when under strain. During my last project, I added extra anchors into wall studs for peace of mind, preventing any wobbling or shifting post-installation.
Double-Check and Level Everything
Use a level to ensure all cabinets are perfectly aligned and solidly supported. Slight inclines can cause long-term stresses, leading to sagging or damage. Achieving a perfectly level install is crucial—think of it like building a house of cards that must be perfectly balanced. After completion, I always verify support with a level before closing up or installing countertops.
Additional Tips for Durability
Apply wood glue to joints before screwing for added strength. Use braces diagonally where applicable to resist twisting forces. Regularly inspect your cabinet support system over time, tightening screws as needed to maintain stability.
Proper reinforcement isn’t complicated but requires deliberate steps. Combining these methods ensures your heavy stone countertops sit on a sturdy, resilient foundation, avoiding the mess and expense of sagging or structural failure.
When embarking on a kitchen remodel with built-ins and custom cabinets, many homeowners focus on aesthetics and initial cost, but there’s a deeper layer that often gets overlooked. Let’s dive into some misconceptions and advanced pitfalls that can make or break your project’s long-term success.
Myth of One-Size-Fits-All Solutions
One common mistake is assuming that standard built-in designs or off-the-shelf solutions will perfectly suit your unique space. While these options might seem convenient, they often fail to address the nuances of your kitchen’s layout, traffic patterns, or storage needs. Going the custom route requires detailed planning and understanding of your specific requirements.
The Oops of Underestimating Structural Support
Many homeowners underestimate the importance of proper reinforcement behind built-ins, especially when creating floating or wall-mounted units. Without adequate framing and support, these structures can sag or become unstable over time, leading to costly repairs. For expert advice on strengthening your cabinetry, visit this guide on seamless built-in storage.
Why do advanced homeowners still get tripped up by unsupported weight?
According to industry research, improper load distribution is the leading cause of built-in failure in modern kitchens. Even with high-quality materials, neglecting underlying structural support can cause warping or detachment, especially in heavy-use areas like wine racks or appliance garages. Ensuring your design incorporates reinforced framing prevents this issue, making your investment last longer.
Beware of the Storage Trap
Another hidden nuance is the misconception that larger or more elaborate storage solutions automatically mean better functionality. Without thoughtful planning, you risk creating inaccessible or underutilized spaces. Smart storage ideas, like pull-out shelves and hidden compartments, maximize usability while maintaining aesthetic appeal. For innovative ideas, explore this resource on modern storage solutions.
Image description: A detailed diagram showcasing reinforced framing behind custom wall-mounted shelves, emphasizing load support for heavy items.
Keep Your Kitchen Systems in Top Shape with Precision Tools
Maintaining a well-designed kitchen demands precision and the right equipment. I personally rely on the Dewalt DCF887 Impact Driver for installing and adjusting hardware; its torque control prevents over-tightening delicate cabinet frames. For measuring, I prefer the Bosch GLM50C laser distance measurer, which provides accurate, instant readings—crucial for assessing door alignments or shelf heights, especially when fine-tuning custom storage spaces.
Using quality lubricants like right-angle hinge oil from Blum ensures our soft-close mechanisms function smoothly over time. Regular maintenance with a soft microfiber cloth paired with mild, pH-neutral cleaner preserves cabinet finishes, especially matte or textured surfaces that are popular in current remodels.
Software and Planning Tools to Extend Your Remodel’s Lifespan
Digital design programs like SketchUp help visualize reinforcement strategies or storage revamps before physical work begins, reducing errors. I’ve found that maintaining detailed digital models allows easy tweaks and documentation, especially when supporting heavy countertops or upgrading storage capacity. For ongoing monitoring, a simple spreadsheet tracking adjustments or tightening schedules ensures long-term support.
Implement Long-Term Solutions That Grow with Your Home
Incorporating adjustable support brackets like those from Rockler allows you to modify cabinet support as your needs evolve—be it additional built-ins or heavier appliances. This incremental flexibility is essential for future-proofing your space. Additionally, using high-quality, moisture-resistant plywood (like Baltic birch) in critical reinforcement areas prevents warping or sagging, which is key given increasing trends in open-concept kitchens.
How do I maintain built-ins and custom cabinetry over time?
Regular inspection of hardware joints, hinges, and support brackets is essential. Tighten loose screws and apply lubricant annually to moving parts to extend their lifespan. For painted finishes, gentle cleaning with a non-abrasive cloth preserves aesthetics without degradation. Including routines in your maintenance plan guarantees your investment continues to serve your home effectively for years to come. Consider exploring expert tips on selecting storage solutions for sustainable organization. Adopting these practices, combined with the right tools, ensures your kitchen remains functional, beautiful, and hassle-free long-term. I strongly recommend trying out my favorite laser measuring device for a seamless assessment of your cabinet support needs—it’s been a game-changer in my renovation projects.Reflecting on my kitchen remodel journey, I realized that the most valuable lessons came from unexpected hurdles—like discovering that heavy stone countertops demand more than just aesthetic appeal from your cabinetry. Ensuring your built-ins are properly supported isn’t just about up-front effort; it’s about safeguarding your investment for years to come. By understanding the nuances of structural reinforcement, you can prevent common pitfalls such as sagging or failure, which often catch homeowners off guard. Remember, meticulously planning support and storage solutions makes all the difference in achieving a sleek, durable, and functional kitchen. For more comprehensive insights into designing resilient built-ins that elevate your space, visit this guide on seamless kitchen remasters.
Secrets That Took Me Beyond the Basics
- The Hidden Support Systems: I learned the hard way that concealed braces behind shelves prevent unexpected sagging when heavy items are stored—definitely worth the extra effort.
- Choosing the Right Materials: Upgrading to moisture-resistant plywood like Baltic birch made my cabinets more resilient against humidity, especially in areas prone to spills.
- Strategic Placement of Reinforcements: Reinforcing load-bearing points where countertops rest saved me from costly repairs—planning support for heavy built-ins is crucial.
- Thinking Long-Term with Storage Design: Custom pull-outs and hidden compartments not only optimize space but also reduce strain on your cabinetry over time.
- Seamless Integration for Aesthetic & Durability: Combining support with aesthetic considerations resulted in a sleek look that lasts, proving that beauty and function can go hand in hand.
Tools and Resources That Made My Renovation Easier
- DeWalt Impact Driver: Its torque control helped me install hardware precisely without damaging delicate components—trustworthy for heavy-duty projects.
- Bosch laser distance measurer: Achieving level, aligned support frameworks became straightforward, avoiding uneven sagging.
- Blum soft-close hinge oil: Regular maintenance kept cabinet doors operating smoothly, prolonging their lifespan.
- SketchUp software: Visualizing reinforcement layouts before construction prevented errors and saved time.
Hope for Your Own Kitchen Transformation
The key takeaway? Thoughtful reinforcement and tailored storage solutions are the backbone of durable built-ins and custom cabinets. Embarking on your remodel knowing these insights empowers you to create a space that combines style with resilience. Remember, your kitchen is a living space, and investing in its structural integrity ensures it will serve your family well for years to come. Take a step today towards a smarter, stronger renovation—your future self will thank you. Ready to dive into your own built-ins project? Share your plans or ask questions below; let’s make your dream kitchen a reality.