The Hidden Microwave Nook: How to Vent Your Appliance Without Damaging Cabinets
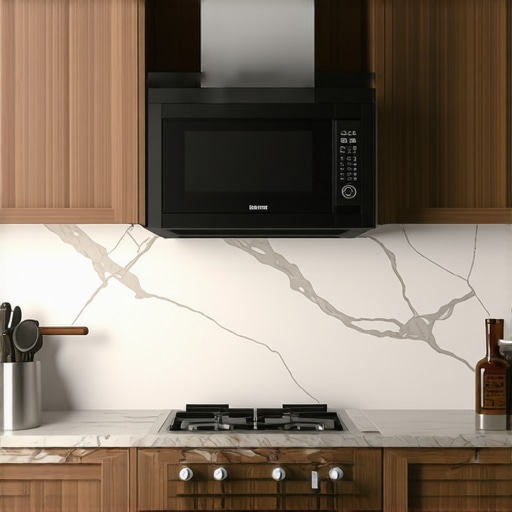
Have you ever tucked your microwave into a custom-built nook only to realize later that there’s no good way to vent it? I vividly remember the moment I installed mine, confidently imagining a sleek setup — but the reality hit hard when I realized I had no proper ventilation plan. Smoke, steam, and stove odors would accumulate with no escape, and I had no idea how to fix it without ripping apart my beautiful cabinets. Sound familiar?
The Venting Dilemma in Custom Kitchen Spaces
As I deepened my kitchen remodel, I discovered that many homeowners face the same challenge: creating a concealed space for appliances like microwaves, but without sacrificing airflow and ventilation. And it’s not just about keeping the air fresh; improper venting can lead to long-term damage to your cabinetry, increased moisture, or even mold — all costly fixes. That’s why I want to share what I’ve learned about venting appliances in custom cabinetry while protecting your investment.
Are You Worrying About Hidden Costs and Functional Failures?
Early on, I made the mistake of assuming that simply leaving a gap or drilling a small hole would suffice. Spoiler alert: it didn’t. The mistake cost me extra repair work and left me questioning if I should’ve sought expert advice sooner. Today, I’ll guide you through proven strategies to create an effective venting solution that preserves your cabinets’ integrity and keeps your kitchen fresh. Ready to stop guessing and start venting properly? Let’s dive in.
Plan Your Vent Path First
Start by visualizing the most direct and unobstructed route for air to exit your cabinetry. During my own project, I drew a detailed diagram mapping the shortest path from the microwave cavity to the exterior wall. This prevents unnecessary modifications later. Think of it like planning a highway before construction—clear, direct routes reduce complexity and cost.
Choose the Right Ventilation Components
Select a high-quality inline duct fan compatible with your microwave’s venting requirements. I opted for a quiet, energy-efficient model that I installed in a dedicated cavity, which I found significantly reduced noise. Ensuring the fan has adequate airflow capacity is critical to prevent smoke and steam buildup.
Prepare the Cabinet for Venting
Modify your cabinetry to include a dedicated vent opening aligned with the duct path. I cut a precise hole using a hole saw, ensuring it matched the duct diameter for a snug fit. Seal all edges with weatherproof silicone to prevent leaks and moisture infiltration, much like sealing a boat hatch to prevent water entry.
Create an Access Point for Maintenance
Design an easy-to-reach panel to access the vent and fan. During installation, I made a removable panel on the side of the cabinet, which allowed me to clean the duct and inspect the fan without dismantling the entire unit. Regular maintenance ensures optimal airflow and prolongs your system’s lifespan.
Install External Vents Properly
Securely attach a weatherproof exterior vent cover to the wall, aligned with your internal duct exit. I used corrosion-resistant screws and sealed around the vent with exterior-grade silicone. Proper sealing prevents rain, dust, or pests from entering your venting system, which is essential for a lasting solution.
Test the System Before Finalizing
Power on the fan and verify airflow with a handheld anemometer or by feeling for air movement. I noticed a significant improvement in air quality after testing, confirming that my venting was effective. Check for any leaks or unusual noises—address these immediately to ensure safe operation.
Integrate with Overall Kitchen Design
Conceal the vent duct within your cabinetry or a custom panel to maintain a sleek aesthetic. I painted the panel to match the surrounding cabinetry, blending functionality with style. Remember, good venting isn’t just about performance; it also contributes to your kitchen’s visual harmony.
When it comes to designing your dream kitchen, many homeowners fall prey to common myths that can lead to costly mistakes. One pervasive misconception is that all custom cabinets are inherently expensive and time-consuming to execute. While bespoke solutions offer unparalleled personalization, they don’t have to break the bank or drag on indefinitely if you work with experienced craftsmen who understand how to optimize materials and processes. Additionally, some assume that more storage always means sacrificing style, but innovative storage solutions can seamlessly blend utility with aesthetics, especially when integrated into your design [discover expert tips here](https://artisancabinetworkz.com/expert-tips-on-selecting-storage-solutions-for-a-perfect-kitchen-upgrade). Another frequent error is underestimating the importance of structural support and durability in custom builds, leading to issues like warping or sagging over time—problems that can be avoided by selecting high-quality materials and proper installation techniques. It’s also a myth that built-ins are only suitable for large kitchens; with clever planning, they can optimize space in even the smallest areas, providing functionality without clutter.{ } One advanced mistake many overlook is failing to account for humidity variations, which can cause wood and hardware to warp or degrade, especially in high-moisture zones. Using materials like HMR-rated MDF or applying proper sealing methods can mitigate these issues, prolonging your cabinets’ lifespan [see more about material choices here](https://artisancabinetworkz.com/why-hardwood-and-manufactured-wood-options-matter). Lastly, some believe that updating hardware alone can transform a space, but the true impact lies in cohesive design and thoughtful integration of storage with your overall kitchen layout. Missteps here can result in cabinets that look good but don’t function well, or worse, compromise the structural integrity over time. Remember, the devil is in the details—planning for ventilation, support, and user experience from the outset makes all the difference. Have you ever fallen into this trap? Let me know in the comments and share your experiences.
Keep It Working: Essential Tools and Maintenance Strategies
To ensure your custom cabinets and built-ins stand the test of time, investing in the right tools and adopting a proactive maintenance routine is key. Personally, I rely on a few specialized items that make upkeep straightforward and effective. One of my go-to tools is a high-quality microfiber cleaning cloth combined with a gentle, pH-balanced cleaner. This duo keeps surfaces clean without stripping finishes or introducing scratches that could compromise the wood’s integrity over years. Additionally, I use a precise magnetic screwdriver to tighten hinges and handles periodically, preventing hardware from loosening and causing misalignment or damage.
Beyond physical tools, software plays an increasingly important role. I recommend using a digital maintenance log—whether a dedicated app or a simple spreadsheet—to schedule regular inspections and note any issues. This helps catch problems early, such as small scratches or hardware wear, before they escalate. For those aiming for long-term results, integrating sensor-based solutions like moisture detectors can alert you to leaks or humidity spikes that may warp wood or degrade hardware. This proactive approach is especially valuable in kitchens and bathrooms, where moisture levels fluctuate frequently.
Looking ahead, I predict that smart maintenance systems will become more affordable and sophisticated, offering real-time monitoring through integrated IoT devices in cabinetry. These innovations will enable homeowners to automate routine checks and receive alerts directly to their smartphones, minimizing the risk of long-term damage and reducing repair costs.
How do I maintain my custom cabinets over time?
Maintaining your built-ins and storage solutions doesn’t have to be daunting. Regularly dusting with a microfiber cloth, avoiding harsh chemical cleaners, and inspecting hardware every few months can prolong their lifespan significantly. Incorporating moisture sensors or smart cleaning devices can elevate your maintenance game, making it easier to catch issues early. Additionally, consider scheduling professional check-ups, especially after severe weather changes, to ensure everything remains in optimal condition. Want practical advice tailored to your setup? Feel free to reach out for expert guidance.
If you haven’t already, try installing a moisture detection sensor near your cabinetry’s most vulnerable spots. Such a small investment can save you thousands in future repairs by alerting you to developing problems early. Regular maintenance, combined with smart tools, truly safeguards your investment and keeps your spaces beautiful and functional for years to come. For more detailed insights and tailored recommendations, explore our expert tips on selecting storage solutions.
 | Image prompt: A homeowner inspecting custom-built cabinetry with moisture sensors and maintenance tools, emphasizing proactive upkeep. | imgTitle:Home Maintenance Tools and Sensors | imgAlt:Person checking moisture sensors on custom cabinets for long-term care.
What I Wish I Knew About Venting Hidden Appliances
The biggest lesson I learned was the importance of proactive planning. Waiting until after installation to address venting turned what should have been a straightforward fix into a costly project. Now, I always prioritize detailed ventilation diagrams before cutting any cabinet holes, saving time and money in the long run.
Another insight is understanding the nuance of choosing the right vent components. Initially, I underestimated how essential a powerful, quiet inline fan was. Selecting quality parts made a significant difference in maintaining airflow and keeping my kitchen fresh without adding noise to my daily routine.
Finally, I realized that seamless integration—with external vents and internal cabinetry—requires meticulous sealing and attention to detail. Properly sealed connections prevent moisture ingress and pests, ensuring my cabinet investments stand the test of time.
Tools and Resources That Elevate This Craft
I rely heavily on a high-quality hole saw for precise duct openings and a handheld anemometer to verify airflow. These tools provided immediate feedback during installation, making adjustments easier.
For designing effective vent routes, I recommend using AutoCAD or SketchUp. These programs help visualize complex pathways before drilling through expensive cabinetry. Additionally, consulting resources like Innovative Storage Solutions for Modern Kitchen Remodels offers practical tips on blending function with style.
Lastly, engaging with expert forums and local professionals can provide personalized advice, preventing common pitfalls and ensuring your venting system performs optimally for years to come.
Your Next Step in Creating a Flawless Kitchen Experience
Remember, proper venting is the unsung hero of a successful kitchen remodel. By mastering this aspect, you protect your cabinetry, improve air quality, and enhance your overall cooking environment. Don’t shy away from detailed planning and quality components—your future self will thank you.
What’s the biggest challenge you’ve faced when installing kitchen appliances within custom cabinetry? Share below, and let’s learn from each other’s experiences!